Create a Workflow Map
Create a workflow map using the Workflow Editor.
Create the New Map
On the Administration menu, click Workspace Manager.
In the Workspace Manager, expand the workspace's panel.
Click Workflow Editor.
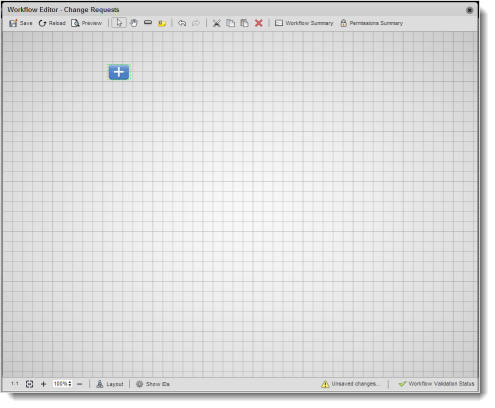
All new workflow maps have a Start node as the initial point in the workflow.
Note: For guidelines on naming workflow states, transitions, and permissions, see Best Practices.
To Copy and Paste From Other Maps
Did you know that you can create workflow maps by copying and pasting states, transitions, and notes from maps in other workspaces? You can even clone entire workflow maps to reduce time and effort when mapping similar workflows like approval processes for different workspaces.
To copy and paste from another map:
- In the source workflow map, select the states, transitions, and notes you want to copy.
- Copy the elements using the Tool Bar icons, shortcut keys, or context menu and close the source map.
- Open the target workflow map.
- Paste the copied elements using the Tool Bar icons, shortcut keys, or context menu.
- Finish mapping the workflow as shown in the next sections.
What you should know when pasting to a different workflow map:
When pasting to a different workflow map, the Workflow Editor copies over all state and transition properties, including permissions. If a copied permission exists, the editor uses the existing one. If the permission is new, the editor adds it to the map.
When pasting to the target map, the editor automatically takes in only validated states or transitions of the workflow. For example, if you copy the initial transition in a workflow map (from the Start element) to a map that already has one, the editor does not paste the transition since a map can have only one initial transition. Or, if you copy a transition with only one of its states (From or To), the editor pastes only the state since all transitions must have both a From state and a To state.
Add a Workflow State
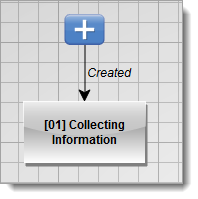
- Click the State icon on the Tool Bar, then click anywhere on the mapping grid to add the state and open the State Properties flyout.
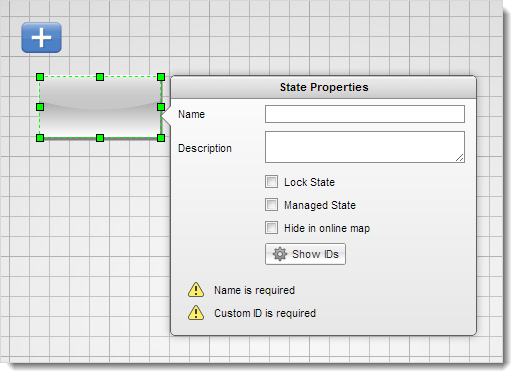
Enter a Name for the state (for example, [01] Collecting Information),
Enter an optional Description.
Set optional properties:
- Lock State. Locks the item when it reaches this state in the workflow. A locked item can no longer be edited unless the workflow loops back to an earlier state. Some users can be given special permission to override state locks (see Set up Permissions and Workflow Permissions).
- Managed State. For revision-controlled items, makes this state the one in the workflow at which point the item is revisioned. This option is useful if you want to revision an item before it has gone through the entire workflow.
- Hide in online map Hides the state on the workflow map and makes it visible only in the Workflow Editor.
To finish adding the new state, click anywhere outside the flyout.

Set up a reminder
To send out a reminder when a transition from the state is pending, see Set Up Workflow Reminders.
Set up an escalation
To configure the state so that a transition from the state or a script is executed automatically after a certain period of time elapses, see Set Up Workflow Escalations.
Using State IDs
State IDs are important if you want to use server-side scripting to control workflows. Each state in a workflow map has a System ID and a Custom ID. System IDs are numerical and read-only; Custom IDs are automatically added to the flyout when the state's Name is entered.
Important: In scripts, use the Custom ID to refer to a state. Although you can edit Custom IDs, each state's Custom ID must be unique in the workflow.
To display the state's IDs in the flyout:
Toggle on Show IDs.
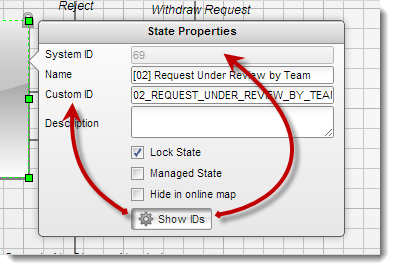
Note: The toggle reverts to off when you close the flyout.
Add a Workflow Transition
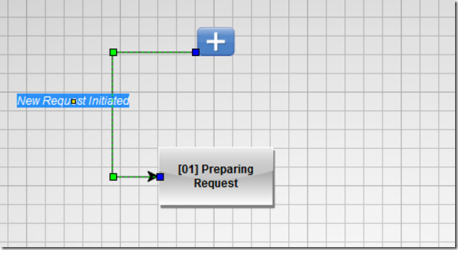
- Mouse over the Start element until the Connect icon appears, then click and drag the mouse to the new workflow state. When the state's border turns green, release the mouse. The transition is created and the Transition Properties flyout opens.
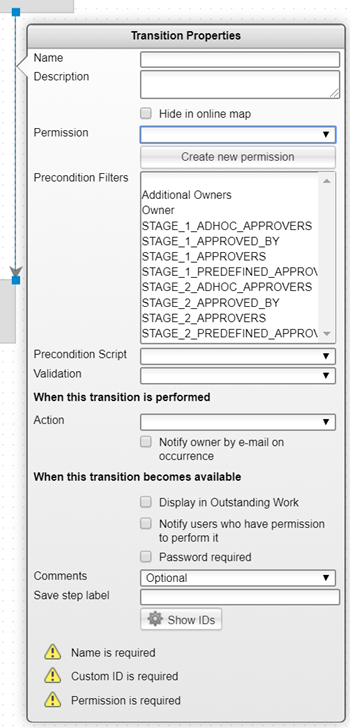
Enter a transition Name (for example, Create Request) and, if desired, an optional Description.
To hide the transition in the workflow map, select the Hide in online map check box.
Assign a workflow Permission to the transition (for example, Create Permission [WF]). To create a new permission, click Create new permission. Important: Only users who are granted this permission can perform the transition (see Set up Permissions and Workflow Permissions).
You can optionally specify:
- Precondition Filters - A filter that limits the group of people who can perform the workflow transition, based on the picklists configured in the workspace.
- Precondition Script - a script that checks for specific conditions before making the transition available to the user.
- Validation - a script that verifies requirements have been met before allowing a transition to occur.
- Action - a script to run when the transition is performed. For help on connecting a Precondition, Validation, or Action script to the transition, see the Developer's Scripting Guide.
To notify the owner of an item that it has passed through a transition to another state, turn on the Notify owner by e-mail on occurrence check box. Only the owner is notified.
To notify the appropriate users that a transition is available for them to perform, turn on the Notify users who have permission to perform it check box. Note: Members of approval board transitions are notified only when the item enters the next state instead of on each time a member approves the transition.
Turn on Display in Outstanding Work to include the related item in each user's My Outstanding Work list.
To require users to re-enter their Password before they can perform the transition, select the Password required checkbox. Note: This password re-entry mechanism satisfies CFR 21 Section 11 digital signature requirements.
To make user comments a requirement, select Required in the Comments drop-down list. Other selections are Optional and Disabled.
To customize the Save Step button in the workflow map, enter the custom label in Save step label (for example, Approve).
To finish adding the transition, click anywhere outside the flyout.
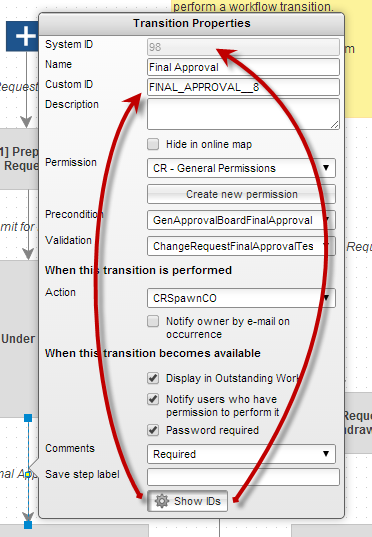
Using Transition IDs
Transition IDs are important if you want to use server-side scripting to control workflows. Each transition in a workflow map has a System ID and a Custom ID. System IDs are numerical and read-only; Custom IDs are automatically added to the flyout when the transition's Name is entered.
Important: In scripts, use the Custom ID to refer to a transition. Although you can edit Custom IDs, each transition's Custom ID must be unique in the workflow.
To display the transition's IDs in the flyout:
Toggle on Show IDs.
Note: The toggle reverts to off when you close the flyout.
Adding elbow nodes to a transition
All transitions start out as a straight line with two endpoint nodes by default. You can add elbow nodes to a transition to make it a right-angle transition. Right-angle transitions can be routed around states or looped back to the same or a previous state.
- Click the transition to select it.
- Hold down the CTRL key and click the transition where you want to add the node OR right-click the transition to open the context menu and then click Add Elbow.
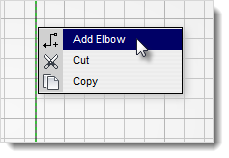
The new elbow node appears as a green square.
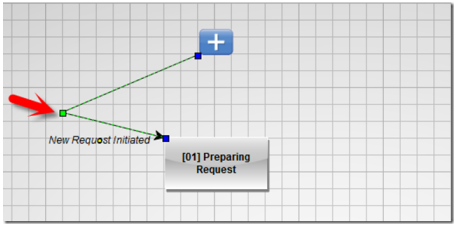
- To reposition the node, click and drag it to where you want it in the mapping grid.
- Add a second elbow node in the same way.
- Click and drag the nodes to lay out the transition how you want it.
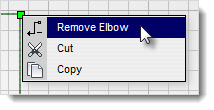
To remove an elbow node from a transition:
- Click the transition to select it.
- Hold down the Ctrl key and click the node OR right-click the transition to open the context menu and then click Remove Elbow.
Finish Mapping the Workflow
Add the rest of the workflow states to the map and connect the states with appropriate transitions (From state > To state).
Copying and pasting workflow elements
To add the remaining elements to the workflow map, clone existing states, transitions, and notes on the map using cut and paste. Select an element, copy and paste it using the Tool Bar icons, shortcut keys, or context menu, and then modify the element as needed.
When cloning within the same map, don't worry about duplicate IDs. The editor takes care of that by giving a cloned state or transition a temporary ID and then generating a unique ID when you save the map.
Add Notes
To add a note to the workflow:
Click the Note icon on the Tool Bar.
Click the mapping grid where you want to place the note.
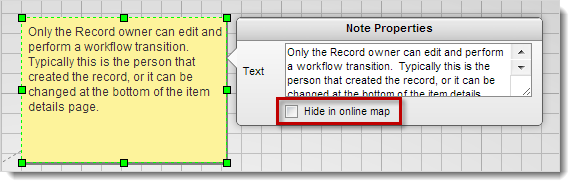
When the Note Properties flyout opens, start typing the note.
To finish adding the note, click anywhere outside the flyout.
To hide the note in the workflow map:
- In the Note Properties flyout, select the Hide in online map check box.
To connect a note to a state:
- Mouse over the note until the Connect icon appears.
- Click and drag the mouse to the state.
- When the state's border turns green, release the mouse .
Validate the Map
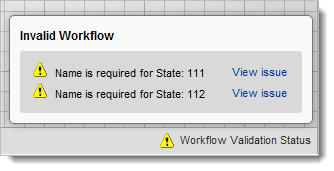
The Workflow Validation Status icon on the Status Bar lets you know if a workflow is valid. If the icon changes from a green check mark to an alert symbol, the workflow is missing required properties or has properties with an invalid format.
To view details of validation errors, click the alert icon. To jump to the location of the error in the workflow map, click the View issue link next to the error message in the Invalid Workflow popup. To close the popup, click the alert icon again.
Save the Map
- Click the Save icon on the Tool Bar and close the editor.
Tip: If you have unsaved changes, an alert icon appears in the Status Bar.