Locking transparency
Jump to Mobile or Windows 10
What does Lock Transparency do and why use it? Lock Transparency creates a mask that locks out the transparent portion of the layer. This means that when applying paint, it only covers areas containing pixels (paint).
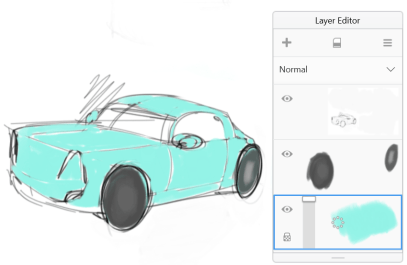
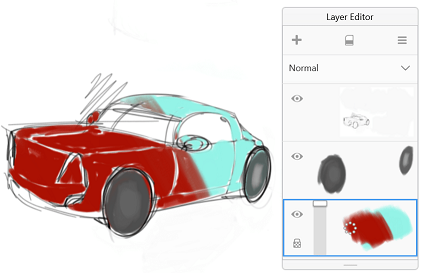
Picture a car with no background image. Use  to make the background see-through, instead of white and opaque. This makes it easier to combine layers and blend pixels with various levels of opacity.
In the example below, I only wanted to paint on the car. With Lock Transparency on, I could paint the car without having to worry about painting white areas, like the windows, as well.


Locking transparency in SketchBook Pro Desktop
In the Layer Editor, tap a layer to select it.
To lock its transparency, tap
 .
.
Now, layer transparency is locked.
Unlocking transparency
In the Layer Editor, tap a layer to select it.
To unlock transparency, tap
 .
.
Now, layer transparency is unlocked.
Locking transparency in SketchBook Pro Mobile


- In the Layer Editor, tap a layer to select it.
- Tap the layer you want to change.
- Tap
 to lock transparency. The icon appears on the layer you have locked.
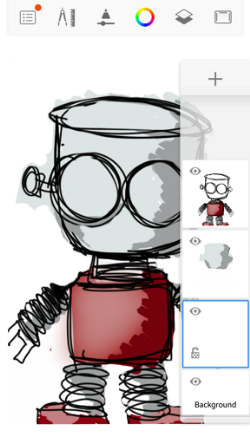
At this point, if you paint on the current layer, only the areas with pixels will be changed. In the image above, the layer with the eye color was selected. Painting on this layer only applied color to that area.
Locking transparency in SketchBook Pro Windows 10


When you use  Lock Transparency on a layer with paint, only the painted portions are affected.
- If the Layer Editor isn’t visible, tap
 and select Layer Editor. The current layer is highlighted.
 - Tap the layer you want to affect.
- Tap
 to lock it. The transparency of the layer is lock. An icon appears.
