根据您所做的修改,可以随意平移和/或旋转刚性目标。不过,它们的形状根本不会更改:这也是将它们称为“刚性”的原因。
- 单击“Transformer Rig”图标以打开该工具箱。
- 单击“Transformer Rig”工具。这时系统会提示您
Select geometry. [Accept Targets] to add selected geometry as Targets of Transformer Rig.
- 拾取要修改的曲面。
- 单击“Accept Targets”。选定曲面变为灵活的目标。
- 这时系统会提示您:
Press [Free] and [Pre-Defined] to add modifiers!
- 选择工具(“Free”或“Predefined”)并选择作为修改器的几何体,然后单击“Accept Modifiers”。
这时系统会提示您
Press [Flexible] and [Rigid] to add geometry to transform, [Free] and [Pre-Defined] to add modifier geometry, [Constraints] to add constraint geometry, and [Go].
- 单击“Add Rigid Targets”图标。
- 拾取应更改位置或方向,但不更改形状的曲面。
- 选择相应的曲面后,单击“Accept Targets”。
- 刚性目标此时以绿色亮显,而且其上会显示文字“Rigid”。可以使用鼠标右键
 单击目标以打开下面的菜单来修改目标的属性:
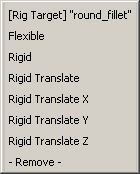
使用该菜单可以将目标从刚性切换为灵活的目标,反之亦然。也可以选择“Rigid Translate”来禁止目标的旋转,或选择一个平移轴进一步约束它。
- 现在,根据需要添加约束。单击“Add Constraints”图标。
- 拾取适当的几何体。
- 单击“Accept Constraints”以添加几何体作为约束。
- 单击“Go”完成操作。
- 选择“Pick”>“Object”
 退出“Transformer Rig”工具箱,然后选择修改器曲面。
 - 选择“Transform”>“Move”
 重新定位修改器曲面。
 请注意,会相应地修改其余曲面。请特别注意,刚性目标曲面的形状会保持不变。