In this part of the tutorial, open a file in Alias and set the project to work in.
Desk lamp modeling strategy
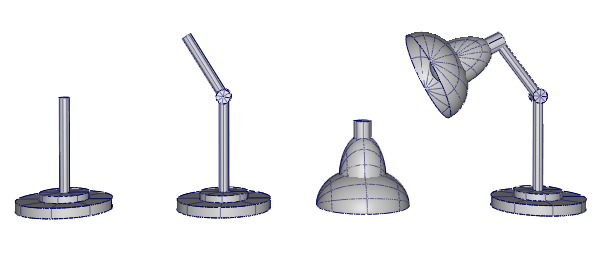
First create a base from cylinders. Then build a moveable arm at an angle, also using cylinders. Finally, build a lampshade using spheres, and then assemble it onto the arm.
As you gain experience in using Alias, choosing a modeling strategy becomes a natural part of your workflow.
To help you build the desk lamp model, an exercise file has been provided which contains outline sketches of the design.

Open the tutorial file
![]() Watch how to open files and set projects.
Watch how to open files and set projects.
- Choose File > Open
 to open the file browser.
 If the desklamp file is listed, skip to step 2.
If not, follow the next steps to set up the CourseWare folder.
Locate and open the CourseWare folder and click Set Current to make the CourseWare folder the current project. If you cannot find the CourseWare folder, refer to Install the tutorial courseware files.
- In the CourseWare\wire folder, choose the file desklamp and click Open.
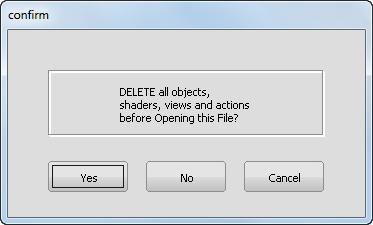
When prompted to delete all objects, click Yes.
 Note:If your values for construction settings differ from the settings in the desklamp.wire file, you are presented with a dialog box. Click Accept New Settings to use the construction settings in desklamp.wire.
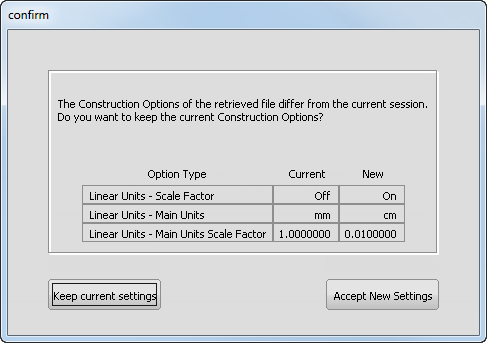
The file browser closes and the desk lamp exercise file appears in the Alias window.
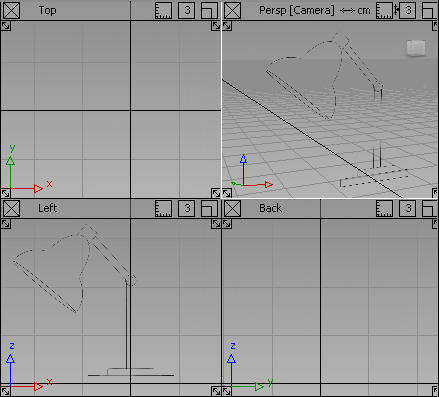
A sketch of the desk lamp design displays in the Left view. This sketch is a reference image, known as a canvas plane. In the next part, use it as a guide to model the desk lamp.
If the two sketches do not appear, it is because the canvas plane display has been turned off. To turn on canvas display, choose WindowDisplay > Toggles > Canvas Planes
 . Tip:
If you do not see any views, or the views do not take up the full view window space, choose Layouts > All Windows > All Windows
 .
.