Switch the picked surfaces between wireframe and shaded modes in the Diagnostic Shade window. When you open the Control Panel, the Diagnostic Shade window displays attached to the bottom of it. You can also choose ObjectDisplay > Diagnostic Shading to open it.
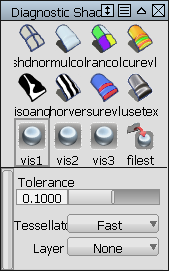
- Shade the picked surfaces with color
-
Click the
 icon in the Diagnostic Shade window.
 - Shade the picked surfaces with random colors
-
Click the
 icon in the Diagnostic Shade window. This allows you to see the layout of adjacent surfaces more clearly.
 - Unshade the picked surfaces
-
Click the
 icon in the Diagnostic Shade window.
 - Adjust the options of a shading mode
-
Click the small triangle at the bottom of the Diagnostic Shade window.
Tip:When surfaces are partially transparent you can pick geometry "through" them. Open the options section of the Diagnostic Shade window and turn up the Transparency setting.
Set the shaded color
- Pick the surface or surfaces.
- Click the small triangle at the bottom of the Diagnostic Shade window to show the options.
- Click the color swatch to show the color editor.
Move the light around the shaded objects
The following diagnostic shaders let you unlink the light from the camera position: Multi-Color, Random Color, Horizontal/Vertical, and User Defined Texture.
When you choose one of these shading modes in the Diagnostic Shading window, and check off the Link Light to Camera option, a white sphere manipulator appears in the perspective window. Clicking and dragging this manipulator moves the light interactively around your model.
Azimuth and Elevation sliders also appear in the Diagnostic Shade control window, and update in synch with the manipulator. Use them to enter exact values, or for fine tuning.
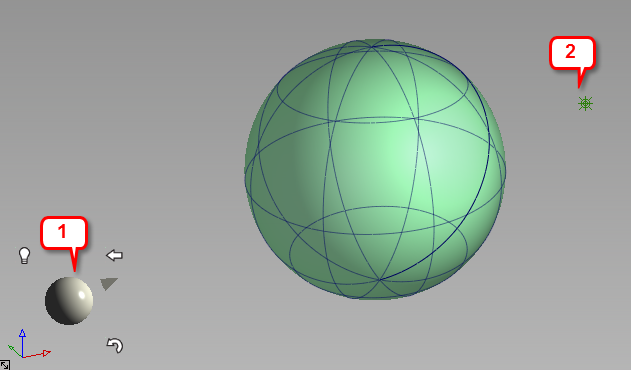
1: Light manipulator. 2: Light icon
Using the manipulator
Click and drag on the manipulator.
- Dragging horizontally changes the azimuth of the light.
- Dragging vertically changes the elevation of the light.
A point light icon represents the light in your model. Depending on the position of the camera with respect to the light, the light icon is not always visible. The light icon is toggled off by default.
Click one of the three icons surrounding the manipulator to do the following:
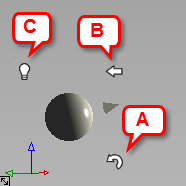
- Curvy arrow: Reset the light to the camera position. Clicking this icon also sets the "home" view, as well as a new pivot location for the light to rotate around. The pivot location is the pivot point, if one exists, or tumble point otherwise.
- Left pointing arrow: Reset the perspective view to the "home" orientation.
- Light bulb: Toggle the light icon on and off. It is off by default.