- Select the surfaces you want to create a smear map for.
- In the Multi-lister, double-click the Projection texture to open its Control Window.
- In the Projection texture Control Window, click the Convert to Smear button under the Effects section.
- A dialog box appears.
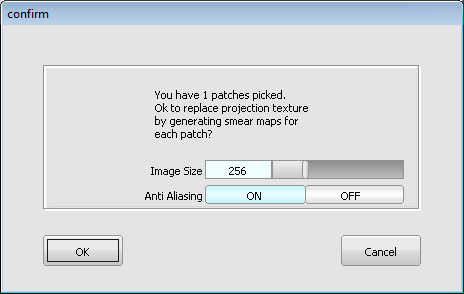
The default Image Size is 256 pixels square. Image files are created and sized so that the Image Size corresponds to the longest dimension of the largest selected surface. If more than one surface is selected, the other image files are proportionally smaller. The valid range is 8 - 1024 pixels.
Tip:Larger image files require more memory to render and, depending on the render specifications, may not noticeably improve render quality. Anti Aliasing is recommended in most circumstances, but Convert to Smear takes four times longer than if Anti Aliasing is OFF.
Note:Convert to Smear places the newly generated image files in a subfolder (that has the same name as the shader being converted) in the pix folder of the current project.
- Click OK. Information is displayed in the information line.
The progress bar at the far right indicates the status of the current image creation.
- When the Convert to Smear operation is complete:
- the Projection texture is replaced by its Source Texture,
- a File texture is mapped to this texture’s Smear Map parameter, and
- the File texture’s Per Object Images list contains a separate image file for each selected surface.
Each selected surface now has its own Smear Map which has all of the same properties as the original Projection texture.
Notes
- Because the Convert to Smear operation destroys the Projection texture, you may want to save the texture (or copy its shader) before using Convert to Smear.
- If you press
 during the Convert to Smear operation, the files created up to that point will be correct but will not necessarily be assigned. Even if you delete the shader used by Convert to Smear, the image files still exist in a folder with the name of the original shader in the current pix folder. If you do a second Convert to Smear operation using the same shader and objects, the previously created files are overwritten without warning.
 - You can use Convert to Smear for spline type surfaces.
- Any image files created are referenced on the Per Object Images list of the new file texture. Each surface gets its own image file for every Projection texture converted. The File texture created has no default Image file, only per object files, therefore the shader swatch does not display the file texture.
To display the texture on the shader swatch, copy any image file name from the Per Object Images list to the default Image field (click in the Object list to highlight the image file name, then click in the default Image field with the
 to paste).
Convert to Smear has the following limitations:
- If Wrap is OFF for the Projection texture, Convert to Smear does not convert the texture properly.
- The Source Texture can only have certain Surface Placement and Label Mapping settings:
- Uoffset, Voffset, Utranslate, and Vtranslate can be set to anything
- Rotate should be set to 0
- Ucoverage and Vcoverage should be set to 1
- Urepeat and Vrepeat must have the same value; the Rgbmult on the Smear Map must be scaled by the repeat value. For example, if Urepeat and Vrepeat are both 5, then set the Rgbmult “value” on the Smear Map to 5.
- If the Source Texture has an image file or texture mapped to Rgboffset, Rgbmult, or Overlay, then you must map a copy of the Smear Map (the File texture created by Convert to Smear) to that image file or texture.
- Bump and displacement maps may show artifacts.
Projection tools
There are two ways to create a Projection texture: using the Multi-lister or using the Projection tools.
- To create a Projection texture in the Multi-lister, you first create a shader, map a Projection texture to the shader, and then position the Projection texture using its Texture Projection Object.
- If you create a Texture Projection Object in the modeling window, the Projection tools create a corresponding shader and Projection texture in the Multi-lister.
There are eight different types of Projection tools, representing the eight different types of projections. See Projection Texture Parameters in Render > Multi-lister![]() for a description of each projection type.
for a description of each projection type.