Choose which tools and diagnostic shaders appear on your marking menus.
Add a tool or diagnostic shader to a marking menu
- Choose Preferences > Interface > Marking Menus
 .
. -
 -drag tools or shaders onto a shelf in the window to add them to the corresponding marking menus. Tip:
When setting up marking menus, hold
 (Windows) or
  (Mac) and double-click icons to shorten (or abbreviate) the name of the function. This allows for narrower marking menus.
Arrange the tools and diagnostic shaders on a menu
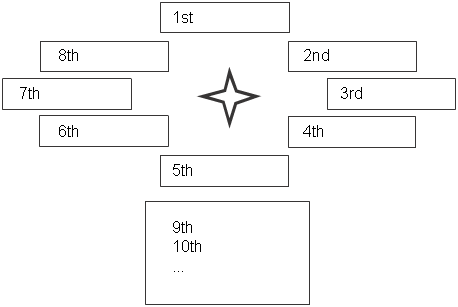
The order of the tools and shaders on the marking menu shelf controls what position they occupy on the marking menu:
Remove a tool or shader from a marking menu
- Choose Preferences > Interface > Marking Menus.
- -drag the tool or shader to the trash can icon.
Rename a tool or shader on a marking menu
- Choose Preferences > Interface > Marking Menus.
- Hold (Windows) or (Mac) and double-click the tool or shader icon.
Swap marking menus between mouse buttons
- Choose Preferences > Interface > Marking Menus.
- Hold (Windows) or (Mac) and double-click a marking menu shelf tab.
- Change the Marking Menu option in the dialog box to the new mouse button for this marking menu.
Create, save, load different marking menu sets
Marking menus are organized on shelves and share the same functionality as regular shelf sets. You can have several different sets of marking menus, and switch between them as needed.
Click the  icon in the title bar of the Marking Menus window, or right-click anywhere on the title bar to access the menu. See Manage shelves for more information.