In this section, complete the model by mirroring the surfaces and creating a cap.
Open the tutorial file (optional)
If you successfully completed part 5, proceed to the next step: Mirror the surfaces.
If you were not successful in part 5, open the file called showergel_Part6.wire, located in the wire folder of the CourseWare project. This file contains the completed model from part 5.
Mirror the surfaces
Finally, mirror all the surfaces using the Layer Symmetry tools.
- Turn on Symmetry for the Bottle layer using the drop-down menu on the layer menu.
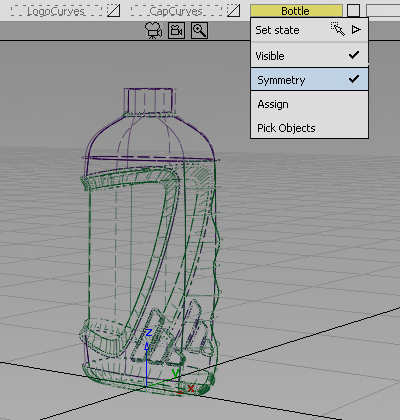
- Click the Bottle layer to make it active. It displays in yellow with a blue border.

- Choose Layers > Symmetry > Create Geometry
 to convert the mirrored image of the geometry into actual geometry.
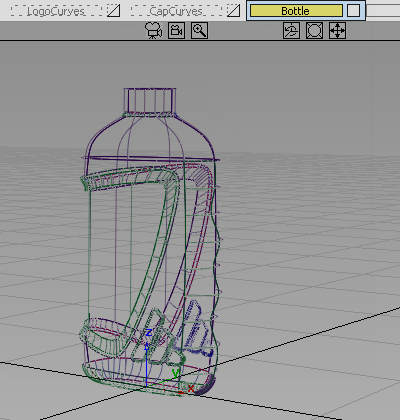
To complete the model as a closed volume, add a planar surface to the top of the neck.
- Choose Surfaces > Planar Surfaces > Set Planar
 and select the two top edges of the neck. Click Go to create the surface.
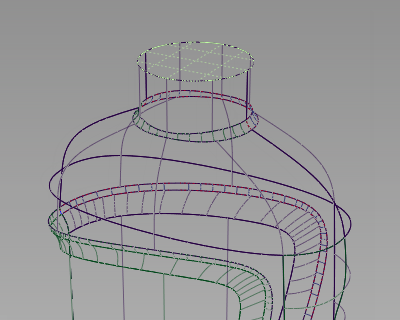
Volume measurement
If you have built your model carefully so there are no gaps between the surface patches, you can calculate the volume enclosed by those surfaces.
For the volume calculation to be accurate, ensure all the surfaces face outwards.
As you build you model, you are not concerned with the surface orientation, and surfaces can randomly face inwards or outwards.
For an accurate volume calculation, you need all the surfaces to face outwards. So first unify the orientation of the surfaces.
Prepare the model for volume calculation
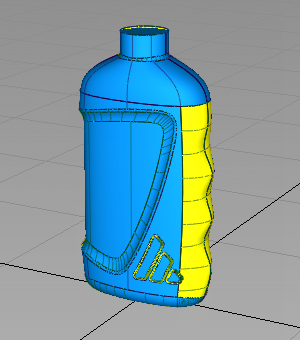
- Make sure that only the bottle surfaces are visible on screen.
- Choose Surface Edit > Orientation > Unify Surface Orientation
 . Drag a pick box over the whole model to select all the surfaces.
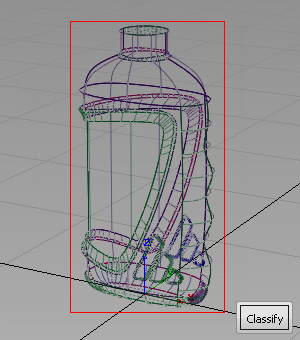
- The surfaces are highlighted,
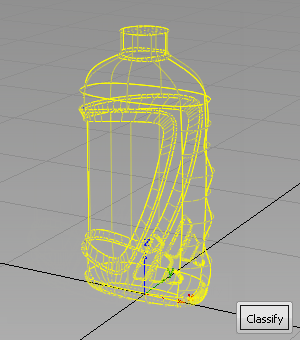
- Click Classify.
The surfaces are highlighted in blue, and a Unify button displays.
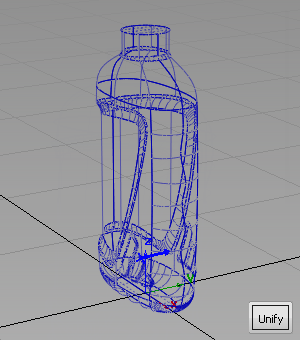
A blue arrow also displays, indicating the orientation of the surfaces. If this arrow does not point out, away from the model, click it to switch the direction.
- Click Unify to unify the surface orientations. A message displays in the prompt window confirming the surfaces have been unified.

Calculate the volume
Now calculate the volume of the bottle.
- Choose Pick > Object
 and select all the surfaces.
 - Choose the Evaluate > Mass Properties
 tool. The volume is calculated and displayed in a separate window.
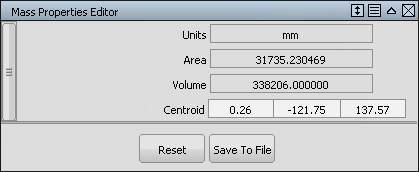
Interpret the calculated volume
The figure given in the mass properties window is in cubic millimeters. Most packaging designs are measured in milliliters.
To make the conversion, divide by 1000.
So, in this example, a volume of 338206 cubic millimeters is 338.2 milliliters.
Also, the volume measured is the external volume of the whole bottle. This volume includes the liquid, the airspace at the top of the bottle and the thickness of the plastic itself. Making an allowance of 25% is a good approximation of the extra volume all these factors add to the desired product volume.
So, if our target is a product volume of 250 ml, you would expect to add 25% to account for the plastic material and airspace, giving a target of 312.5 ml for the external shape modeled. This value would display as 312500 mm3 in the Mass Properties window.
Revolve a cap
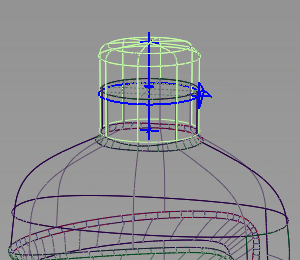
To finish the model, you can build a simple cap from curves supplied on the CapCurves layer.
- Turn on the visibility of the CapCurves layer.
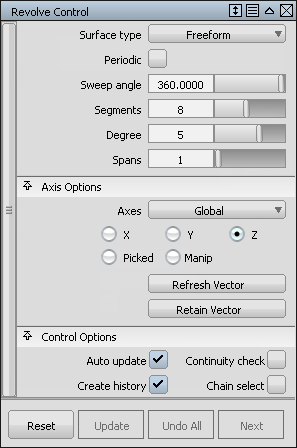
- Choose Surfaces > Revolve
 and double-click the icon to open the option window.
 - Change the number of Segments to 8.
In the Axes Options section, select Global for the Axes. Global axes enable you to revolve all the curves at the same time around the origin.
Select Z for the revolution axis.
Under Control Options, turn off Continuity check.
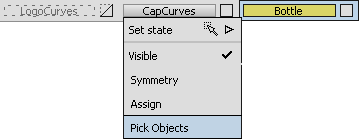
- Select all the cap curves using Pick Objects on the layer drop-down menu.

- Choose Surfaces > Revolve to create the cap surfaces.
- Assign the new cap surfaces to the CapCurves layer.
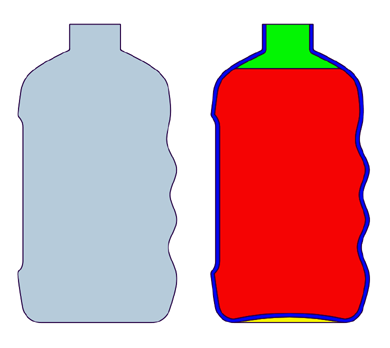
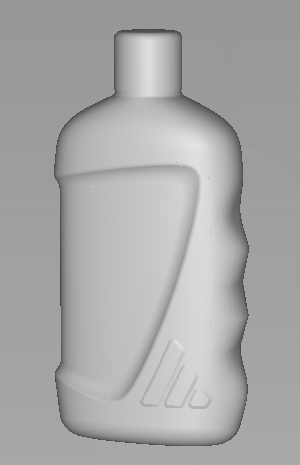
The Shower Gel pack design is now complete.
Save your work
- Save your work in the wire folder of the Lessons project.
- Name your file myshowergel6.wire.