
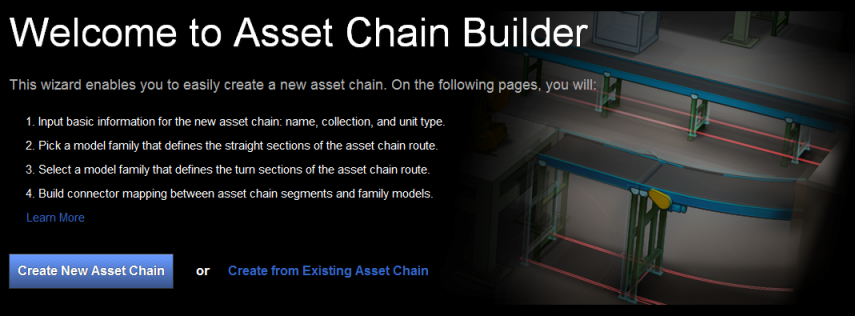
The Factory Asset Chain Builder is a simple-to-use web wizard that enables you to easily create a new chain asset from anywhere through a web browser. On the pages of the wizard, you will:
- Input basic information for the new chain asset: name, collection, and unit type.
- Select a model family that defines the straight sections of the asset chain route.
- Choose a model family that defines the turn sections of the asset chain route.
- Specify the name of the connectors that are used at the beginning and end of each chain segment.
- Build parameter mapping between asset chain segments and family models.
It's easy to get started!
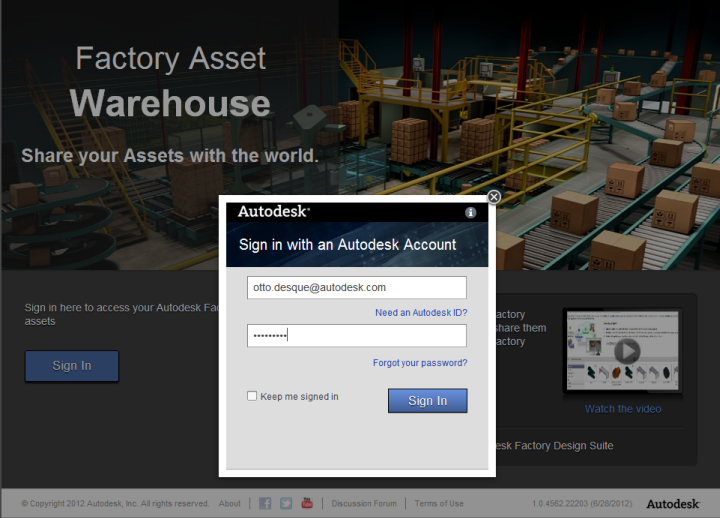
Sign In or Create an Account
Go to the Factory Asset Warehouse: Factory Asset Warehouse. If you are a current Autodesk user, just use your existing credentials to sign in to Factory Asset Warehouse.
Asset Chain Builder Prerequisites
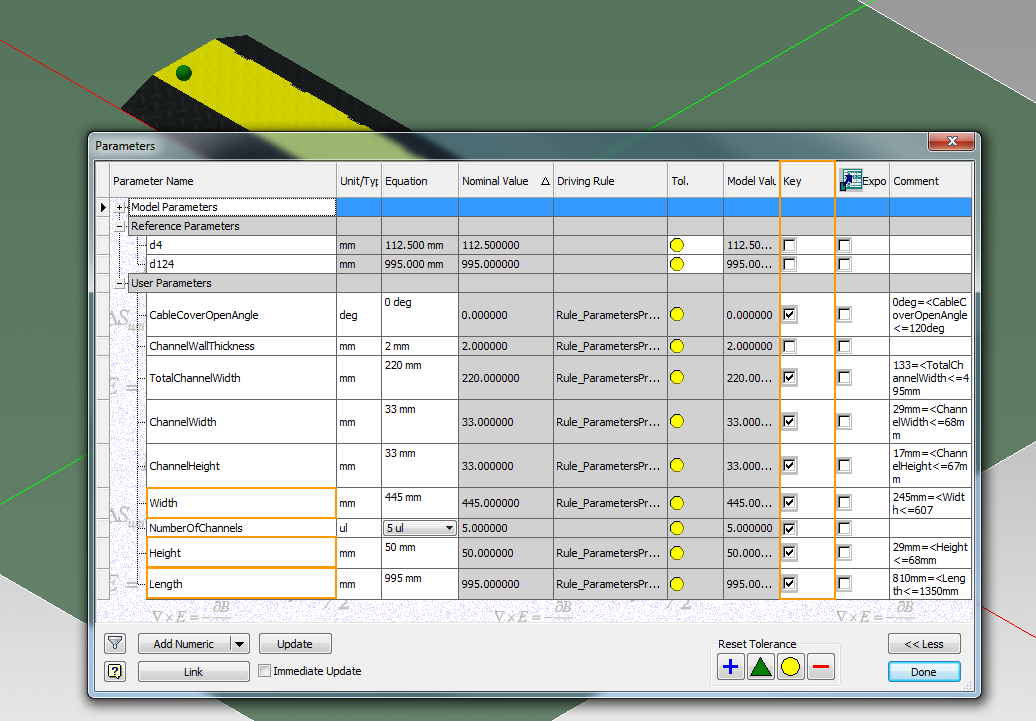
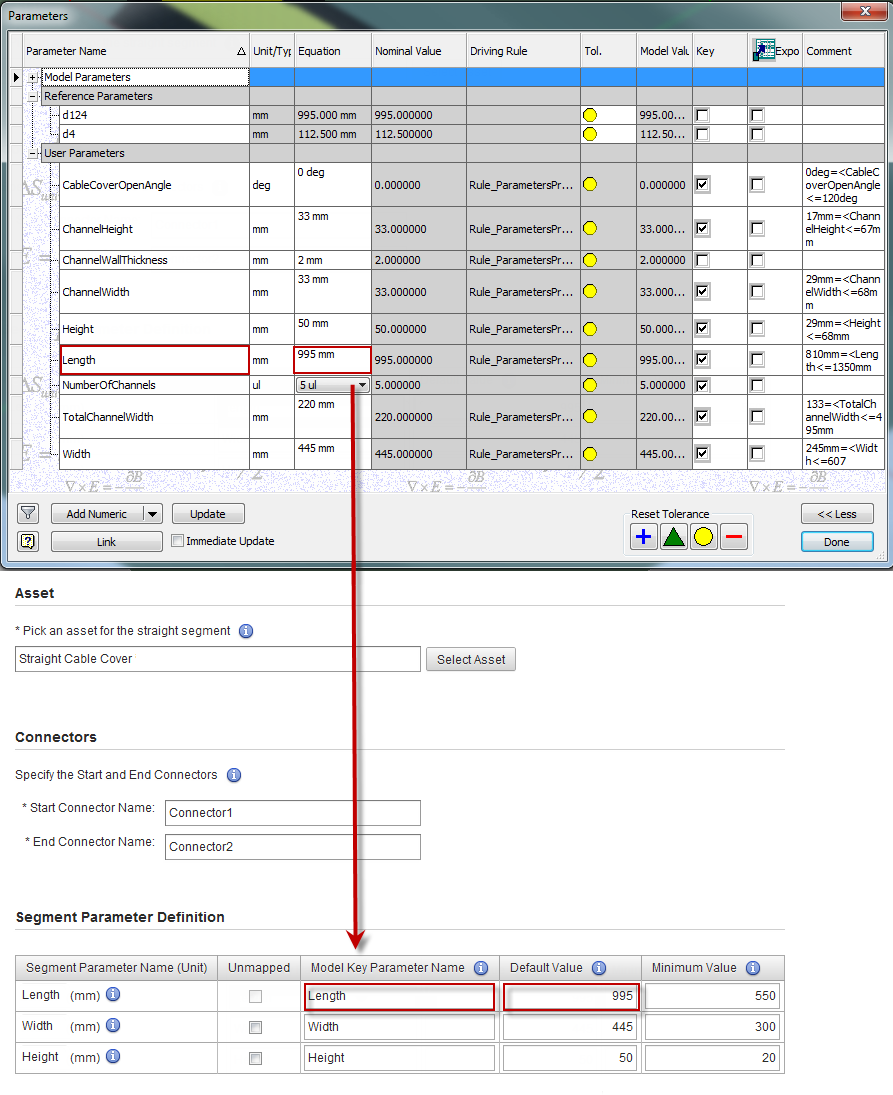
To ensure that assets are populated into the layout with the correct size, the asset models that represent both straight and curved chain segments must have the parameters defined in the Asset Chain Builder tables, which are set as key parameters in Inventor in advance. The parameters must then be mapped properly between Model Key Parameters and Segment Parameter Names.
In the following example, the straight asset Cable Cover is used to represent the straight segment of the chain. The Width, Height and Length parameters of the model are mandatory and must be set as Key Parameters in Inventor. When populating the 2D asset chains with their Inventor 3D equivalents, the Model Key Parameter receives the value from the mapped Segment Parameter Name to create asset components within Inventor.
Upload Asset Models
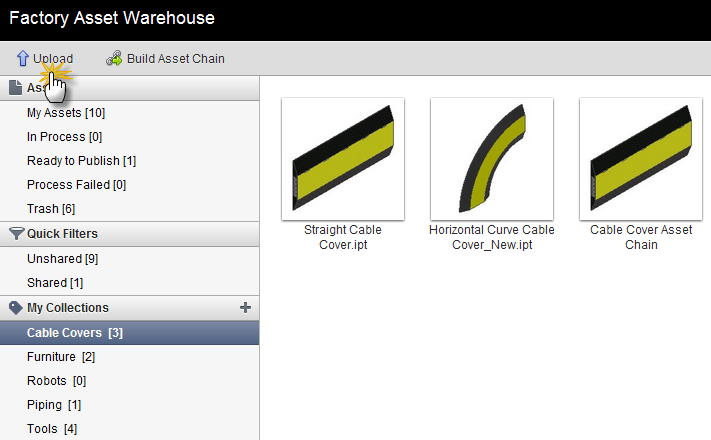
All models to be used for straight and turn assets must already be uploaded to the Factory Asset Warehouse server, either from the Asset Builder within Inventor Factory, or from the Factory Asset Warehouse web site. Once your asset models are uploaded to the Factory Asset Warehouse, they are available to be selected as the segments of the chain.
If there is no asset model available in the Factory Asset Warehouse, click on the Upload button in the toolbar. In the pop-up dialog, click Select Files and locate and select the models you want to import to the Factory Asset Warehouse from your desktop. The asset model is imported automatically. You can monitor the progress in the In-Process window.
Asset Chain Builder Overview
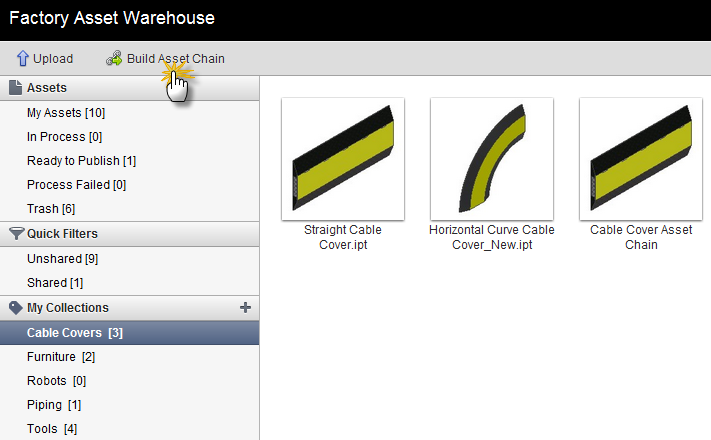
Click on the Build Asset Chain button in the toolbar to launch the wizard:
After launching the Asset Chain Builder, you can choose from between two options:
- Create New Asset Chain - Start creating a new asset chain using an empty template.
- Create New from Existing Asset Chain - Create a new asset chain, using an existing asset chain as a template.
Asset Chain Basics Section
In the Asset Chain Basics section, the following basic information is required.
|
Name |
The file name of the asset chain as it will appear in the AutoCAD Factory Asset Browser. |
|
Collection |
You can organize your asset chains in a collection. Optionally provide a Collection name from the Factory Asset Warehouse. |
|
Unit Type |
Specify the unit type for the parameter values in the following pages. Imperial represents inch units and Metric represents millimeters. |
Straight Segment Settings Section
In the Straight Segment Settings section, you must:
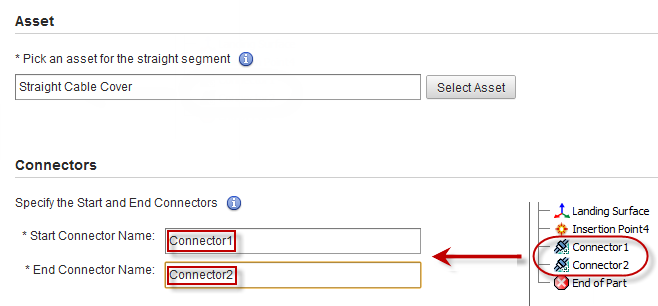
- Specify an asset to represent the straight segment of the chain.
- Click the Select Asset button and, from the Select Asset window, select the asset that represents the straight segment of the asset chain.
- Enter the names of the Start and End connectors. The connectors are used to connect the chain segments together. Ensure that the connector names you provide are consistent with those that appear in the Model Browser.
- Set up the parameter mapping between the segment and the model.
Segment Parameter - Segment Parameters are used to store the value of the Model Key Parameters that are defined in Inventor. This ensures that the 2D asset chain is correctly populated with its 3D equivalents in Inventor. Some Segment Parameters in the table (such as "Length") are mandatory and must be mapped correctly with their corresponding Model Key Parameters. Other Segment Parameters may be unmapped. Activate the appropriate Unmapped check box if you do not wish to map a parameter.
Typical Segment Parameter names for straight segments appear below. Additional Segment Parameter names are required for turn segments and described in the Turn Segment Settings Section of this document. Be sure to enter the actual parameter names defined for your asset as they may differ from the examples shown here.
- Length - The Segment Parameter named "Length" stores the value of the Model Key Parameter called "Length". This important value is used to divide the asset chain into segments of the proper length and must be mapped. When populating the 2D asset chains with their Inventor 3D equivalents, the Model Key Parameter called "Length" receives the value of the Segment Parameter named "Length" to create Inventor asset components.
- Width - The Segment Parameter named "Width" stores the value of the Model Key Parameter called "Width". The value of "Width" determines the line weight of the line that presents the conceptual 2D asset chain in AutoCAD Factory. When populating the 2D asset chains with their Inventor 3D equivalents, the Model Key Parameter called "Width" receives the value of the Segment Parameter named "Width" to create Inventor asset components. While it is not essential that a Width parameter be defined and mapped, it is good practice to do so especially if the parameter is controlled by an Asset Variant. There are other instances when it may be advantageous to map this parameter. (See the Warning message below.) Danger: If the Width parameter is unmapped, Asset Chain Builder applies a default width of 30 inches (700 millimeters) to the asset chain when it is created in AutoCAD Factory. The width of the chain is measured about its centerline. This default width may appear quite large and out-of-place in the AutoCAD layout depending on your asset type, but the asset chain will populate correctly with 3D assets of the proper width when synched to Inventor. Once you use the Sync AutoCAD or Publish/Update DWG commands in the 3D layout, the asset chain should appear normal in AutoCAD Factory. This issue can be avoided by specifying and mapping an explicit Width parameter as defined in the Inventor Parameters list.
- Height - The Segment Parameter named "Height" stores the value of the Model Key Parameter called "Height". When populating the 2D asset chains with their Inventor 3D equivalents, the Model Key Parameter called "Height" receives the value of the Segment Parameter named "Height" to create Inventor asset components. Unless it is controlled by an Asset Variant, this parameter can be unmapped.
Model Key Parameters - These parameters store the values of (typically required) length, width, and height when creating asset components within Inventor.
Default Value - The default value is the same as the nominal value of the Model Key Parameter found in the Inventor Parameters list of the asset. Enter the numeric values in this section of the Segment Parameter Definition table.
Minimum Value - When creating an asset chain in AutoCAD Factory, it is possible that one or more chain segments may be shorter than the length specified by the Model Key Parameter. After they are populated in 3D in Inventor Factory, these shortened, or custom, chain segments appear in the color red by default. The Minimum Value field specifies the smallest numeric value permissible for the shortened chain segment.
Turn Segment Settings Section
Before discussing the Turn Segment Settings section, it will be helpful to describe the three different chain segment turn types.
- Arc Turn - This Arc type asset is used for the curve segment in an asset chain.
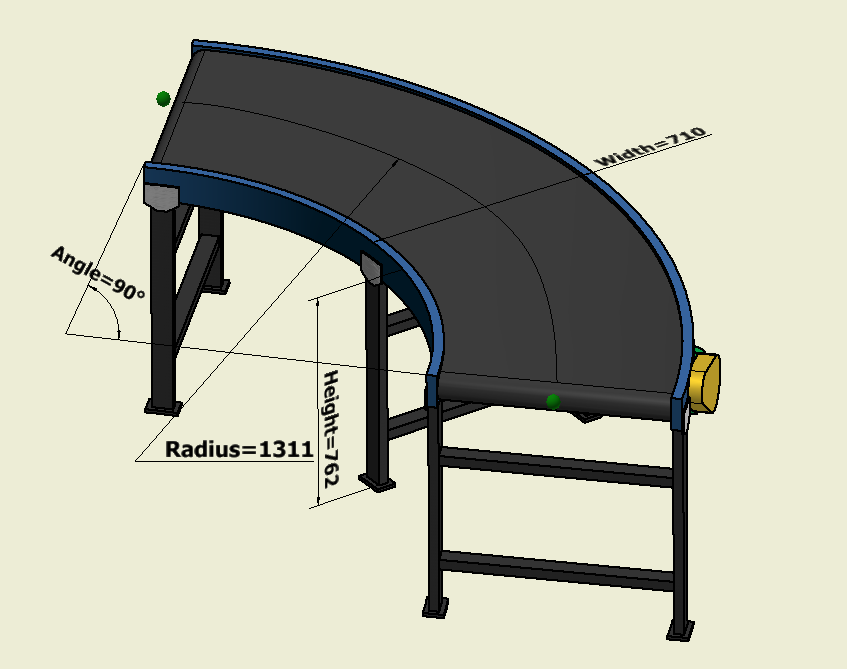
- Radius - The Segment Key Parameter named "Radius" stores the value of the Model Key Parameter called "Radius". This parameter is the distance between the center and the middle arc line of the arc turn segment section. This value is used by the Model Key Parameter to drive the radius dimension of the populated asset component in Inventor Factory. The Radius parameter must be mapped.
- Angle - The Segment Key Parameter named "Angle" stores the value of the Model Key Parameter called "Angle". This value, in degrees, is set to the desired turn angle for arc turn segments (like conveyors) and straight turn segments (such as 90° wall and fence segments). The Angle parameter must be mapped.
- Straight Turn Type - The Straight Turn type asset is used to provide angled turn segments, rather than curved turn segments.
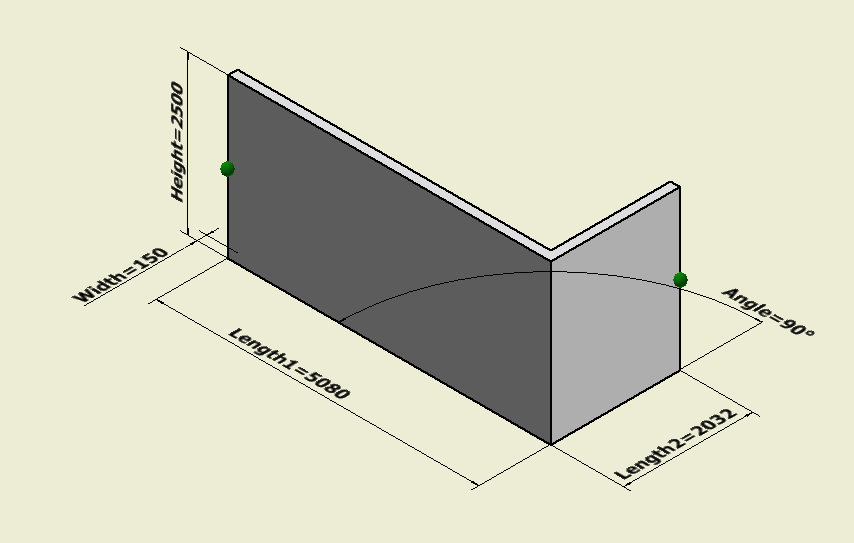
- Length1 - The Segment Parameter named "Length1" stores the value of the Model Key Parameter called "Length1" which represents the length of the turn asset on the side of the first connector. This important value is used to divide the asset chain into segments of the proper length and must be mapped. When populating the 2D asset chains with their Inventor 3D equivalents, the Model Key Parameter called "Length1" receives the value of the Segment Parameter named "Length1" to create Inventor asset components.
- Length2 - The Segment Parameter named "Length2" stores the value of the Model Key Parameter called "Length2", which is the length of the turn asset on the side of the second connector. When populating the 2D asset chains with their Inventor 3D equivalents, the Model Key Parameter called "Length2" receives the value of the Segment Key Parameter named "Length2" to create asset components within Inventor.
- Angle - The Segment Parameter named "Angle" stores the value of the Model Key Parameter called "Angle". When populating the 2D asset chains with their Inventor 3D equivalents, the Model Key Parameter called "Angle" receives the value of the Segment Parameter named "Angle" to create asset components within Inventor.
- Extend Arc Turn Type - This Arc type asset is also used for the curve segment in an asset chain. A typical example might be for a piping run.
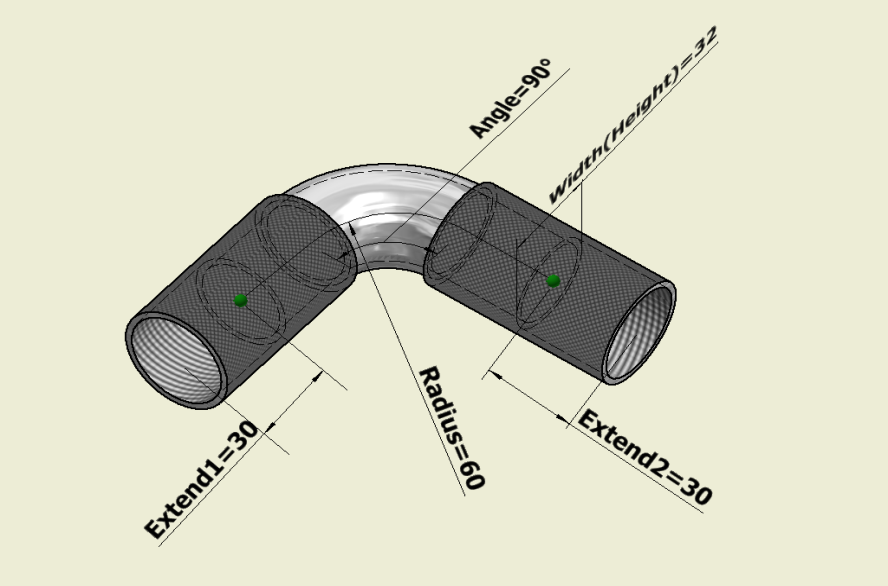
- Extend1 - The Segment Parameter named "Extend1" stores the value of the Model Key Parameter called "Extend1". In this example, "Extend1" represents the length of thread on one end of the pipe asset model. When populating the 2D asset chains with their Inventor 3D equivalents, the Model Key Parameter called "Extend1" receives the value of the Segment Parameter named "Extend1" to create asset components within Inventor.
- Extend2 - The Segment Parameter named "Extend2" stores the value of the Model Key Parameter called "Extend2". In this example, "Extend2" represents the length of thread on the other end of the pipe asset model. When populating the 2D asset chains with their Inventor 3D equivalents, the Model Key Parameter called "Extend2" receives the value of the Segment Parameter named "Extend2" to create asset components within Inventor.
For an Arc Turn Segment, use the Model Key Parameter "Radius" instead of the "Length" parameter. Also, the "Angle" Model Key Parameter must be added.
- Specify a turn segment type.
- Click the Select Asset button and, from the Select Asset window, select the asset that represents the curved segment of the asset chain.
- Enter the names of the Start and End connectors. The connectors are used to connect the chain segments together. Ensure that the connector names you provide are consistent with those that appear in the Model Browser. Remember that you can open the corresponding asset in Inventor and copy the connector names from the Browser to the corresponding connector name text fields.
- As you did in the Straight Segment Settings section, set up the parameter mapping between the segment and the model.
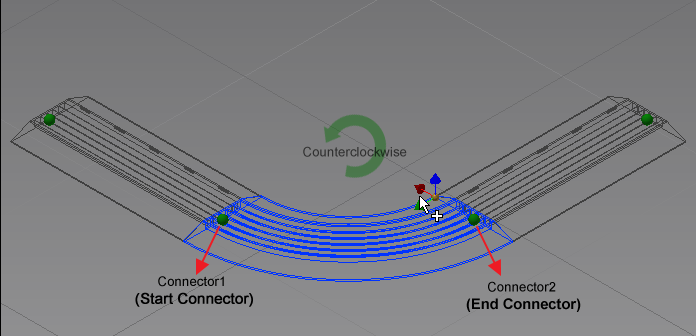
It is important to correctly specify the start connector and end connector of an Arc Turn segment. Doing so determines the proper curve direction of chains when the 2D segments are connected together and populated with 3D assets in Inventor Factory. By default, the arc turn segment defined for an asset chain curves in a clockwise direction (right turn).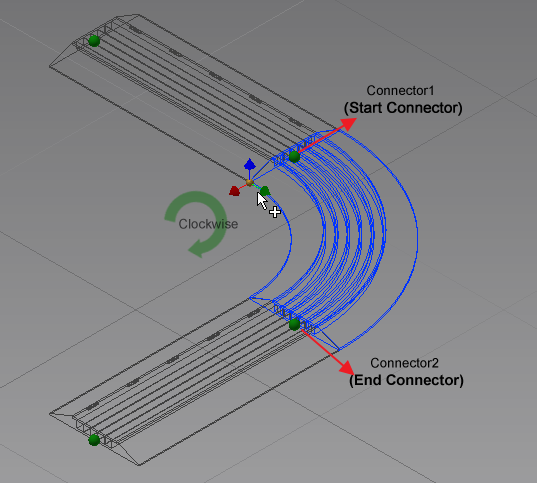
Summary Section
The Summary section is used to review all your data. If necessary, you can go back each step to make changes. Once you are satisfied with your entries, click the Publish button to publish your asset chain. Once the asset chain has published successfully, click the OK button to return to the Factory Asset Warehouse home page to verify that the new asset chain is uploaded to the Warehouse collection you specified.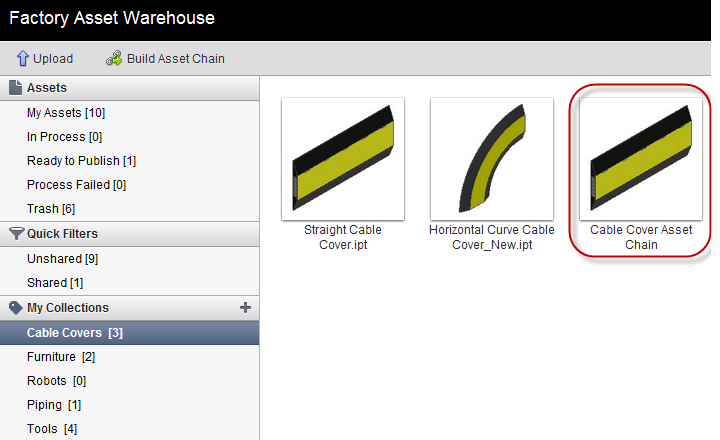
Finally, if you wish to share the asset chain with other users, set the Share status to ON.
Using Your New Asset Chain
Launch AutoCAD Architecture or AutoCAD Mechanical. Once you have logged into Autodesk 360 from AutoCAD, you can download the new type of asset chain from the Factory Asset Warehouse and then create the asset chains in AutoCAD Factory accordingly.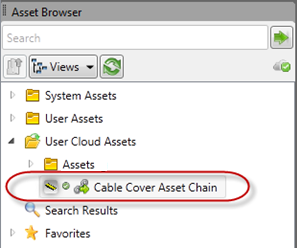
Logging Out of Factory Asset Warehouse
To log out of Factory Asset Warehouse, simply click on the Sign Out link at the top-right corner of the screen.