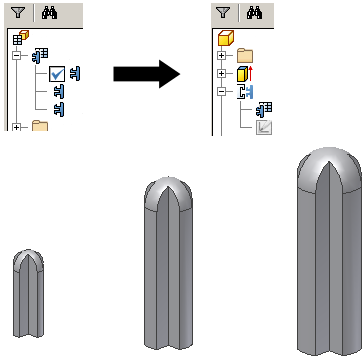
Use one of the following two methods. Both methods use the Extract iFeature command to save the iFeature to the specified catalog location.
- Save a set of features as an iFeature, and open the iFeature file to create the table.
- Create a table-driven iPart, and save it as a table-driven iFeature. Use this method to use the entire iPart as an iFeature.
or

Convert an iPart to a table-driven iFeature
- Create an iPart, as outlined in the Procedure Create an iPart Factory.
- Use Extract iFeature to extract the table and the included features for future use. To extract all the features in the part, select the base feature. If the base feature has geometrically dependent features, they are automatically selected. You can remove them in the Extract iFeature dialog box. No changes are necessary in the Extract iFeature dialog box.
- Click Save to create the iFeature file.
Note: There is no link between the original iPart and the iFeatures save the part file.
Edit iFeature table
The table from the original iPart is available for edit.
- Open the iFeature file.
- Start the iFeature Author.
- Edit the table.
Use Extract iFeature to create table-driven iFeatures
Create an iFeature that includes all parameters you want in the table-driven iFeature.
- On the ribbon, click
Manage tab
 Author panel
 Extract iFeature
.
 - Save the iFeature to the Catalog location.
- Save and close the source part file.
- Open the iFeature (.ide) file.
- On the ribbon, click
iFeature tab
 iFeature panel
 iFeature Author Table
.
 - On all tabs, in the right pane, click in the Name and Prompt boxes to customize Name and placement instructions.
- On the Parameters and Geometry tabs, you cannot add or remove the variables defined in the iFeature list.
- On the Properties tab, left pane, click a property, and then click the right arrow to add it to the right pane. Click the top-level property, such as Project, to select all nested properties at once.
- On the Threads tab, click thread specifications in the left pane, and then click the right arrow to add to the right pane.
- On the Other tab, click in the Name box to enter a custom item and corresponding prompt message.
- In the iFeature table, each selected parameter is a column heading:
- Right-click a numbered cell, and then insert a row, delete the selected row, or set as the default row.
- Right-click a column heading, and then set as a key value , a custom column, or delete the selected column. If custom, right-click again, and then specify the value range.
- In table rows, click in cells, and then enter values to create a unique variation of the iFeature.
- When finished, click OK to convert the iFeature to a table-driven iFeature.
When you use a table-driven iFeature in a model, select the version in the Insert iFeature dialog box.
Note: To discard changes after you edit and save the table, in the Edit menu, choose Undo Update.