 Click the Stitch command.
 - Click the Body selection option and then select the stand in the graphics window.
- Do not change the default setting (0.0004 in) for Fill gaps smaller than.
 Click Find remaining gaps and free edges.
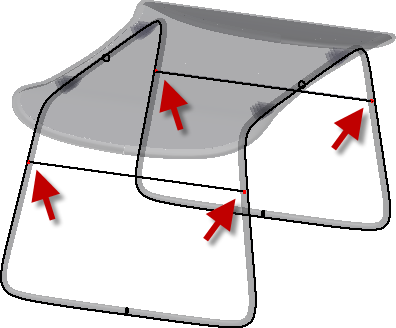
 Notice the free edges are highlighted at all locations the cross bar intersects the stand.

- Click Cancel.
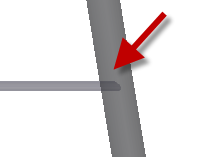
Zoom in on one of the cross bar ends. Notice that it penetrates the leg. The intersecting faces prevent the stand from becoming a solid until the cross bars are trimmed to the intersection with the legs.

 On the ribbon, click Intersect Faces.
 - Set the select option in the dialog box to Face and the Method to Trim.
- Click the cross bar closest to you for the first pick.
- Click a leg near the cross bar. The cross bar is trimmed when you make the second pick and the dialog box remains open.
 Note: Inventor uses the pick location as the "side to keep". If the wrong side is trimmed, undo the operation and select a different location on the face or body.
 - Repeat the operation and trim the other three intersections.
- Click Done to finish.
 Click the Stitch command.
 - Set the Select option to Body, and then click the stand.
 Click Find remaining gaps and free edges. There are no gaps or open edges displayed.
- Click OK to stitch the stand into a solid. A healthy solid appears in the browser.
- Right-click the solid in the browser and turn off the visibility.
Note: You can control solid model visibility in the Repair environment by right-clicking the body in the browser. After you exit the Repair environment, solid body visibility is controlled from the Solid Bodies folder at the top of the browser.