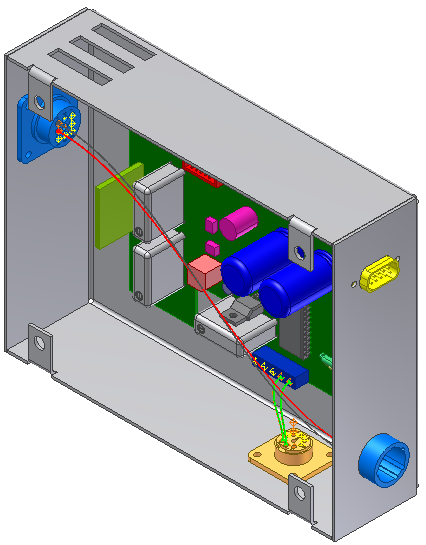
Add a second harness assembly, and then add cable wires. You can document the cable harness in a separate nailboard drawing.
- On the ribbon, click
Environments tab
 Begin panel
 Cable and Harness
.
 - Enter Harness Assembly2.iam for the name and accept the default file location.
- Add the following reference designators for the connectors. In the browser, right-click the connector and select Harness Properties to set the RefDes.
For part 360575:1 add RefDes U7.
For part 360575:2 add RefDes U8.
-
 On the ribbon, click
Cable and Harness tab
 Create panel
 Create Cable
.
 - On the Create Cable dialog box, accept the default Cable ID (Cable1).
By default, the Cable ID is “Cable” plus an incremental number starting with 1.
- From the list of cables, select the cable to insert. Select the category and cable name shown.
Category: Belden
Name: 8441
This cable contains two wires to connect in the assembly.
- Verify that the first cable wire and the Pin 1 button are selected.
- Rotate the view so that the pins on 36575:2 are visible. Select U8 Pin1.
Cable wires are automatically assigned Wire IDs as they are connected. By default, the Wire ID is the Cable ID plus the Conductor ID.
- Connect the other end of the cable wire to part 36575:1. When the tooltip displays as U7 Pin 1, click the work point. The status of the cable wire in the list changes to connected. The system automatically advances to the next cable wire.

- Connect the second cable wire from U8 Pin 2 on part 36575:2 to U7 Pin 2 on part 36575:1.
- Click OK.

- In the browser, expand the harness assembly and the Cables folder to view the added cable and cable wires in the hierarchy.
Cable wires are named with the Cable ID followed by the conductor ID, and the conductor ID in parentheses.