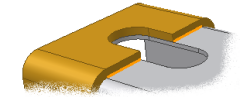
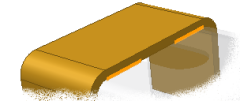
The three weld groups represent stages in the weldment process:
- Preparations - Metal removal, typically a chamfer, to prepare for a weld.
- Welds - Fillet, groove, and cosmetic weld beads.
- Machining - Metal removal after welding, often through multiple assembly components.
Features added in the three groups act at the assembly-level only. They do not appear in the individual parts and subassemblies.
The following image shows weld and machining features in a weldment assembly.


The weldment features exist in the weldment assembly only and do not affect the part files.
You activate the various weldment feature groups with the Weld tab or through the Model browser. To do this, you must first open a Weldment file.
- Set the active project to tutorial_files.
- Click New
 on the Quick Access toolbar. Ensure that you click the icon itself, and not the associated drop-down menu.
 - To ensure that you complete this tutorial using a metric template file, click the Metric tab displayed along the top of the selection area of the dialog box.
- Double-click the template file Weldment (ANSI - mm).iam.

- To activate the Preparation feature group, click Preparation on the Weld tab.
Commands for creating weld preparations, such as chamfers and assembly-level cut extrusions, become active on the Weld tab.
You can also activate one of the three weld groups through the Model browser. For example, if you double-click Welds in the browser, the commands for creating welds, such as Fillet, Groove, and Cosmetic, become active. Alternatively, you can right-click a group in the browser and select Edit from the context menu.
- Close this file without saving.