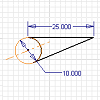
Sketch geometry behavior in a sketch depends on the linetype assigned to it. The sketch linetypes available are Normal, Construction, Centerline, and Reference.
In a drawing file, you can access all of the linetypes in the Drafting Standard you assign to the file.
Linetypes in sketches
- Normal
-
This linetype is the default. Features consume sketch geometry that uses Normal linetype.
- Construction
-
Use construction geometry to constrain normal sketch geometry. It can aid in the development of sketches for parametric features. It is contained in the sketch, but does not add features when the sketch is consumed.
- Centerline
-
Centerline is a variation of the Construction linetype. It helps to determine construction axes, or to dimension to a location on the opposite side of the centerline, equidistant from the sketch geometry you select.
- Reference
-
When you project a sketch from a part edge, reference linetype is assigned automatically to it. Reference geometry is associative, and updates when you modify the associated part face.
If you change reference geometry to another linetype, it loses its associativity.
Linetypes for sketches in drawings
When you enable sketch mode in a drawing file, all linetypes associated with the current style are available. These linetypes can differentiate the 2D annotations to your model.