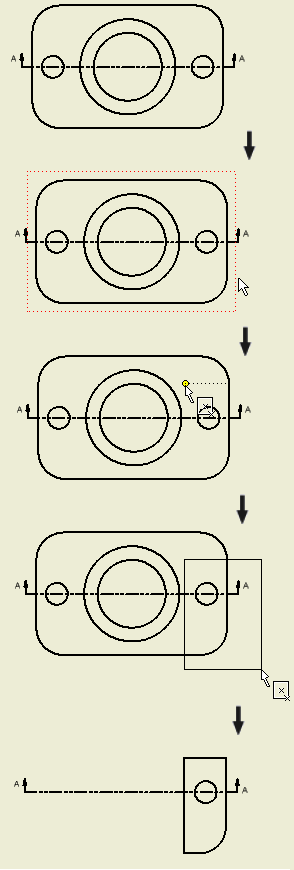
When a crop operation is executed, first the type of boundary (circular or rectangular) must be selected. A circular boundary can be specified by a center point of circle and a point on the circle. A rectangular boundary can be specified by two points which define the diagonal of the rectangle.

|
|
|
Perform a crop operation using an existing sketch
An existing view sketch that qualifies as a crop sketch can be used to crop a view. To qualify as a crop sketch, the sketch must contain a single non self-intersecting loop. The sketch must be associated with the view..
|
|
|
Model geometry can be projected into sketches used for cropping. If the model geometry changes, the crop sketch may become invalid for cropping.
Crop sketches can be edited just like any other view sketch. To edit a crop sketch, open the corresponding crop node in the browser, select the sketch, right-click and then select Edit. When you leave existing sketch environment the sketch is validated for cropping.
If the sketch is still valid for cropping, the view updates to accommodate the changes to the sketch. If the sketch is no longer valid for cropping, then a dialog box is displayed indicating the reason the sketch is invalid. Select “Cancel” to cancel the edit and continue in the sketch environment. Select “Continue” to exit the sketch environment. Exiting the sketch environment with an invalid sketch marks the crop node with a warning icon and the view is not cropped.
Set options for crop operations
Boundary types can be set for crop operations. On the ribbon, click
Place Views tab
 Modify panel
 Crop
, select a view to be cropped, and right-click to display the context menu. Select the crop boundary type directly in the context menu (Rectangular or Circular) or click Crop Setting to display Crop Settings dialog box.
The boundary type selected directly in the context menu is applied to a particular crop operation. The boundary type selected in the Crop Settings dialog box is set as a default type for the next crop operations.