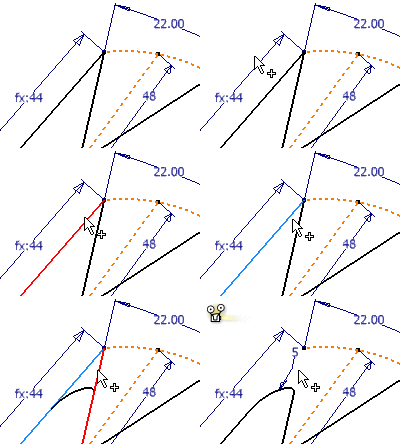
Use Bend to place tangent corner bends on lines created with the 3D Line command and lines added to the sketch with the Include Geometry command.
If you prefer, you can automatically place bends while you sketch lines.
Manually add bends to 3D lines
To begin, create 3D sketch geometry, or right-click a 3D sketch icon in the browser and select Edit.
- On the ribbon, click
3D Sketch tab
 Draw panel
 Bend
Bend
 .
. - In the dialog box, set the bend radius.
- The Equal command is automatically selected and constrains bends to each other. If desired, cancel the selection to prevent automatically constrained bends.
- Select 3D lines, 3D sketch points, or included geometry (geometry copied to the 3D sketch with the Include Geometry command) that meet in a corner.
- Continue to select lines, then close the dialog box when finished.
When you open the Bend dialog box, the last-entered radius shows.
 Show Me how to create bends manually in a 3D sketch
Automatically add bends to 3D lines
Two settings control automatic bends in 3D lines. Set the Auto-Bend options before you create 3D lines.
To set the system-wide default:
- On the ribbon, click
Tools tab
 Options panel
 Application Options
and click the Sketch tab.
 - Select the Auto-bend with 3D line creation check box, then click OK.
To set the default for the current file:
- On the ribbon, click
Tools tab
 Options panel
 Document Settings
and click the Sketch tab.
 - Under 3D Sketch, enter the Auto-Bend Radius, then click OK.
When one or both of these settings are on, automatic bends are added to corners when you create lines using the Line command.
Note: While the Line command is active, right-click, and clear the Auto-Bend check mark to disable automatic bends.