In a 3D sketch, click
3D Sketch tab
 Constrain panel
 Coincident
to attach curve endpoints to other endpoints, work points, curves, and Included geometry. To detach the curves, delete the coincident constraint.
Examples:
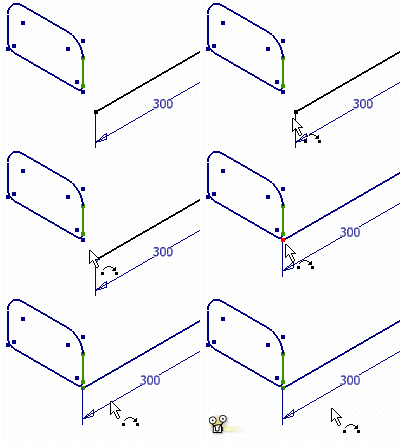
Apply a 3D coincident constraint between an endpoint and vertex
- In a 2D sketch, create a rectangular profile.

- Exit the 2D sketch.
- In a 3D sketch, create a line.

- On the ribbon, click
3D Sketch tab
 Constrain panel
 Coincident
 to attach an endpoint of the line to a vertex of the rectangle.
 - Show All Constraints.
- Pause the cursor over the coincident constraint symbol. Note the connected endpoint and vertex.
- Delete the coincident constraint.
- Use the Coincident command to attach the line endpoint to a different vertex.
Apply a 3D coincident constraint between an endpoint and Included curve
- Delete the coincident constraint.
- On the ribbon, click
3D Sketch tab
 Draw panel
 Include Geometry
 .
. - Select a line of the rectangle.
- On the ribbon, click
3D Sketch tab
 Constrain panel
 Coincident
to attach the line endpoint to the Included rectangle line.
 - Show All Constraints.
- Use the 3D Move/Rotate command to move the attachment point along the Included line.