Most designers have parts that differ by size, material, or other variables, although the same design works in many models. You can create these designs as iParts, and then use one or more of the variations.
You use the iPart Author to create part families that contain a table. For standard iParts, each iPart variation is an iPart member, which is defined by a row in the table.
In general:
- Start with a new or existing part.
- Determine the portion of your design that changes with each member.
- Use the Parameters command to rename parameters, establish equations, and create user parameters.
- Use the Create iPart command to define one or more table rows that represent members of the iPart factory, specifying variations of its parameters, properties, thread information, iMate information, feature suppressions, and work features.
- Save the part, which is automatically saved as an iPart factory.
Workflow for iParts
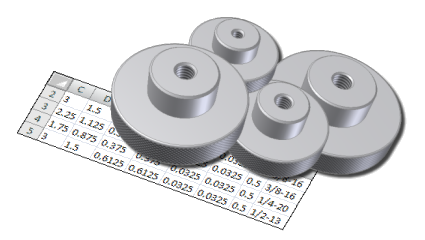
When you author an iPart you design the part and define all of its variations. You create a row in a table for each possible version. Each version, called a member, is stored in an iPart factory. Your customer can then select a row in the table to represent the appropriate version of the part. This technique generates an iPart member.
You can create two types of iPart factories: standard and custom.
Types of iParts
There are two types of iParts:
- A Standard iPart Factory defines all values in columns. When you publish an iPart using a standard iPart factory, the member parts cannot be modified after placement.
- A Custom iPart Factory contains at least one column identified as a Custom Parameter Column. When you publish an iPart using a custom iPart factory, the custom parameters in the member parts can be modified when the iPart member is placed. You can add features to a custom iPart member.
Information to include in iPart
You can include:
- Parameters. Use the Parameters Editor to rename parameters, establish equations between parameters, and create User parameters.
- Properties, so that you can include information such as part number, stock number, and material. Your bill of materials and parts list are automatically kept up to date.
- Threads, including different thread families, designations, classes, direction, and pipe diameter.
- iMates, specifying which should be included or suppressed, offset values, matching names, and sequence number.
- Work features, including which should be included or excluded and visibility status.
- Feature Suppression status. Using feature suppression, you can include several configurations of a single part in one file. For example, one configuration of the part may have an extrusion with a cut, while another has an extrusion with a join.
- iFeatures and table-driven iFeatures. You can specify which inserted iFeatures to include in the iPart. If the iFeature includes a table, you can specify the iFeature row value and the suppression status for each row.
Differences in standard and custom iParts
When creating an iPart factory, you determine whether or not parameters can be modified when an iPart is placed in an assembly. Parts created from standard iPart factories cannot be modified. Parts created from custom iPart factories can have designated parameters modified when placed.
Standard iPart factories, such as bolt factories, are not edited. Because bolts are parts that do not change, you select the individual iPart member to use, but you do not edit any values. Usually, standard iPart members are stored in a library. By default, files for standard iPart members are located in a folder of the same name as the factory.
Custom iPart factories are not edited directly, but you can choose the value for custom parameters when you place a member from the factory. For example, with an angle iron factory, you select the iPart to use, and then modify certain values such as length, width, or thickness. Only the values specified when the iPart factory was created can be modified. Custom iPart members are usually specific to a particular assembly and can be stored anywhere other parts are stored.
The location of files created for custom iPart members is based on the path specified using Browse in the Place Custom iPart dialog box. With custom iPart members, you can input a custom value not contained in the table. Custom iPart member columns appear with a blue background in the iPart factory. You can edit custom iPart members by adding additional features, sketches, and so on. It means that two custom iPart members produced with identical parameters can be different.
Behavior of work features in iParts
Work features are useful in iParts.
Create work features in a part before you transform it into an iPart factory, and then determine which work features to include or exclude in iPart members.
In the iPart Author dialog box, work features have default Include or Exclude settings. You can override the setting by selecting work features to include or exclude in the iPart table. Each row can have work features Included or Excluded. Default settings are:
- Work features constrained with iMates are Included.
- All other work features are Excluded, except the features constrained with iMates.
For standard iParts, each row in the iPart table represents a member. A column for each work feature indicates whether it is included or excluded. You can modify the setting for each row in the table.
Tips for creating iPart factories
- Determine the part of your design that changes with each version.
- After you create the basic part, use the Parameters command to rename system parameters and to create unique parameter names. Then use the iPart Author command to create the iPart factory. Named parameters are automatically added to the iPart table.
- When creating an iPart factory, use Suppress and Unsuppress features to make significant changes between members. Add the features to the iPart table, and then specify the suppression status for the features in each row of the iPart table.
- In the iPart Author, right-click materials, sizes, or other critical values in the right pane and designate as keys. Only key values are shown in the model browser. Key numbers determine the nesting hierarchy, such as key 3 is nested under key 2, which is nested under key 1.
- Default document units are used if you do not specify a unit of measure in a table cell.
- To include part properties in drawings include them in the iPart table, even if their values do not vary between members.
Publish DWF data
Publishing from an iPart factory produces a DWF file containing an iPart table. Activate the iPart table in the browser, and then use ![]()
 Save As Save Copy As. Specify the DWF file type and appropriate options.