Thick and Thin Sections
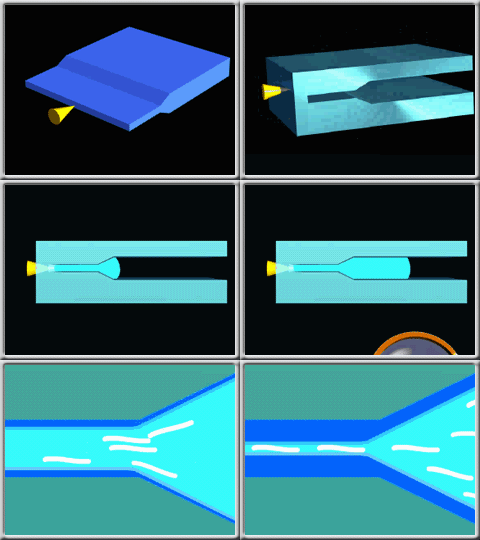
If you have chosen to put the polymer injection location on an area which is thinner than other areas of the part, then it is likely that the thin area will freeze first. If this happens, then pressure will not be applied to the thicker areas as they freeze—that is, the thicker parts of the model will be underpacked, causing uncontrolled shrinkage and hence warpage and/or possible sink marks. In extreme cases, the part may be a short shot, as shown in this animation:

Underpacking can cause hesitation, sink marks, differential shrinkage and part warpage.
Sink marks are depressions formed on the surface of injection molded parts. These depressions are typically very small; however they are often quite visible, because they reflect light in different directions to the undeflected part.
All polymers shrink during cooling. If a part shrinks uniformly in all directions and in all areas of the mold, then it will not warp. However, if a part shrinks different amounts in different places, it can warp.
What to do next
-
Move the injection location to another place on the model, which is not so thin. In general, it is best to inject from thick to thin.
-
Increase the thickness of the wall around the injection location and merge this local region into the main thick area to ensure that there is always a non-frozen channel to transmit pressure from the gate to the thick areas during the packing phase.
Gate implications
When designing the gate/s, attention should be given to the size of the gate. To reduce problems, make sure your gate size is no greater than the local thickness of the part that directly surrounds the gate.