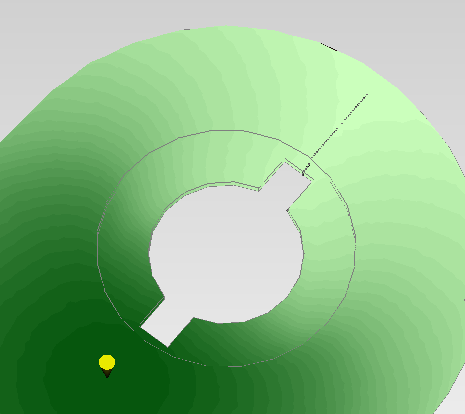
The Fill Preview is a pre-analysis representation of how the part will be filled.
Fill Preview is displayed once an injection location has been placed onto the model and the Fill Preview check-box in the Study Tasks pane has been selected. Fill Preview results update any time you relocate or add an injection location.
The Fill Preview displays the following information:
- A gradient representation of the fill time – the lighter the color, the later that section of the part was filled.
- Small black points that collectively represent weld lines.

The Fill Preview is available only under the following conditions:
- Mold type is set to Part Only
- An injection location has been set.
- The Fill Preview option in the Study Tasks pane has been selected.
- An analysis of the study has not been done.
- The part cannot include runner, feed and cooling systems.
- Multi-cavity models are not supported.
- Cutting planes do not work with Fill Preview.
- The absolute thickness of any section of the part must be greater than 0.1mm.
Note: A Fill Preview will not detect short shots; you will need to run a Fill analysis to determine this.
Using this result
Injection locations can be added and adjusted and the impact of those choices assessed in real time. The ability to obtain quick feedback on weld line locations and potential overpacking, prior to launching an analysis, will shorten the overall development cycle.
Things to look for
When viewing the Fill Preview result, check the following:
- Weld lines have the potential to impact on the structural strength of the part and can be considered visual defects when located in the wrong place. Adjusting the injection location could move the weld lines to a less critical position. If weld lines are a concern, run a fill analysis to more accurately determine the weld line quality.
- To avoid overpacking and the resultant warpage problems, the extremities of a part should all fill at the same time. Where possible adjust the injection location to obtain an even fill.