|
In this exercise, you load door types into the project, and then add interior and exterior doors to the model.
Objectives
- Load door families.
- Use the Type Selector to change door types.
- Place doors in the model.
- Use the Spacebar to change the swing of the door before placing the door.
- Use the flip controls to change the orientation of the door after placing it.
Load Families
- Open project GSG_06_place_doors.rvt.
- Click Insert tab
 Load from Library panel
 (Load Family).
 - In the Load Family dialog, navigate to the folder where you saved the family files for the exercise.
- While pressing Ctrl, select the following files, and click Open.
- bifold-4 Panel.rfa
- Casement 3x3 with Trim.rfa
- Double-Glass 2.rfa
- Single-Glass 2.rfa
Place Doors
- In the Project Browser, under Floor Plans, double-click 02 - Entry Level.
- On the Properties palette, for Underlay, select None.
Without the underlay display of the lower level, it is easier to see the walls for the current floor.
- Click Architecture tabBuild panel
 (Door).
 - In the Type Selector, verify that Double-Glass 2 is selected.
- If needed, click Modify | Place Door tabTag panel
 (Tag on Placement) to place tags with doors.
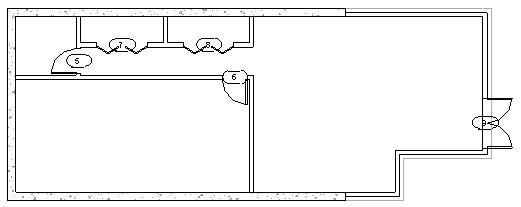
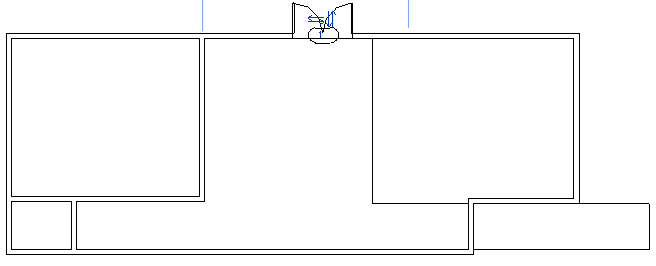
 - Click to place a door in the North exterior wall of the building, as shown.
- In the Type Selector, under Single-Glass 2, click 36" x 84".
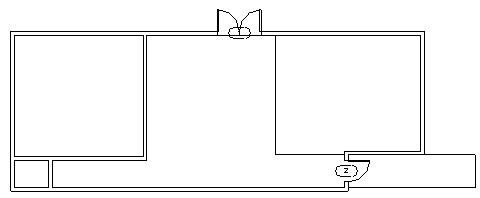
- Click to place the door in the lower East wall, as shown. Note: To change the swing direction or hinge side as you place the door, press the Spacebar. To change the direction after a door is placed, click the flip arrows.
- In the Type Selector, under Single-Flush, click 36" x 84".
- Place 2 more doors in the entry level, as shown.
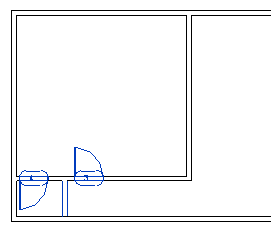
- Open the 01- Lower Level floor plan.
- Click Architecture tabBuild panel (Door).
- Place doors in approximate locations, as shown. (Use the Type Selector to change the door type, as desired.)