In a 2D or 3D view, you can align a surface pattern on a model element. For example, you can use this technique to align the following:
- ceiling tiles with a corner of a room
- masonry to the edge of an exterior wall
- wallpaper as desired to an interior wall
- carpet as desired on a floor
Example
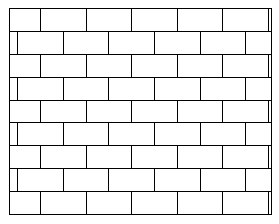
Surface pattern on wall before alignment
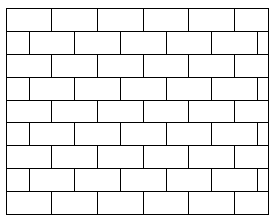
Surface pattern aligned to upper-left corner of wall
If you are adjusting the surface pattern of a free-standing stone wall, you can align its surface pattern on each exposed side individually.
You can align the surface pattern for each surface of a model element (not just for the model element as a whole).
To align a surface pattern on a model element
- Open a project view that displays the model element with the surface pattern to align.
To specify a surface pattern for the material of the model element, see Changing the Graphics Properties of a Material. If the surface pattern does not display in the view, you may need to change the view’s detail level to fine, or zoom in on the model element.
- Place the cursor over a line of the surface pattern.
- Press TAB one or more times until the surface pattern line highlights.

- Click to select the surface pattern line.
- Move the selected surface pattern line as desired, using one or more of the following techniques:
- Press the arrow keys to nudge the surface pattern up, down, left, or right, in small increments.
- Use the Move tool to move it a specified distance. See Moving Elements with the Move Tool.
- Use the Rotate tool to rotate the surface pattern. See Rotating Elements.
- Use the Align tool to select a model reference with which to align the surface.