 Revit Structure
 Revit Structure
You may want to cut a plan view at the back clip plane when you have an element (such as a slanted wall) that spans multiple levels. If you only want the wall visible in the plan view as it appears in the view range of level 3, you can clip the wall from view using the Depth Clipping parameter.
You activate this feature using the Depth Clipping parameter for the plan view. The back clip plane is defined by the View Depth parameter, which is part of the view’s View Range properties.

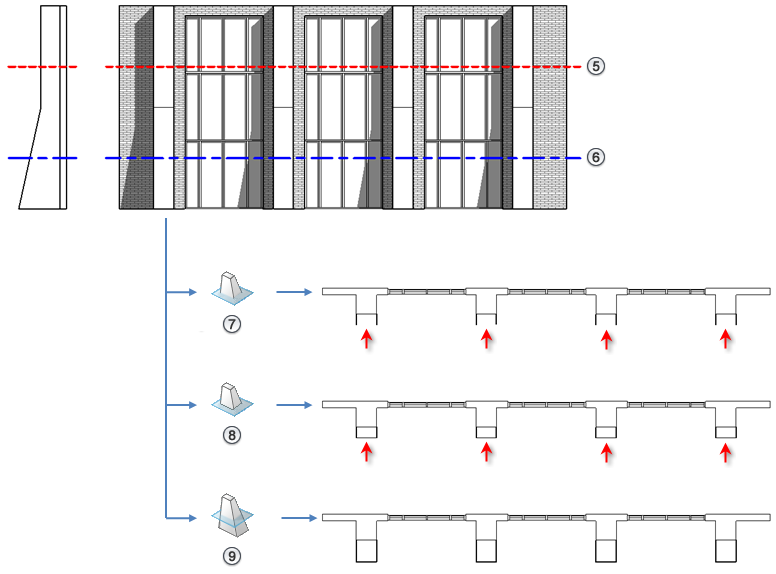
The following image illustrates the back clip plane.

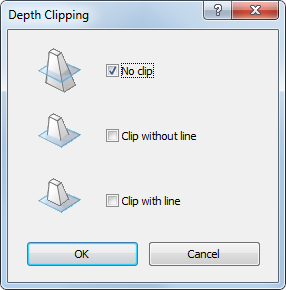
The following image shows the cut plane and view depth for this model and the resulting plan view representations for the Depth Clipping parameter options (Clip without line, Clip with line, and No clip).

Plan regions respect the Depth Clipping parameter setting of their parent view, but follow their own View Range settings.
Elements that have symbolic representation in certain views (such as structural beams) and non-cuttable families are not affected when you cut a plan view by the back clip plane. They will display and are not cut.
This property does affect printing.
To cut a plan view by the back clip plane
The Depth Clipping parameter is available for plan and site views.
The Depth Clipping dialog displays.
