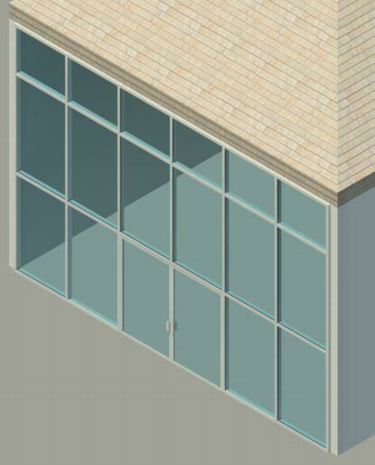
In Revit, you add a door to a curtain wall by customizing a curtain panel so that it schedules as a door.
- Open a plan, elevation, or 3D view of the curtain wall.
- Move the cursor over an edge of the curtain panel to be customized until one of its mullions or the curtain wall highlights.
- Press Tab until the panel highlights, and then click to select it and display the pin icon.
- Click the pin icon to unpin the panel.
- In the Type Selector, select a curtain wall door to replace the panel. Only curtain wall doors can replace a curtain wall panel.
If necessary, you can load a curtain wall door by clicking Insert tab
 Load from Library panel
 Load Family. In the Load Family dialog, open the Doors folder, select any door family with curtain wall in its name, and click Open to load the family into the project.
 - Highlight the mullion under the door, and click to display its pin icon.
- Click the pin icon to unpin the mullion, and then press Delete.
To delete a curtain wall door, select it and change it back to a curtain wall panel using the Type Selector.

Curtain wall door