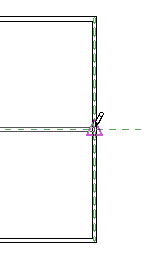
When you place an element or component, or sketch a line (straight, arc, or circle), Revit displays snap points and snap lines to assist in lining up elements, components, or lines with existing geometry. Snap points depend on the type of snap, but are represented in the drawing area as shapes (triangles, squares, diamonds, and so on). Snap lines are represented as dashed green lines in the drawing area.
The following illustration shows the green dashed snap line and a midpoint snap point (triangle).

You can enable or disable object snaps, and specify dimension snap increments. You can also override snap settings using keyboard shortcuts. You set snap settings in the Snaps dialog, and the settings are held for the duration of the Revit session. Snap settings apply to all files open in the session, but are not saved with a project.
Jump Snaps
Jump snaps are any snap points that are away from the current position of the cursor. For example, if you are resting the cursor on the midpoint of a wall, a jump snap might display at the endpoint of the wall.
Jump snaps occur when you clear the check box for the Nearest object snap in the Snaps dialog.