- In a Revit project, open a 2D view or a 3D orthographic view.
The view must contain a flat or cylindrical surface on which you can place decals. You cannot place decals in 3D perspective views.
- Click Insert tab
 Link panel
 Decal drop-down
 (Place Decal).
 If no decals exist in the current project, the Decal Types dialog displays, and you need to create a decal type. See Creating a Decal Type.
- From the Type Selector, select the type of decal to place in the view.
- If you want to change the physical size of the decal, on the Options Bar, enter values for Width and Height. To maintain the aspect ratio between these dimensions, select Lock Proportions.
- In the drawing area, click a flat surface (such as a wall face or roof face) or a cylindrical surface on which to place the decal.
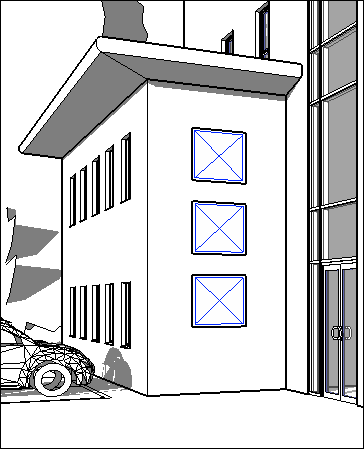
The decal displays as a placeholder in all non-rendered views, as shown. When you move the mouse over the decal or select it, it displays as a rectangle with a cross through it. The detailed decal image is visible only in rendered images.

- After placing a decal, you can continue placing more decals of the same type. To place a different decal, select the desired decal in the Type Selector, and then click the desired location on the building model.
- To exit the Decal tool, press Esc twice.

3D view showing placeholders for decals
Related topics