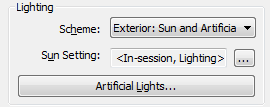
- In the Rendering dialog, under Lighting, for Scheme, select the desired setting.

- If you selected a lighting scheme that uses sunlight, for Sun Setting, select the desired sun position.
To define new sun and shadow settings for the rendered image, click
 (Browse). Click OK or Cancel to return to the Rendering dialog.
 - If you selected a lighting scheme that uses artificial light, click Artificial Lights to control artificial light in the rendered image.
You can create light groups and add lighting fixtures to light groups. You can also dim or turn on or off light groups or individual lighting fixtures. Click OK or Cancel to return to the Rendering dialog.
- If the lighting scheme is Interior: Sun only or Interior: Sun and Artificial, consider whether you want to turn on daylight portals.
During the rendering process, daylighting is performed automatically. For advanced lighting quality in interior views, you can enable daylight portals, if needed. Daylight portals improve the quality of the rendered image, but they can also increase render time. By default, daylight portals are turned off. See Daylight Portals.
- Continue to define other render settings.