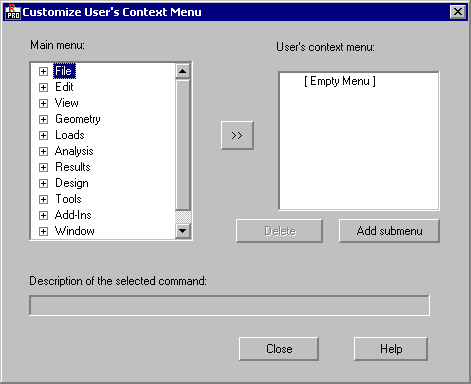
Click Tools menu > Customize > Customize context menu to open the Customize User's Context Menu dialog.

The left panel of the dialog displays the main menu tree. The right dialog displays the User's context menu with the commands added by a user.
To add a new command to the user's context menu:
- Click in the left panel where the new command is to appear.
- Select the desired command in the left panel.
- Click >> to move the selected command to the context menu.
To create a submenu in the context menu:
- Click Add submenu to create a submenu in the right panel. To change its name, click the left mouse to type the new name.
- Click the Empty menu option under the submenu.
- Select the desired command in the left panel.
- Click >> to move the command to the context menu.
Note: You can divide the commands in the user's context menu using a separator. Move a separator from left to right panel by clicking >>.
The bottom part of the dialog displays the description of the command in the left panel.
Note: The commands defined in the user's context menu are added at the end of the existing context menu, following a separator.
To delete a command from the user's context menu:
- Select the command in the right panel.
- Click Delete.