In this model, we simulate the flow through a hydraulic valve. The working fluid is water, and the valve is in the half-open position. The model is set up and ready for you to run and explore the results.
Before you begin, please watch this short video that demonstrates the steps of the tutorial:
Get started
1. Download the model by clicking here. Save the file to a folder on your computer, and unzip the contents.
2. Open Simulation CFD 360 by double-clicking the desktop icon:
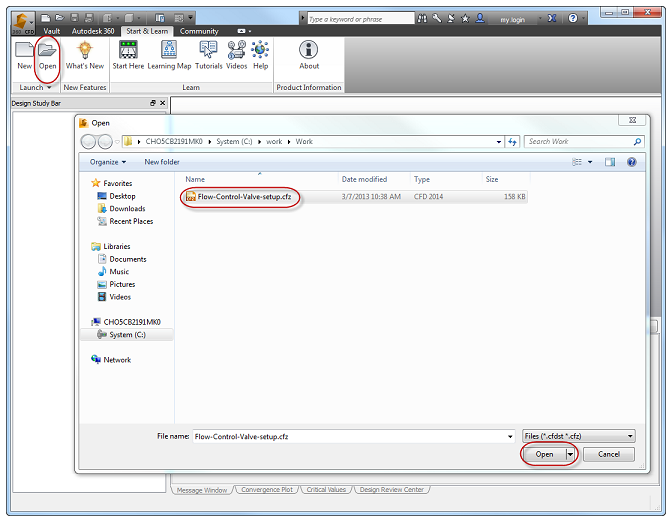
3. To open the model, click Open from the Start & Learn ribbon tab, select the cfz file, and click the Open button.
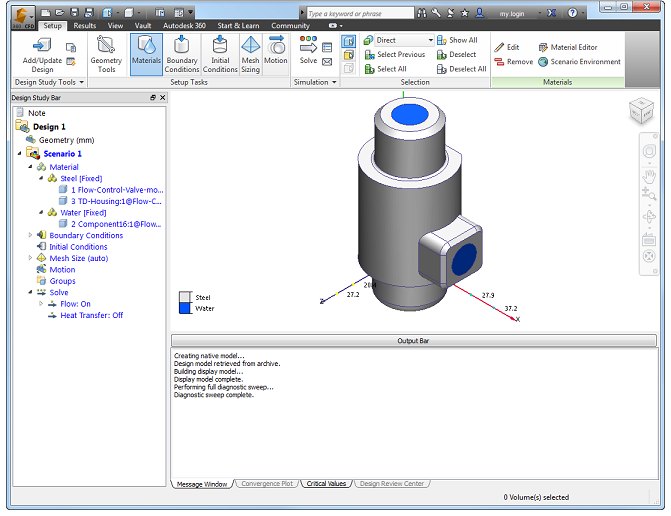
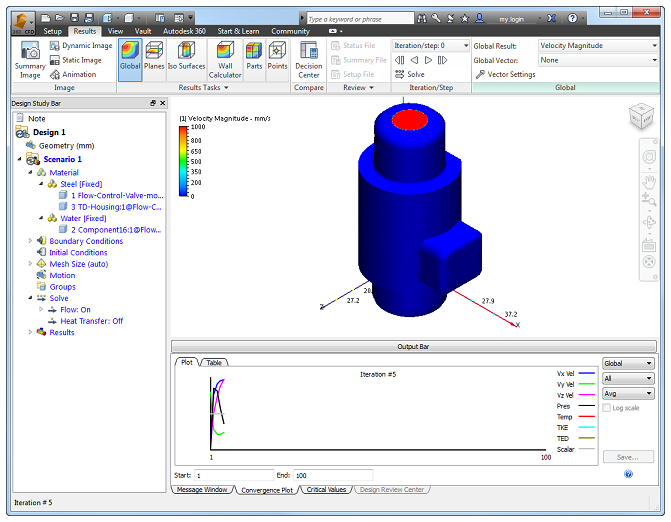
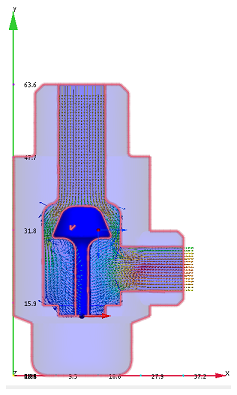
After the model loads, you should see this:
Run the simulation
1. Click Solve from the Setup (tab) > Simulation (panel):
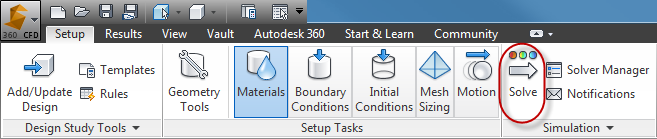
2. Click Solve.
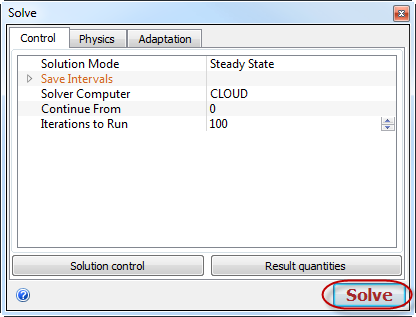
You should see the simulation start. This model should take roughly 5 minutes to run.
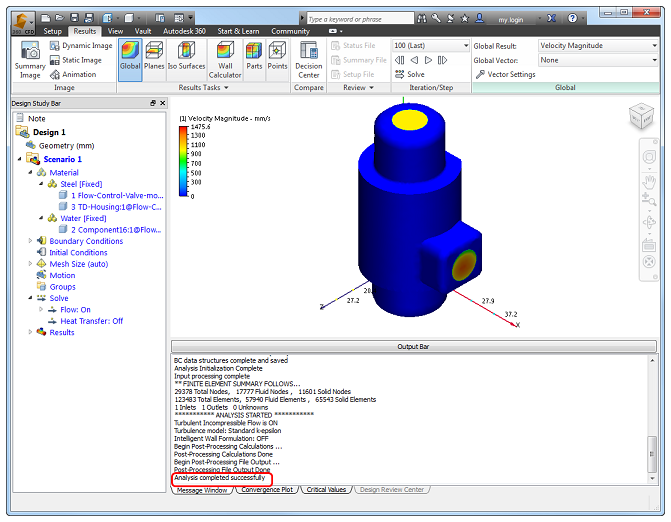
When it's finished, you should see Analysis completed successfully in the Output Bar:
View the results
Now that you've run the simulation, we can visualize how the water flows through the valve.
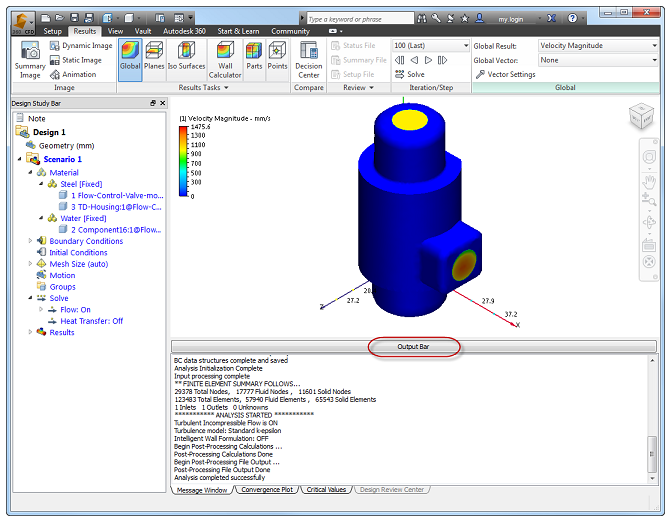
1. Let's expand the workspace by clicking the Output Bar button.
2. To create a results plane, click Planes, and click Add.

3. To re-orient the plane, left click on it, and click Z.
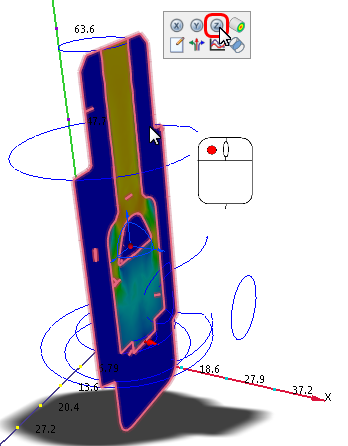
4. To rotate the model, click Front on the View Cube.

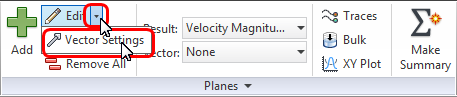
5. Click the small arrow beside Edit, and click Vector Settings.
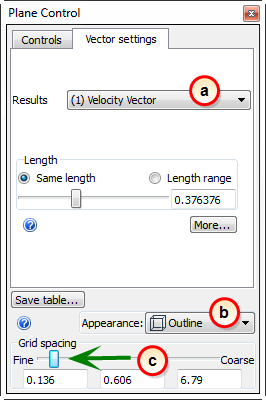
6. To enable vectors and make them look awesome:
- a. Select Velocity Vector from the Results menu.
- b. Select Outline from the Appearance menu.
- c. Drag the Grid spacing slider toward the left.
7. To shade the solid parts:
- From the Design Study bar (Results branch), right click on the Flow-Control-Valve part, and click Shaded.

- Right click on the TD-Housing part, and click Transparent.
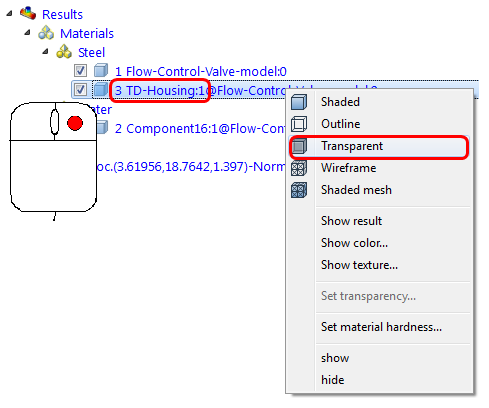
- Right click on the TD-Housing part again, and select Set Transparency. Drag the slider toward the right. (85% should be enough.)

Good job! In just a few minutes, you ran a fairly complex 3D flow simulation and created a view that's awesome and useful.