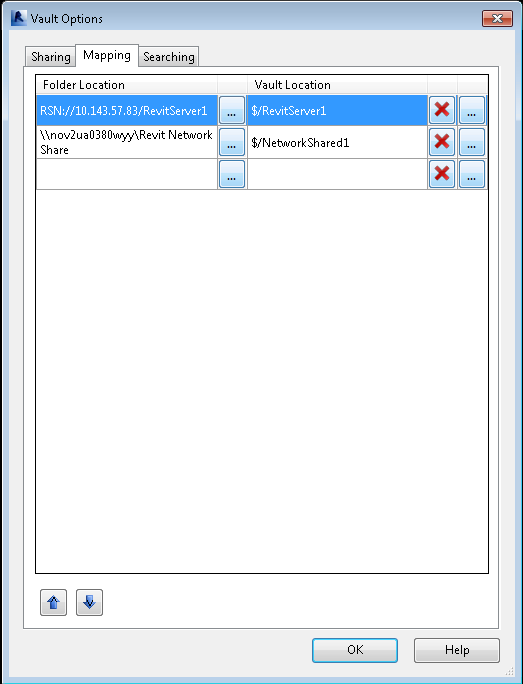
- Click Options on the Vault add-in ribbon.
- Click the ellipses (...) button under Folder Location.
- Select the folder that you want to map. To select a Revit Server folder, check the Use Revit Server check box. Note: Make sure that you use a folder at the root level for Revit 2013 (without subscription), such as $\Projects, as it will only pick up the setting from there. Subfolders from Revit Server are honored in the structure so setting it up once is sufficient.
- Click OK.
- Click the ellipses (...) button under Vault location.
- Select the Folder in Vault where files from the selected Windows folder should be added.
- To delete a mapping, click the associated delete button.
Map any local, network, or Revit server folder to any Vault folder on the Mapping tab of the Vault Options dialog.

Configure Mapping Options
Note: When mapping folders, a parent folder mapping will include all sub folders. For example if the folder C:\Vault\ is mapped to $\Vault in the vault, then there is no need to map C:\Vault\Libraries. This path automatically maps to $Vault\Libraries in Vault.