In this lesson, first you use Layers and the Scene Explorer to organize the objects created in Revit, then you illuminate the beach house with artificial light so you can create nighttime renderings.
Set up the lesson:
- Continue working on your own scene file or
 open
beachhouse_scene_management.max.
open
beachhouse_scene_management.max.
Prepare the scene for artificial illumination:
- On the Scene Explorer panel, select the mr Sky Portal001 object.
- On the
 Modify panel
  mr Skylight Portal Parameters rollout, turn off the Sky Portal.
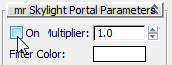
-
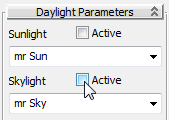
 Select the SunAndSky-002 object.
 - On the Daylight Parameters rollout, turn off the two Active toggles for Sunlight and Skylight.
- From the main menu, choose Rendering Environment. On the Environment And Effects dialog Common Parameters rollout, turn off Use Map.
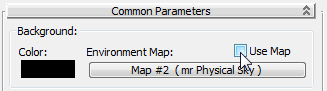 Note: Even when the Sunlight and Skylight are turned off, the Environment Map associated with the Skylight affects the rendering, and can cause unwanted brightness in reflective highlights.
 -
 Close the Environment And Effects Dialog.
 Now the scene has no daylight illumination, and is ready to be lit by artificial lights.
Set up the Scene Explorer to reorganize Revit objects:
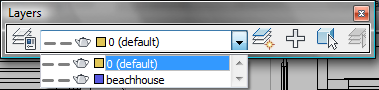
- Right-click an empty area of the main toolbar, and from the drop-down menu, choose Layers.
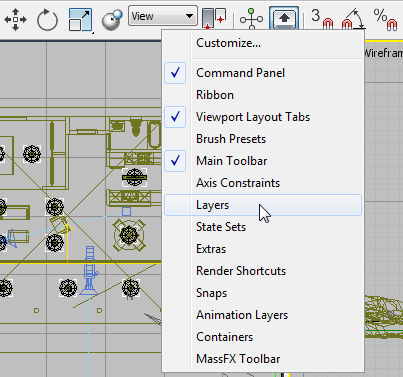
3ds Max opens the Layers toolbar. However, layer information is not included for geometry imported from an FBX file, so at present there are only two layers in the scene: the default, 0 layer, and a beachhouse layer that contains all the geometry, including lights, cameras, furniture, and the terrain and the building itself.
You will use the 3ds Max Scene Explorer to improve this organization.
- Keep the Layers toolbar open for now.
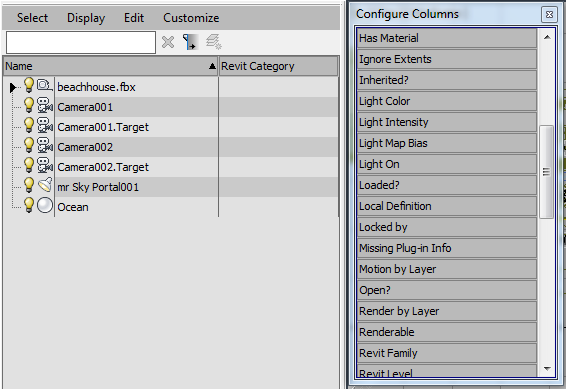
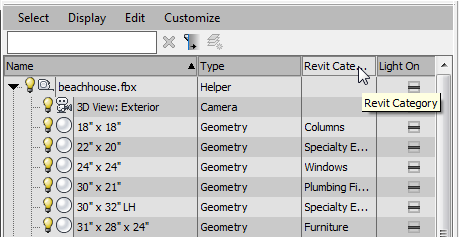
- On the Scene Explorer panel, right-click the column header and from the drop-down menu, choose Configure Columns.
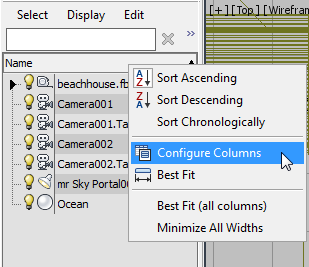
3ds Max opens a Configure Columns dialog.
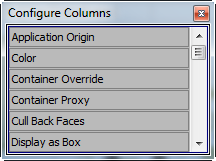
- Move the Configure Columns dialog to the right of the Scene Explorer window. Tip: If you resize the Configure Columns dialog to make it taller vertically, it is easier to find the columns you want to add to the Scene Explorer.
- If the Scene Explorer does not show a Revit Category column, drag the Revit Category column from the Column Chooser dialog, and drop it on the column header to the right of the Name column. Note: If you are running 3ds Max Design, the default Scene Explorer already has a Revit Category column. To see it, expand the Scene Explorer panel by dragging its right margin farther to the right.
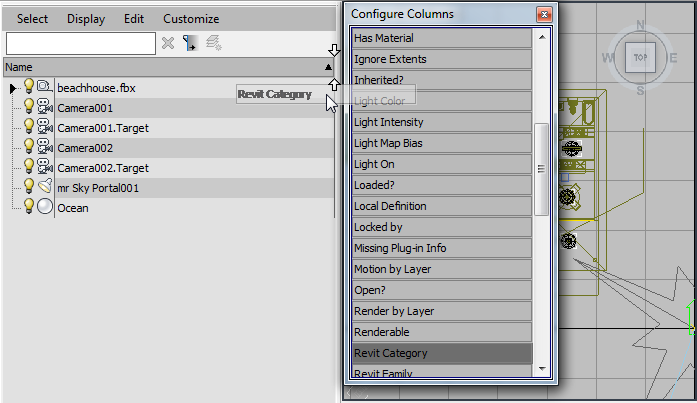
3ds Max adds the Revit Category column to the Scene Explorer.
- Drag the right edge of the Scene Explorer panel so you can see all of the new Revit Category column. Move the Column Chooser dialog so it doesn't obscure that column. Tip: It helps to make the Name column narrower. You can resize individual columns by dragging their divider edges in the header.
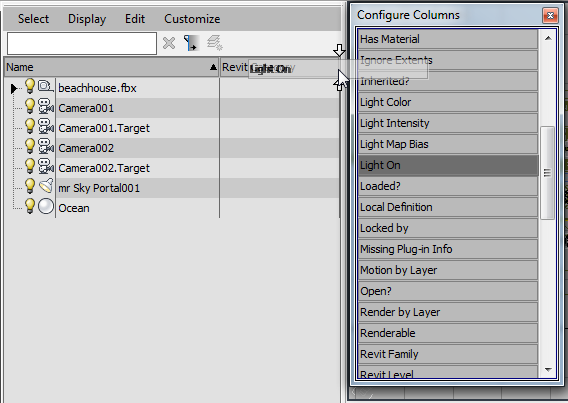
- Drag the Light On column from the Configure Columns dialog to the column header, as well.
 Tip: After you add a column, you also can move its position by dragging and dropping.
 - Finally, drag the Type column and drop it to the left of the Revit Category column.
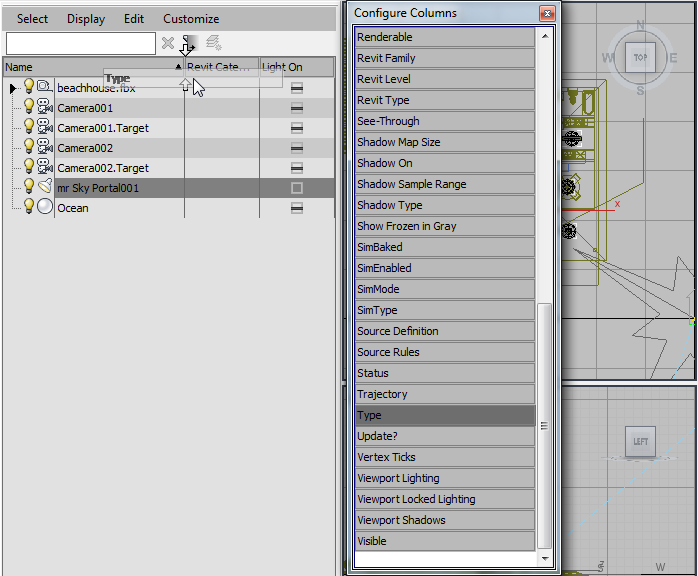
Now the Scene Explorer panel displays the information you need.
-
 Close the Configure Columns dialog.
Now that you have bound the beach house geometry to the 3ds Max scene, you can use 3ds Max tools to organize it. First, you will place the furniture on a separate layer, so you can hide or unhide the furniture easily.
Move the furniture onto a separate layer:
- On the Scene Explorer, click the arrow icon to expand the beachhouse.fbx entry that contains the geometry imported from Revit.
- Click the Revit Category column header.
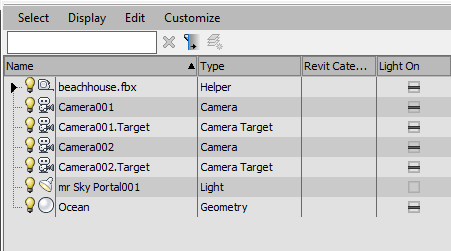
Now all the objects that were imported from the Revit scene file are organized by category.
- Scroll so you can see the objects in the Furniture category.
- Select the first furniture object in the list, hold down the
 key, and then select the last furniture object to select it and all furniture objects in between.
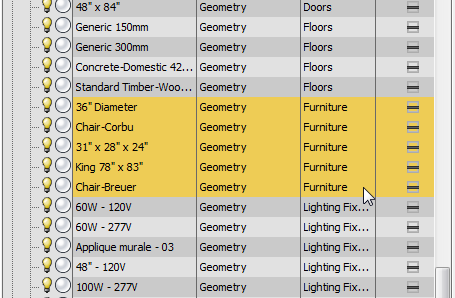
- On the Layers toolbar, click
 (Create New Layer).
 3ds Max opens a Create New Layer dialog.
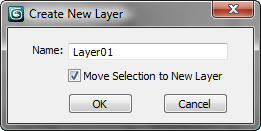
Name the new layer Furniture, leave Move Selection To New Layer turned on, then click OK.
Note: If the dialog doesn't appear, click (Manage Layers) and use the Scene Explorer - Layer Explorer window to rename the layer.
 Now the furniture is on a Furniture layer of its own, apart from the other beachhouse objects. You can use Show/Hide, Select and other layer controls for these Revit objects, just as you can with objects created in 3ds Max.
- Deselect the Furniture objects.
- Close the Layers toolbar.
Select the lights for artificial illumination:
- On the Scene Explorer, click the Type column header to sort the object list by Type.
- Click and +click to select all the lights except for mr Sky Portal001 and SunAndSky-002 (which is actually a child of the Helper Compass001).
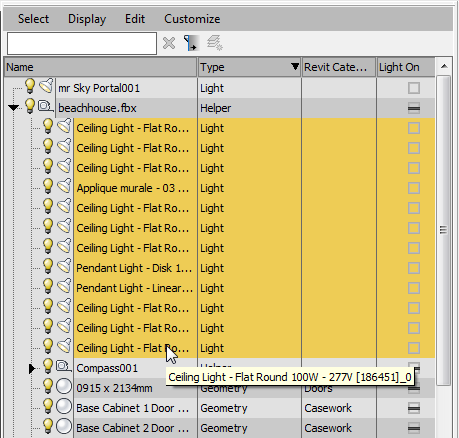
- Click the Light On checkbox for one of the selected light objects.
3ds Max turns on all the lights you selected.
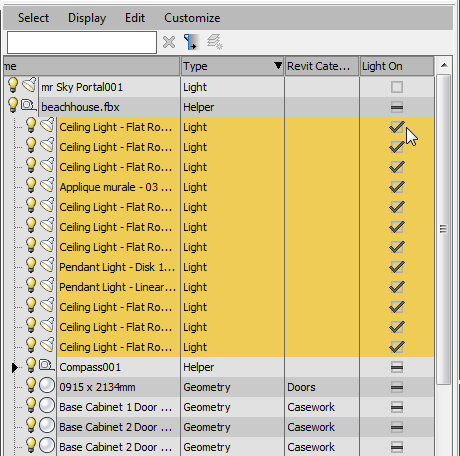 Tip: You can also use the Light Lister to turn lights on and off, but in the Scene Explorer it is easier to select multiple light objects.
 - Close the Scene Explorer.
You imported the Revit scene with its photometric lights turned off because you did not need them for daylight rendering. Now you can use the Scene Explorer to turn the lights back on with a simple click of the mouse.
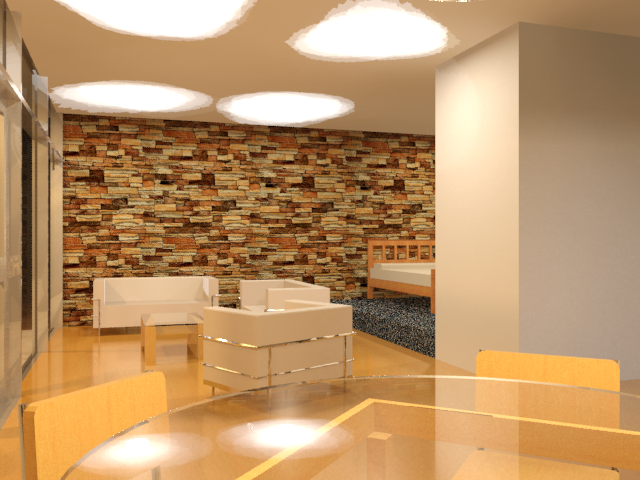
Render the interior at nighttime:
- Activate the Camera002 viewport and click
 (Rendered Frame Window) to display the Rendered Frame window.
 - Click
 (Environment And Effects Dialog (Exposure Controls)) to display the Environment And Effects dialog.
 - On the mr Photographic Exposure Control rollout Exposure group, change the Preset to Physically Based Lighting, Indoor Nighttime.
- Change the Shutter Speed to 0.2.
- On the Exposure Control rollout, click Render Preview.
Rendering the indoor preview takes longer than rendering the preview of the exterior view.

- On the Rendered Frame Window, click Render to render your night scene.
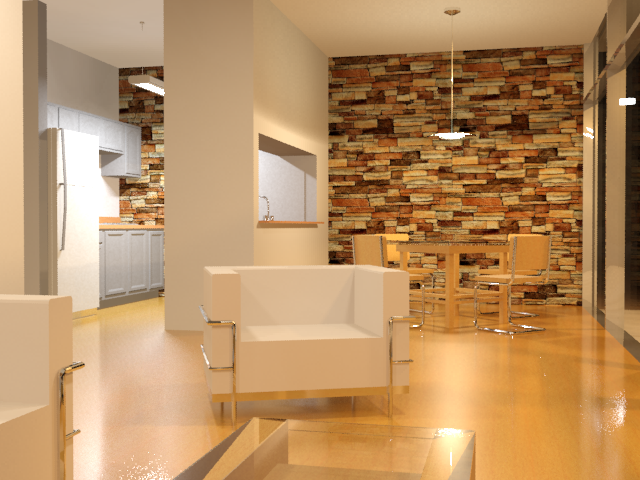
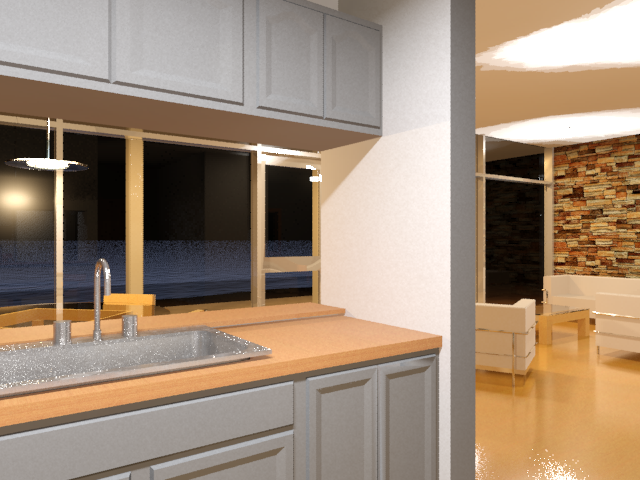
The rendered result shows that while most of the light sources are illuminating the interior quite nicely, the kitchen light is too bright, washing out detail in the cabinets and appliances. But rather than go back and adjust the light intensity in Revit, you can use controls in 3ds Max to accomplish the same task.
- Select the kitchen light, Pendant Light - Linear - 2 Lamp 48” - 120V 0, and in the Modify panel Dimming group, set the Resulting Intensity to 50 % (percent).
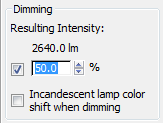
This reduces light intensity from 5280 lumens to 2640.
- On the Rendered Frame Window,
 clone the rendered frame, and then render the image again.
A comparison of the results shows the effect of dimming the kitchen light. The details of the cabinets are easier to see, and there is less glare on the kitchen floor.
Save your work:
- Save the scene as my_beachhouse_nighttime.
Summary
You have learned how to take models created in Revit and bring them into 3ds Max to create professional-looking renderings.
If you wish, you can test your knowledge of the camera, lighting, and exposure techniques you followed in this tutorial by creating, then rendering the following views of the bungalow model.
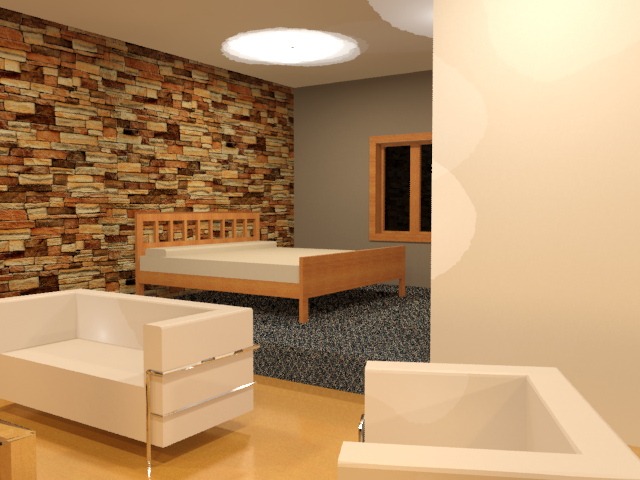
Bedroom
Living room
Kitchen
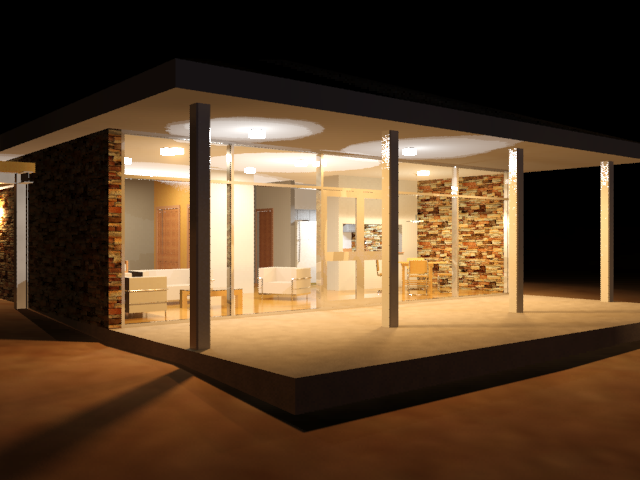
The Exterior view at night
All these views are set up and ready to render in the scene beachhouse_final.max.