Next, you will add materials to the barracks. Materials for the barracks use texture maps, as the ammunition canister does, but they also use bump mapping to create a more three-dimensional appearance.
Set up the lesson:
- Continue from the previous lesson or
 open
army_compound01.max.
Isolate the barracks:
- On the main toolbar, open the Named Selection Sets drop-down list, and choose the barracks selection set.
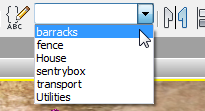
3ds Max selects the barracks buildings.
- Right-click the viewport to display the quad menu, and choose Isolate Selection.
3ds Max displays the barracks in the center of the viewport, and hides the other scene geometry.
- Use
 (Orbit) and
  (Field-Of-View) to adjust the view so you can clearly see the barrack walls.
Texture the barrack walls:
- Activate
 (Select Object), then click an empty area of the viewport to deselect the barracks set.
 - If it is not already visible,
 display the Material Editor. Tip: Besides the toolbar button, another way to display the Material Editor, or to restore it if it is minimized, is simply to press M.
 - On the Slate Material Editor menu bar, choose Options
 Propagate Materials To Instances to turn it on. (When this option is turned on, a check mark appears before its name.)
 Like the oil tanks and generators, the barracks objects, roof, walls, and floors, are instances of each other. By turning on this option, you can apply a material to all the objects of one type by dragging and dropping to only one object.
- In the Slate Material Editor, drag another Standard material node into the active View. Double-click the node to display the material parameters, then in the Name field, change the name of the material to BarracksWalls.
- In the Slate Material Editor
 Material/Map Browser panel, at the left, locate Maps
  Standard
  Bitmap, and drag this map type into the active View.
 3ds Max opens a file dialog.
- On the file dialog, choose planks.jpg, and then click Open.
- Wire the new planks texture to the BarracksWalls material node’s Diffuse Color component.
- Click the new Bitmap node to make it active, and on the Slate Material Editor toolbar, click
 (Show Shaded Material In Viewport) to turn it on.
 The BarracksWalls material now has an image of the planking.
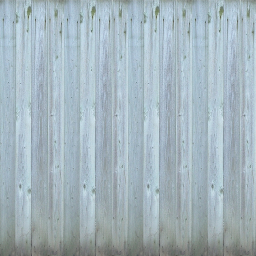
Planks texture for barracks walls
- Drag the BarracksWalls node output socket to the leftmost barrack walls.
All three barracks now show the BarracksWalls material.
The planks texture shows dirt at the bottom of the wall, but with default mapping coordinates, the dirt appears just above each doorway, instead.
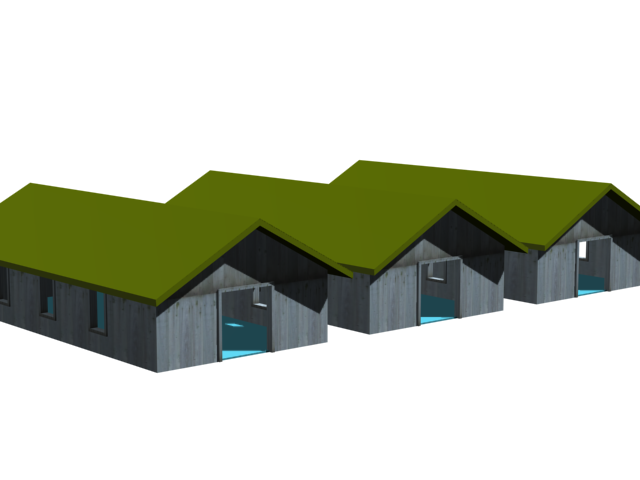
Planks texture appears on the walls, but is not aligned correctly.
Use UVW Map to adjust the planks:
-
 Select Barracks01-Walls, and then go to the
  Modify panel.
 - Use the Modifier List to apply a UVW Map modifier.
- In the Parameters rollout
 Mapping group, change the projection type to Box. Also set Length = Width = Height = 4.0m.
 Now the planking texture is correctly aligned with the walls.
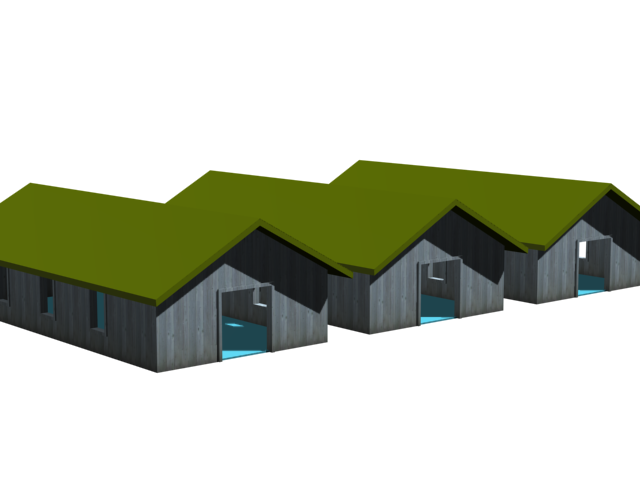
After applying UVW Map, the planks on the walls are aligned correctly.
Add a bump map to the planks material to improve realism:
- In the Slate Material Editor
 Material/Map Browser panel, at the left, locate Maps
  Standard
  Bitmap, and drag another Bitmap node into the active View.
 3ds Max opens a file dialog.
- On the file dialog, choose
planks.bump.jpg,
and then click Open.
3ds Max adds the node to the active View.
This map is simply a black-and-white version of the planks.bmp map itself.
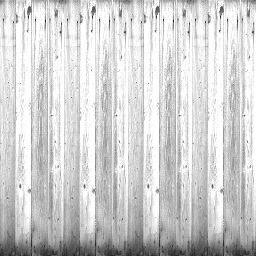
Black-and-white planks texture for bump mapping
Bump mapping uses intensities in the map to affect the surface of the material when you render it: White areas appear higher, and black areas appear lower. This is why the bitmap you use for bump mapping is often a black-and-white version of the map you use for texture.
- Wire the node to the Bump component of the BarracksWalls material.
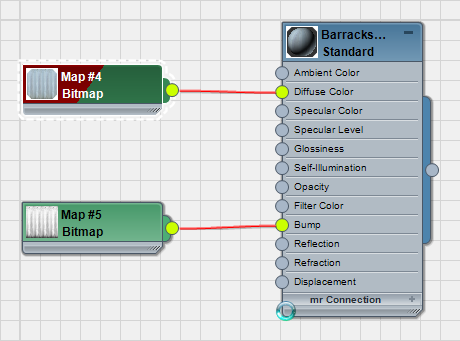
As it did for the other Bitmap nodes, 3ds Max adds a Controller node for the bump map’s Value.
Tip: Pressing L tells the Slate Material Editor to lay out nodes in the active View. - In viewports the bump effect is subtle, so click
 (Render Production) to see the effect of the new map.
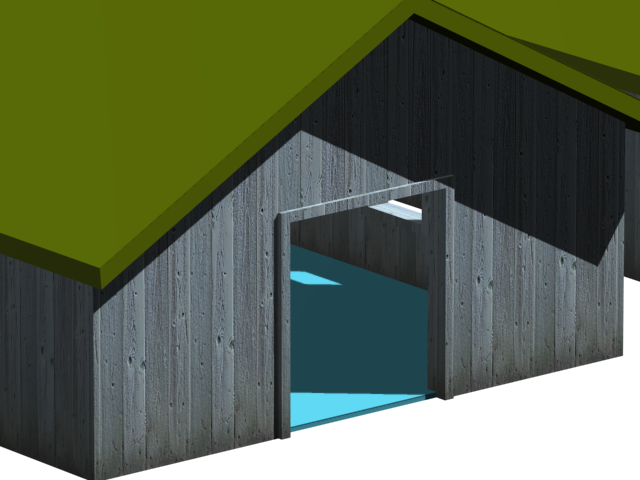
The barrack walls with bump mapping
Note: The legacy viewport drivers, Direct3D or OpenGL, don't display bump mapping at all.To get an even more weathered look, you can increase the bump mapping Amount.
- Double-click the main BarracksWalls material node, and then on the Maps rollout, increase the Bump Amount to 75. Note: You might notice a couple of user-interface changes that happened when you assigned the map for bump mapping: A checkbox indicates that bump mapping is turned on, and the Bump button now shows the name of the map: planks.bump.jpg.
- Click
 (Render Production) again.
 Now the planks appear extremely weathered.
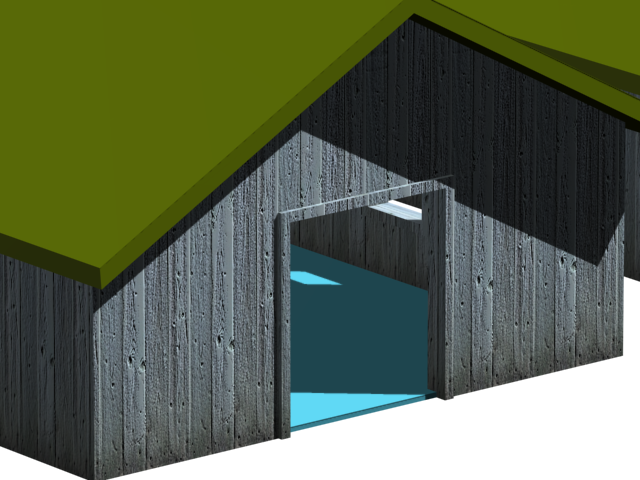
The barrack walls with increased bump mapping
If you take a closer look at the barracks, you can see that the texture looks good, but it also has a flat appearance, smoother than aged wood typically appears.
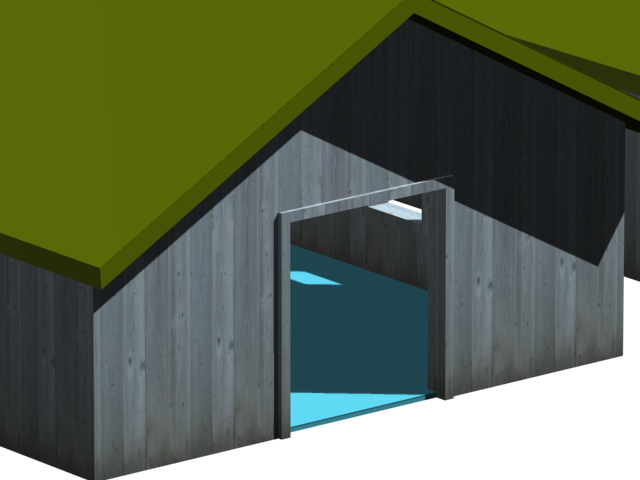
Barrack walls with a texture alone, and no bump mapping
You can improve the appearance of the plank walls by using bump mapping. Bump mapping makes an object appear to have a bumpy or irregular surface.
Texture the barrack roofs:
- Increase the
 Field-Of-View so you have a good view of the barrack roofs.
 -
 Select Barracks01-Roof.
 - Clear the Slate Material Editor
 active View.
 - In the Slate Material Editor, drag another Standard material node into the active View. Double-click the node to display the material parameters, then in the Name field, change the name of the material to BarracksRoof.
- In the Slate Material Editor
 Material/Map Browser panel, at the left, locate Maps
  Standard
  Bitmap, and drag this map type into the active View.
 3ds Max opens a file dialog.
- On the file dialog, and then choose metal_plate.jpg as the texture map.
- Wire the new Bitmap node to the Diffuse Color component of the BarracksRoof material.
- Click the BarracksRoof material node again to make it active.
- Click
 (Assign Material To Selection), and then click
  (Show Shaded Material In Viewport) to turn it on.
 In the viewport, the map appears on the barrack roofs. However, it is oriented the wrong way: the corrugated plates should lie along the slope of each roof instead of lengthwise.
Tip: The map should be applied to all three roofs. If it isn’t, Propagate Materials To Instances was not on. Choose Options Propagate Materials To Instances to turn this option back on, and try applying the map again.
 - Double-click the Bitmap node with the metal_plate.jpg texture. On the Coordinates rollout, change the W Angle to 90.0 degrees.
- Go to the
 Modify panel, and use the Modifier List to apply a UVW Map modifier.
 At first this appears to lose the W-Angle correction you just made, but changing the modifier alignment will fix that.
- In the Parameters rollout
 Alignment group, choose Y as the alignment axis.
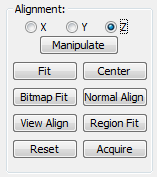
Now the metal plates are oriented correctly again.
- Also on the Alignment rollout, click Fit.
This sets the Width to its correct value of 7.033 meters.
- In the Parameters rollout
 Mapping group, change Length to also equal 7.033m.
 (Make sure you leave the UVW Map projection set to Planar, the default.)
The roof texture now has the correct size and orientation.
- In the Slate Material Editor
 Material/Map Browser panel, at the left, locate Maps
  Standard
  Bitmap, and drag another Bitmap node into the active View.
 3ds Max opens a file dialog.
- On the file dialog, choose metal_plate.bump.jpg as the texture.
- Wire the new Bitmap node to the Bump component of the BarracksRoof node.
- Double-click the new Bitmap node to display its parameters. On the Coordinates rollout, change the W Angle to 90.0 to match the texture.
- Double-click the BarracksRoof material node. On the Maps rollout, increase the Bump Amount to 90.
- Click
 (Render Production) to see the effect.
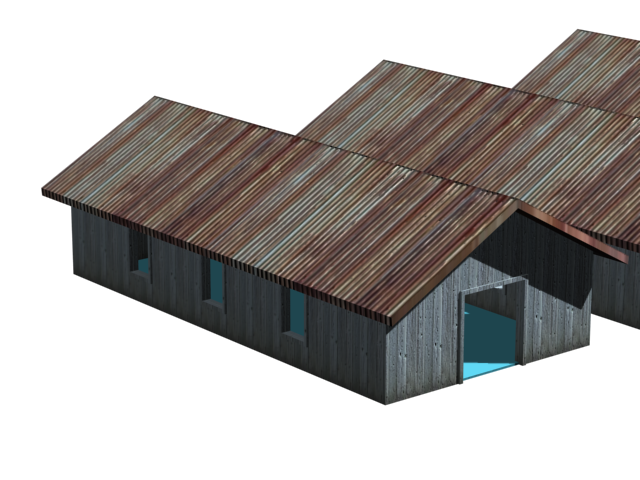
The barrack roofs with bump mapping
You will use a similar method for the roofs and floors of the barracks.
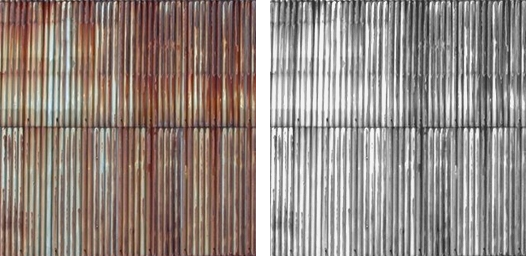
Left: Texture map for the barrack roofs
Right: Bump map for the barrack roofs
At the forward eaves of the roofs, the texture streaks a bit. In this scene, it isn’t a problem because usually you will render the barracks from a distance. Of course, the bump mapping isn’t too apparent at a distance, either. Whenever you texture a scene, bear in mind how much detail you want to use to make the scene believable.
Texture the barrack floors:
-
 Select Barracks01-Floor.
 - Add a new Standard material node to the active View, double-click it, and name the material BarrackFloors.
- Add a new Bitmap node, choose wood_batten.jpg as the texture, then wire it to the Diffuse Color of BarrackFloors.
- Click the BarrackFloors material node again to make it active.
- Click
 (Assign Material To Selection), and then turn on
  (Show Shaded Material In Viewport).
 - Add another Bitmap node, choose wood_batten_bump.jpg as the texture, then wire it to the Bump component of BarrackWalls.
- Double-click the BarrackFloors material node, and on the Maps rollout, change the Bump amount to 90.
-
 Apply a UVW Map modifier to Barracks01-Floor. Leave the projection set to Planar. Set Length = Width = 4.0m.
 You don’t need to adjust the orientation of the floorboards.
Texturing the barrack floors should now be a familiar process
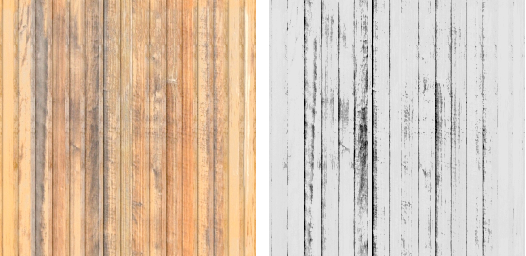
Left: Texture map for the barrack floors
Right: Bump map for the barrack floors
Now the barracks are completely textured.
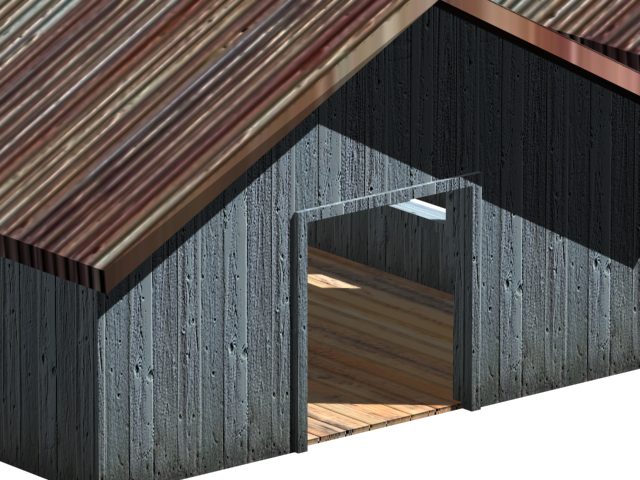
Close-up of one barrack with textures for roof, walls, and floor
Use the Barrack Materials for the Sentry Box
Now that you have textured the barracks, you can use the same materials for the sentry box. The trick is to use the same materials and the same UVW Map settings.
Change the view:
- Minimize the Slate Material Editor.
- On the status bar, near the bottom of the 3ds Max window, click to turn off
 (Isolate Selection Toggle).
 The viewport shows the entire scene once again.
- Click the Point Of View (POV) viewport label, which currently reads "[ Perspective ]", and choose Cameras
 Camera02.
 This gives you a view of the completed barracks, and the unfinished sentry box.
The new view lets you see the roofs, walls, and floors of the completed barracks, and also the roof, walls, and floor of the sentry box, which doesn’t yet have materials applied.
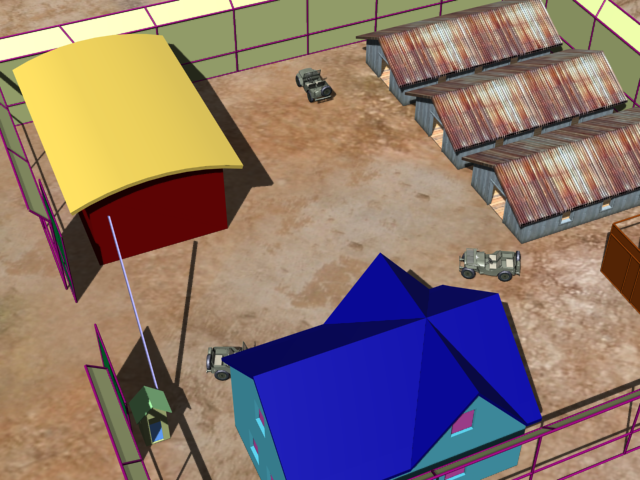
Camera02 view with finished barracks to the right, unfinished sentry box to the left.
- Click the Point Of View (POV) viewport label, and choose Perspective.
Changing to a perspective view doesn’t change what appears in the viewport, but in the perspective view, you can navigate without changing the camera settings.
Copy the barracks floor material:
-
 Click one of the Barracks0X-Floor objects to select it.
 -
 +drag the UVW Mapping entry in the floor object’s modifier stack, and drop this modifier instance over the floor of the sentry box. (Before it has a material, the floor appears blue.)
 The sentry box floor now has the correct mapping, but it still needs its material.
- Press M to open the Slate Material Editor, then drag from the output socket of the BarrackFloors material to the sentry box floor.
Now the floor has both the material and the correct mapping.
Copy the roof and wall materials:
- For the roof and walls of the sentry box, follow the same steps you did for the sentry box floor: First select a barracks roof or wall,
 +drag UVW Mapping from the modifier to the corresponding sentry box object, then wire the appropriate material to the roof or walls.
 If the material is no longer visible in the active View of the Material Editor, then on the Browser panel open the Scene Materials group, drag the material into the active View, and choose Instance.
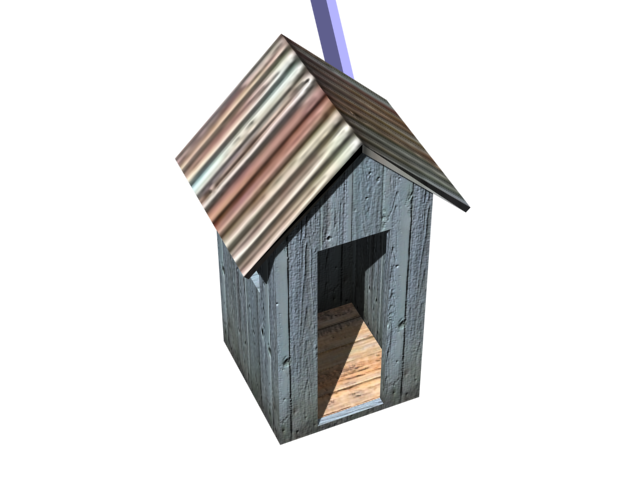
The sentry box with the same materials as the barracks
Note: The order in which you apply the material and the mapping doesn’t matter. The important thing is to assign the material and the UVW Mapping, so that the materials render correctly.
Create a new, 3D material for the sentry bar:
- On the main toolbar, open the Named Selection Sets drop-down list, and choose the sentrybox selection set.
3ds Max selects the sentry box.
- Right-click the viewport, and choose Isolate Selection from the quad menu.
- Use
 (Orbit) and
  (Field-Of-View) to adjust the view so the sentry bar is clearly visible.
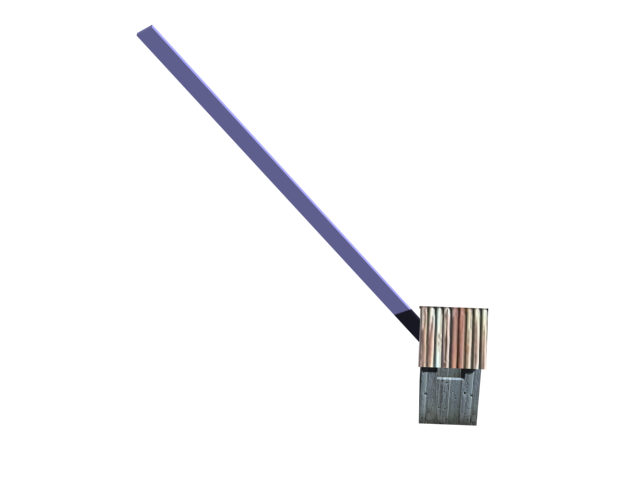
Isolated sentry box with a view of the bar
-
 Select the sentry-bar object.
 - In the Slate Material Editor, drag a new Standard material node to the active View, double-click the node, and name the new material SentryBar.
- From the Material/Map Browser
 Maps
Maps  Standard group, drag a Gradient Ramp node into the active View. Wire this node to the Diffuse Color component of the SentryBar material.
 - Click the new SentryBar material node to highlight it, then click
 (Assign Material To Selection) and
  (Show Shaded Material In Viewport).
 - Double-click the Gradient Map node to see its parameters.
Gradient Ramp is a 3D procedural material like the Noise material you used for the generator casings.
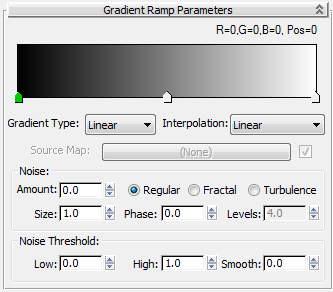
- In the Gradient Ramp Parameters rollout, change the Interpolation type to Solid.
The gradient display changes to two solid colors, one of them black.
- Double-click the arrow-shaped slider at the middle of the gradient display. This slider controls the color to its right (you could use the first slider on the left to adjust the black color.)

Gradient Ramp with solid colors
.Double-click the middle slider (shown in green) to change the color to the right of the slider.
3ds Max opens a Color Selector.
- On the Color Selector, change the second gradient color to orange: Red = 255, Green = 150, Blue = 0.
- Click OK to close the Color Selector.
- On the Coordinates rollout, change the U Tiling value to 10.0.
The material changes from two color areas to multiple stripes.
- Also in the Coordinates rollout, change the W Angle value to –2.5.
Now the stripes have an angle to them.
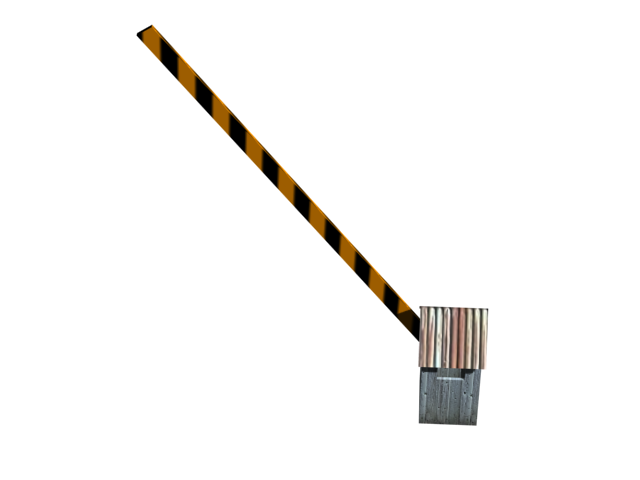
Isolated sentry box with the completed sentry bar
For the sentry bar, which blocks or permits vehicle access to the compound, you can use a simple material with a procedural map named Gradient Ramp.
View the entire scene again:
- On the status bar, near the bottom of the 3ds Max window, click to turn off
 (Isolate Selection Toggle).
 The viewport shows the entire scene once again.
- Click the viewport label and choose Cameras
 Camera01.
 - Click the viewport label again and choose Perspective.
Save your work:
- Save the scene as my_fieldhq_barracks.max.