In this lesson, you choose a brick material to map to the building arch, and specify the Unwrap UVW modifier as the mapping method. Then you create a spline object and use it as a guide to the mapping process.
Set up the lesson:
- On the Quick Access toolbar, click
 (Open File), navigate to
\scenes\materials_and_mapping\spline_mapping\
and open
splinemap_start.max.
Note: If a dialog asks whether you want to use the scene’s Gamma And LUT settings, accept the scene Gamma settings, and click OK. If a dialog asks whether to use the scene’s units, accept the scene units, and click OK.
(Open File), navigate to
\scenes\materials_and_mapping\spline_mapping\
and open
splinemap_start.max.
Note: If a dialog asks whether you want to use the scene’s Gamma And LUT settings, accept the scene Gamma settings, and click OK. If a dialog asks whether to use the scene’s units, accept the scene units, and click OK.
Choose the material and apply the mapping method:
-
 Maximize the Orthographic viewport and
  select the Arch-Door object.
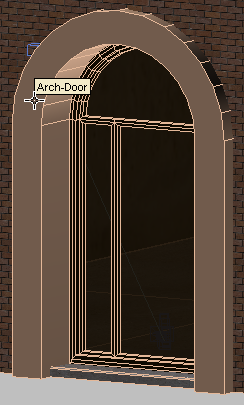
Arch door object with no material applied
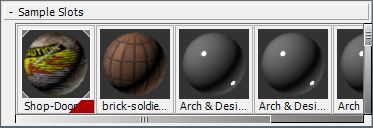
- Open the
 Slate Material Editor. Locate the Sample Slots group.
 A material called brick-soldier has already been prepared for the arch object.
- Drag the brick-soldier material from the Browser
 Sample Slots group into the active View. In the Instance (Copy) Material dialog, make sure Instance is chosen, and then click OK.
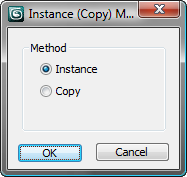
- In the active View, make sure the brick-soldier node is selected, then on the Slate Material Editor toolbar, click
 (Assign Material To Selection). Also click to turn on
  (Show Shaded Material In Viewport). (If you use a legacy viewport driver, this button's tooltip reads, "Show Standard Map In Viewport.")
 The arch turns a dark gray. It shows no further detail because no mapping coordinates have yet been specified for the Arch-Door object.
-
 Close the Slate Material Editor.
Assign mapping coordinates (a first approximation):
- Go to the
 Modify panel. From the Modifier List, choose Unwrap UVW.
 Unwrap UVW is often used to map images onto complex objects. Unwrap UVW is better equipped to handle mapping of complex geometry, because it breaks that geometry into sections and applies planar mapping to each section.
- Right-click the arch object in the viewport and from the quad menu, choose Hide Unselected to isolate the object.
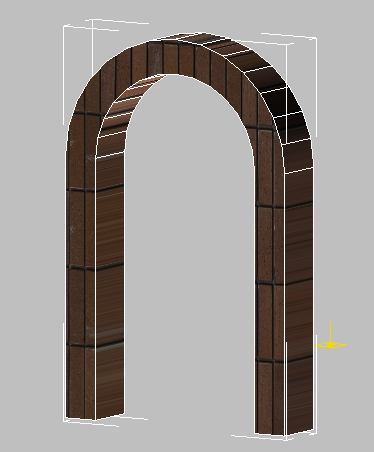
Arch object with brick material mapped to its surface
- On the modifier stack, click the plus-sign icon (+) next to the Unwrap UVW modifier to expand its hierarchy, then click to go to the Polygon sub-object level.
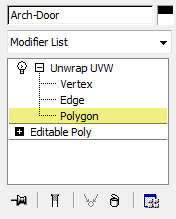
At this level, you can map the brick material onto each selected face of an object.
- In the viewport, select a face on the arch object.
3ds Max displays a yellow gizmo, representing a planar projection of brick material onto the selected face.
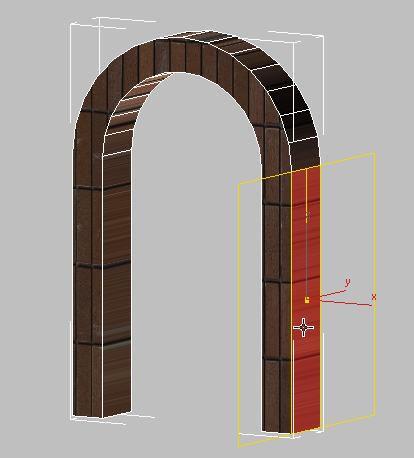
Planar projection of brick material onto an arch face
- Select another face on the arch object.
Notice how the yellow gizmo resets onto the newly selected face.
A number of Unwrap UVW controls can help you map specific types of objects. Some of these are similar to the UVW Map options. The Projection rollout
 (Cylinder Map) button, for example, displays controls used to map materials onto cylindrical objects, such as a human arm or a lamp post. Other options have more special purposes: For example, you can use the Peel rollout
  (Pelt Map) button to map a material onto fabric such as a pair of trousers, or a curtain.
 In this scene, you will use the Spline option, which is useful for mapping curved objects with a cylindrical or square cross-section such as a snake, or a ventilation duct.
Before you use this option, you will create the spline object itself.
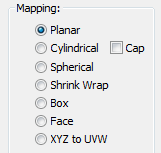
The common way to assign mapping coordinates is to use a UVW Map modifier, but if you look at the various options this modifier has for orienting a map (Planar, Cylindrical, Spherical, Shrink Wrap, Box, Face, and XYZ To UVW), you can see that none of them corresponds to the curved shape of the arch.
Create the spline shape to use as a map path:
- On the modifier stack, click Polygon to exit the Polygon sub-object level.
The spline you create needs to be centered in the arch object. You could use the Line tool or the Rectangle tool to draw the spline, but you would need to enter the precise arch-object coordinate values to do so. It is easier to derive the spline from the existing object geometry.
- On the stack, click the Editable Poly entry. Click Yes to dismiss the warning message that 3ds Max displays.
- On the Selection rollout, click
 (Edge) to go to the Edge sub-object level.
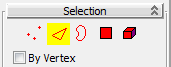
- Click and
 +click to select all the outer edges at the front of the arch object.
 Be sure to leave the bottom and inside edges unselected.
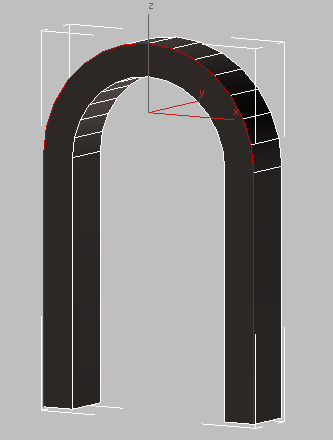
Arch object with all outer edges selected
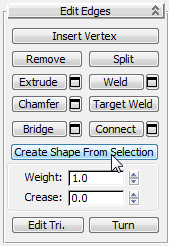
- On the Edit Edges rollout, click Create Shape From Selection.
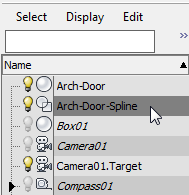
- On the Create Shape dialog Curve Name box, name the shape Arch-Door-Spline, make sure Shape Type is set to Smooth, then click OK.

- Click
 (Edge) again to exit the Edge sub-object level.
 - On the Scene Explorer panel, click to select the newly created Arch-Door-Spline .
 Tip: By default, the Scene Explorer panel appears to the left of the viewports, but if it has been hidden, you can press the H key to display a floating version of the Explorer.
 - Press F3 to switch to wireframe mode.
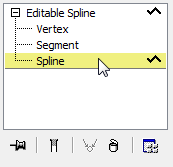
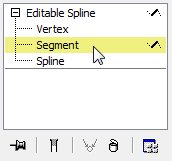
- From the Modifier List, expand the Editable Spline entry, then click Spline.
- On the Geometry rollout, scroll down so you can see the Outline button, and then click it.
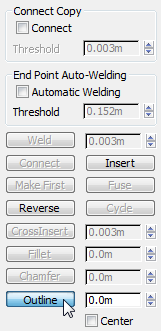
- In the viewport, click the original spline and drag inward so the outline spline is positioned roughly at the midpoint between the outer and inner edges of the front face of the arch.
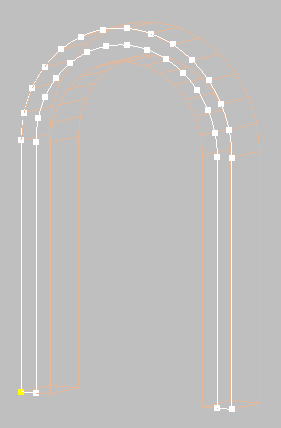
Outline spline centered on the front face of the arch object
The outline spline position does not have to be perfectly centered: You will align it more precisely in a moment.
- On the modifier stack, click Segment.
- Click and +click to select the line segments at the base of the arch (they connect the original spline to the outline spline), then press
 .
. 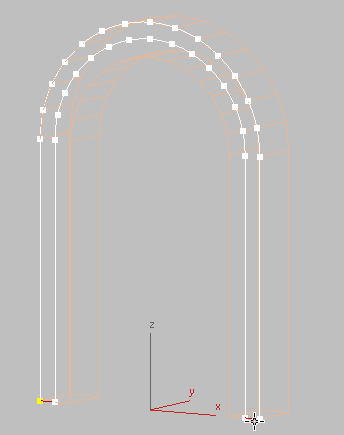
Spline segments at the base of each arch column
- On the modifier stack, click Spline again, select the outer, original spline, then press .
- On the modifier stack, click Spline again to exit the Spline sub-object level.
Align the spline with the arch:
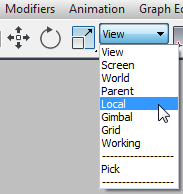
- On the main toolbar, choose the Local coordinate system.
- Make sure the spline is selected, then on the main toolbar click
 (Align), and then click the Arch-Door object.
 - In the Align Selection dialog Align Position (Local) group, turn off X Position and Y Position, turn on Z Position, and in both the Current Object and Target Object subgroups, choose Center. Click OK.
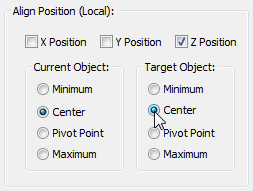
The spline is now properly placed in the center of the Arch-Door object, ready to be used as a guide to map the brick material.
Note: After alignment, the spline should be inside the Arch-Door object: That is, equidistant not only from the sides of the arch, but also from the front and back. If the spline remains on the surface of the arch, Spline Mapping will not work.
Apply the spline as a guide for the mapping:
- Press F3 to return to a shaded view.
- Select the Arch-Door object.
- On the modifier stack, in the Unwrap UVW modifier hierarchy, click Polygon to go to the Polygon sub-object level.
- On the Selection Parameters rollout, turn off
 (Ignore Backfacing).
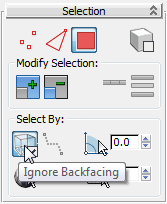
If you leave Ignore Backfacing turned on, only the polygons facing you in the viewport will be included in a selection. Polygons hidden on the other side of the model will remain unselected.
- On the main toolbar, make sure the Window/Crossing toggle is in the
 Crossing state.
 - Starting just above the base column to the left, click and drag diagonally upward across the arch object to region-select all the faces except for those on the underside of each column base.
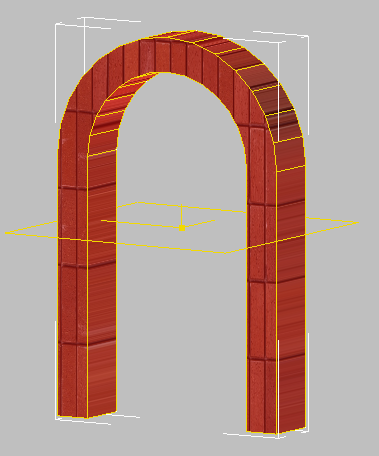
Arch faces selected
- On the Modify panel, scroll down to the Wrap rollout and click
 (Spline Mapping).
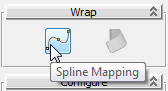
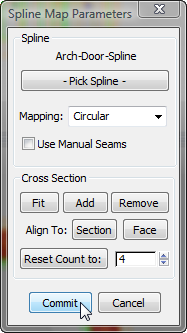
- On the Spline Map Parameters dialog, click Pick Spline.
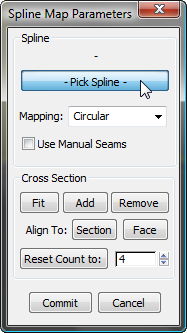
For now, leave the Spline Map Parameters dialog open.
- Press H and on the Pick Object dialog, choose Arch-Door-Spline from the list, then click Pick.
The arch object is enveloped by a cage gizmo, which shows the outline and cross sections of the mapping.
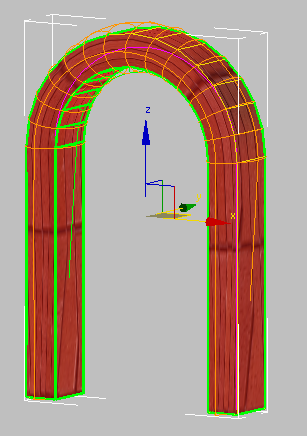
Arch object enveloped by the cage gizmo
Now you need to correct the base of the cage gizmo, which is too narrow for the arch geometry.
Adjust the mapping gizmo:
-
 Orbit the viewport until you can see the two unselected faces at the base of the arch.
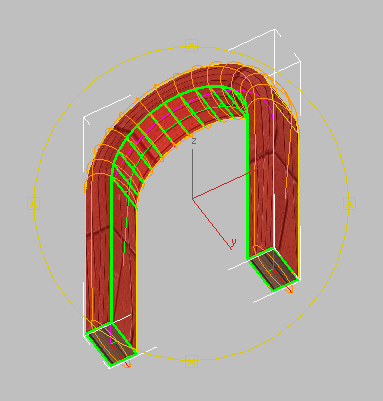
Bottom of arch, showing that the cage gizmo is too narrow
- On the main toolbar, activate
 (Select And Uniform Scale), For each base of the arch, click to select the base of the gizmo, then drag the Scale gizmo along its Y axis until the cage is at least as wide as each face at the base of the arch.
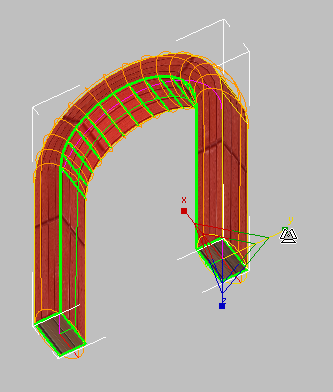
Cage gizmo after resizing each base
You do not need to be precise at this point: In the next lesson, you will specify the cage more precisely by using the Unwrap UVW controls.
- On the Spline Map Parameters dialog, click Commit to accept the changes made to the spline mapping so far.
Save your work:
- Save the scene as my_arch_spline_mapping.max.