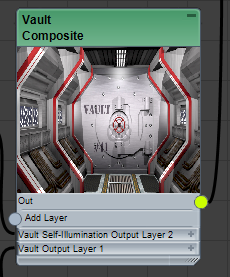
A Composite node collects the output elements of a state into a single composite.

Composite nodes appear in the Render Elements view (Compositor menu  Compositor View (RE)).
You can think of this node as a "pre-composition" prior to the main Compositor Output node. Generating a Composite for each state reduces the number of layers that appear when you export data to After Effects.
As wired by default, the controls section under the thumbnail contains layers for the state's Output Bitmap nodes. A state has only one layer unless it includes rendered elements.
For each layer, you can specify the name, bitmap and mask images, a blend mode, and the opacity. You can also rewire the state output nodes to change the layer order.
In addition, the Compositor Output node provides the following controls:
- To use the node's right-click menu, right-click the node and choose Zoom Selection Extents or Refresh.
- To add a layer to the composition, wire a Bitmap Output node to the Add Layer connection.
- To delete a layer, right-click the layer title and choose Delete Layer.
- To change a layer's blend mode, click the Normal field next to the Blend Mode parameter. Choose the new blend mode from the pop-up list. For descriptions of the blend modes, see Blend Modes for Compositing.
- To toggle a layer in the output, click the X button at the right end of the layer. X means it's on; blank means it's off.
- Bitmaps are normally fully opaque, although the Compositor Output node does take alpha transparency into account. To change the opacity, double-click the numeric field in the Opacity layer and enter a new value.
- To apply a mask to a layer, wire a bitmap node to the Mask layer. The mask image doesn't need to be from the rendered output; you can change the image that any bitmap node uses by clicking its File Name field and specifying a different image.