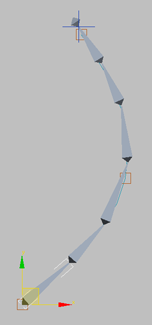
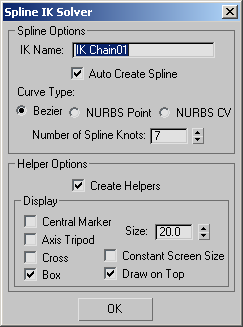
The Spline IK Solver dialog appears after bone creation if the Spline IK Solver has been selected as the IK solver and Assign To Children is turned on.

This dialog sets parameters for the spline that will be created to control the bone structure. The spline, in turn, is shaped by the positions of helper objects at each knot (control point).
Interface

Spline Options group
- IK Name
- Sets the name of the IK chain object. This object appears as a set of blue cross hairs at the end of the chain after you click OK.
- Auto Create Spline
- Automatically creates the spline used for the Spline IK solver based on the parameters on this dialog. When off, no spline is created and a spline must be manually created and assigned to the spline IK solver in order to use the solver. See Spline IK for a description of this procedure. Default=on.
- Curve Type
- Choose the type of curve to serve as the Spline IK control:
- Bezier Creates a Bezier spline, similar to a spline created with the Create
 Shapes
  Line tool. This is the default curve type.
 - NURBS Point Creates a NURBS Point Curve, where all knots (control nodes) lie on the curve.
- NURBS CV Creates a NURBS CV Curve, where knots (control nodes) do not necessarily lie on the curve.
- Bezier Creates a Bezier spline, similar to a spline created with the Create
- Number of Spline Knots
- Vertices on the spline, or control points and CVs on the NURBS curve. You alter the spline or curve by moving and animating the knots. The number of knots sets the degree of refinement on the curve as well as the number of points that can be selected and moved to change the shape of the curve.
The default value is the number of bones in the Spline IK chain. Because one purpose of a Spline IK solver is to reduce the number of objects that require animation, you might want to use a lower value, such as half the number of bones.
Helper Options group
- Create Helpers
- When on, 3ds Max places one or more Point helper objects at each knot in the spline or curve, making it easier to move and animate the knots.
You can enable more than one type of helper. When you move one helper, the others at the same location also move, as does the curve knot.
- Center Marker
- Places a small X-shaped Point helper at each knot.
- Axis Tripod
- Places a small tripod-axis-shaped Point helper at each knot.
- Cross
- Places a small cross-shaped Point helper at each knot.
- Box
- Places a small box-shaped Point helper at each knot.
- Size
- Sets the size for helpers.
- Constant Screen Size
- Keeps the sizes of helpers constant regardless of the zoom extent of the viewports.
- Draw On Top
- Displays the helpers on top of all other objects in the scene for improved visibility in busy scenes. Tip: To change the display of helpers after creation, select each helper and change selections on the Modify panel.