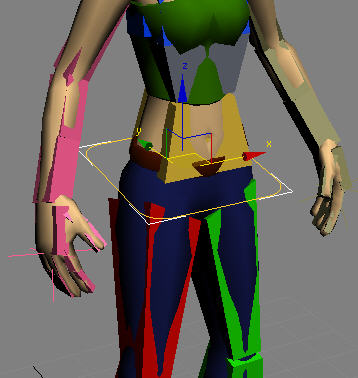
Manipulation gizmos provide a cleaner interface for working with your character. Often the CATBones are hidden under the skin mesh, so selecting and editing the bones can be difficult. The gizmo, which can be any of five different spline shapes (or a custom object), surrounds the bone so it’s easier to grab for applying transforms interactively.
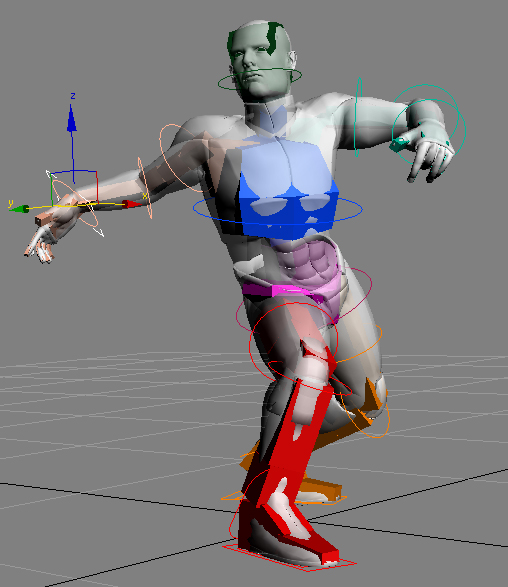
Once you apply a gizmo to a CATRig part, selecting the gizmo provides access to the same interface elements as selecting the body part itself. Similarly, keyframes from animating the CATRig show up on the track bar when you select the gizmo. Even MAXScript calls work on the gizmo. When you right-click a gizmo, you get the same right-click menus as with the CATBone.
Applying a Gizmo
When the CATRig is in Setup mode and you right-click on any CATBone, the Tools2 quadrant includes the Add Gizmo command.
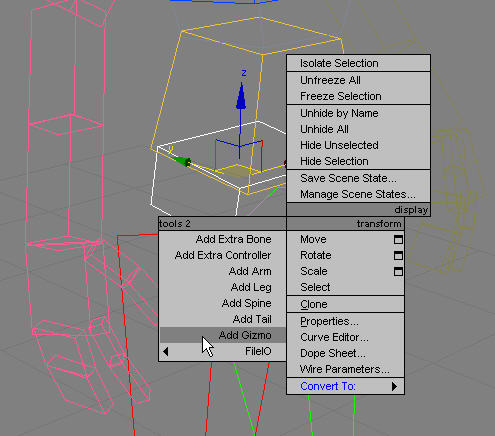
Choosing Add Gizmo opens a dialog with a list of preset gizmo shapes.
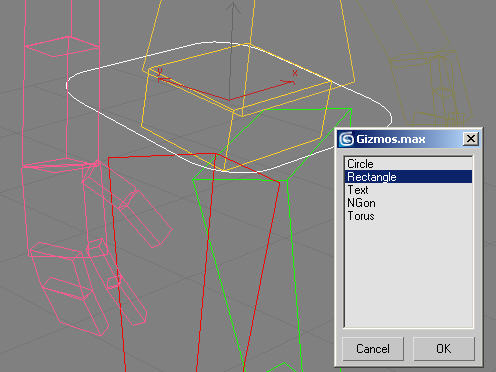
You can edit the gizmo settings to fit the size and shape of your character skin mesh. To do so, select the gizmo and go to the Modify panel. These settings are the same as for the equivalent spline objects in 3ds Max; see the main help for details.
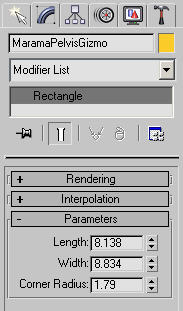
As you modify the spline settings, the changes appear immediately in the viewports.
Tips
- Deleting gizmos To delete a gizmo, select it and press
 . This doesn’t affect the CATBones was manipulating.
 - Creating custom gizmo hierarchies It is not necessary to link gizmo objects to every part of the CATRig, although it is possible and doesn’t cause any problems.
In some cases it can actually be useful to link gizmos together. You can create hierarchies of gizmos that help you to navigate the rig, rather than use the actual hierarchies of the CATRig. For example, you could link the ribcage gizmo directly to the pelvis gizmo and then navigate the rig rapidly with the
 and
and  keys.
keys. - Defying the laws of circular dependency You can link gizmos in ways that would normally cause a circular dependency in 3ds Max. You can, for example, link the gizmo for a leg platform (IK target) directly to the ankle gizmo without causing a circular dependancy.
- Adding to the list of gizmos The list of gizmos that is displayed in the Gizmos dialog comes from a file called Gizmos.max, found in the system path under \plugcfg\CAT\Gizmos. (The full path, by default, is C:\Documents and Settings\[user name]\Local Settings\Application Data\Autodesk\3dsmax\[program version]\enu\plugcfg\CAT\Gizmos.)
If you open this file, you can see the shape objects that comprise the list. To add to the list of predefined gizmo shapes, add your own gizmos to this file and resave it. You can use any type of object as a gizmo.
- Removing unwanted right-click menus CAT uses the right-click menu system in 3ds Max to augment its workflow. If you assign a gizmo to CAT that has an Edit Spline/Poly/Mesh modifier at the top of the stack or is an editable spline or other object with object-specific quad menus, you will find additional, unnecessary options whenever you right-click your gizmo. The simplest solution is to assign a Push modifier or other modifer with no right-click menu options to the top of the stack. Thereafter, when you right-click the gizmo, you get only the CAT menus.