The viewports display white brackets around objects that have transform keys at the current time. These key brackets only appear in viewports using the wireframe shading method.
Use the Track View to view all key types. You can also see all keys for the current selection in the track bar.
For example, suppose you animate a sphere by moving it at frame 20, and scale and rotate it at frame 50. When you drag the time slider, white brackets appear around the sphere at frames 50, 20, and 0, and keys appear at the same frames in the track bar.
If you then apply a modifier such as Bend, and animate its Angle setting at frame 40, you won't see a white bracket around the sphere at frame 40, but track bar displays a key for the Bend animation.
Controlling Key Bracket Display

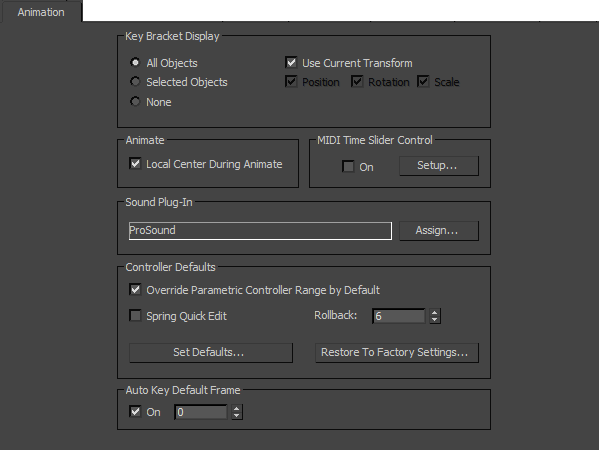
Animation panel of the Preference Settings dialog
You can control the display of key brackets using options in the Preference Settings dialog  Animation panel.
Creating Transform Keys with the Time Slider
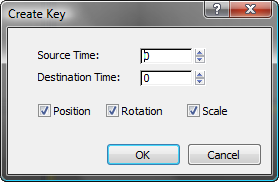
You can use the time slider to create transform keys by copying transform values from one time to another. To specify the type of key to create and the source and destination time for the key values, right-click the time slider to display the Create Key dialog.

You set parameters in the Create Key dialog:
- Source Time
-
Specifies the time from which transform values will be copied.
- Destination Time
-
Specifies the time where the key will be created.
- Position, Rotation, Scale
-
Determine which transform key values will be copied to the destination time.
When you click OK, new keys for the specified transforms are created at the destination time, using values from the source time. Keys do not have to exist at the source frame, because the interpolated values at the frame are used.
You might find it easier to create and manipulate keys with the track bar.
When Auto Key mode is on, you can right-click and drag the time slider at the same time. When you do this, the Source time uses the frame number that you were on when you pressed the mouse button, and the Destination time accepts the frame number that you move the time slider to.
When Set Key mode is on, you can right-click and drag the time slider to move to another frame in time, without losing your character pose. If you find you have posed your character on the wrong frame, simply right-click and drag the time slider, and the pose will be copied to the new frame. Click Set keys to set keys for the pose on the new frame.
Creating Position Lock Keys and Rotation Lock Keys
Creating a lock key creates a key with Linear interpolation. If you create the lock key while an existing key is selected, it changes that key's interpolation from Smooth to Linear. (Different types of interpolation are described in Bezier Controllers.)
You can create a lock key for position or for rotation.
Lock keys are useful when you want an object to be stationary, but smooth interpolation is causing it to "wobble" on its stationary spot.
To create a lock key:
- From the Customize menu, choose Customize User Interface.
- On the Customize User Interface dialog, click the Quads tab, and then, from the drop-down list at the upper right of the dialog, choose Animation.
- Click the top-left quadrant of the four gray squares that comprise the quad menus.
The quad turns yellow.
- In the Action list to the left, find Create Position Lock Key. Drag it to the window on the right below any menu item. Choose Save and click OK to apply this and close the dialog.
- (Optional.) Select a key.
 +right-click the object you're animating. Note: The Auto Key button need not be on.
- From the quad menu that appears, choose Create Position Lock Key .
You can also create keyboard shortcuts for these two commands. Create Position Lock Key and Create Rotation Lock Key are main user interface shortcuts. See Keyboard Shortcuts.