The Panels sub-object level of the Garment Maker modifier lets you position and bend the panels of your pattern to fit your object or figure.
You can also use these controls to adjust the texture mapping of your garment.
Interface

- Density
-
Controls the mesh density of a selected panel. This value is applied as a multiplier of the Main Parameters rollout
 Density setting. You can increase the density of a particular panel by raising this value.
 If Main Parameters rollout
 Auto Mesh is off when you change this value, go back to the Main Parameters rollout (Cloth level in modifier stack) and click Mesh It! to update the mesh. For this reason, it is recommended that you leave Auto Mesh on. The only time you might want to turn off Auto Mesh is while creating the seams at the Curves sub-object level. Re-meshing can take some time, so you might want to define a number of seams before re-meshing.
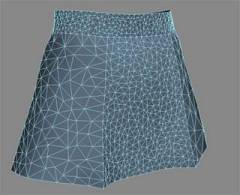
Different Density settings applied to separate panels
- Mat ID
-
Set the material ID for the selected panel. Using this option enables you to assign different materials to select portions of the clothing.
Position group
- Reset
-
Resets the position of the selected panels to their original locations (that is, the locations immediately after Garment Maker was applied).
- Reset All
-
Resets the position of all panels to their original locations.
Deformation group
Most controls in this group are available only when one or more panels are selected.
- Reset
-
Removes the deformation of the selected panels (restoring the flat state).
- Reset All
-
Removes the deformation from all panels.
- Use Preserved
-
Turn this on to override the None or Curved deformation options. When on, the panel gets its shape from the preserved mesh instead of the deformation options.
- None
-
Makes this panel flat.
- Curved
-
Use the value in the Curvature field to bend the panel.
- Curvature
-
Sets the amount of curve or bend of a panel. The higher this value is, the more the panel will curve.
- X-axis
-
Sets the axis for the curvature to the panel's local X axis.
- Y-axis
-
Sets the axis for the curvature to the panel's local Y axis.
Panel Position group
These buttons move the selected panel to a specified position. These positions are determined by 3ds Max based on the positions you set with the Mark Points On Figure controls at the Garment Maker object level. The positions are:
- Front Center
- Front Right
- Front Left
- Back Center
- Back Right
- Back Left
- Right Side
- Left Side
- Right Arm
- Left Arm
Level group
Sets where the top of the panel should go. Garment Maker derives these locations from the locations you specify with the Mark Points On Figure controls. The choices are:
- Top at neck
- Top at shoulder
- Top at underarm
- Top at waist
If you change the setting here, it affects the subsequent Panel Position results.
Adjusting Texture Coordinates
When Garment Maker is in Flat Panels mode (that is, the Main Parameters rollout  Flat Panels optionis chosen), the texture coordinates are defined by the positions of the panels. Imagine the panels are being cut out of a large piece of fabric. The location and orientation of a panel in that large piece of fabric determine how the texture is aligned on it. By moving and rotating a panel, you can change its texture coordinates. Remember, you must be in Flat Panels mode to do this.