Create a model in Autodesk Revit Structure or Autodesk Revit Architecture.
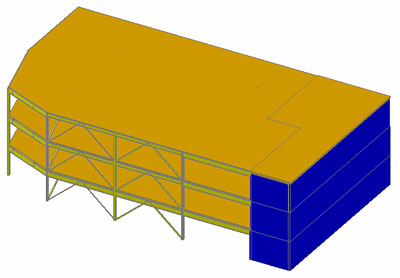
For example, create a structure with two levels. A part of the structure is created from steel beams, columns and bracings and the other part are created from concrete beams and columns. The walls and slabs over the levels are made from concrete. Some joints are created between bracings and beams.
Exporting this model in the Advance Steel internal format with .gtcx extension Revit requires the Advance Steel and Concrete plug-in installed.
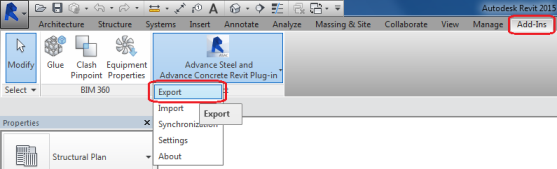
To export the model from Revit
- Access the Export command:
- Select the appropriate export option:
- Advance export - exports the model as a GTCX format, used for import in Advance Steel.
- Other formats - option to select from SNDF 2.0, SDNF 3.0, CIS2, IFC and PSS formats.
- Country Library - filters the automatic section mapping to a specific country library.
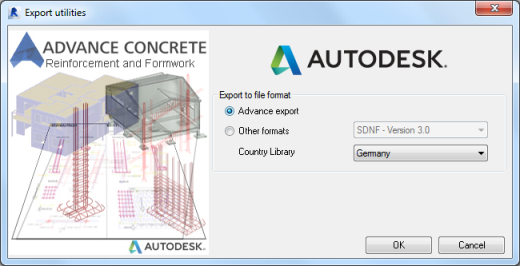
- Click OK.
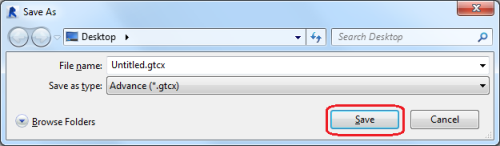
- In the Save As dialog box select the location where you want to save the exported file.
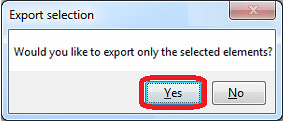
If none of the elements are selected then the entire model is exported. If some elements are selected, a confirmation dialog box appears. Clicking yes, exports only the selected elements. Otherwise, click No to export the entire model.
- Click Yes if you want to generate a report.
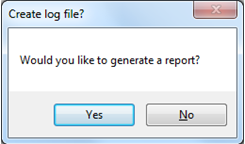
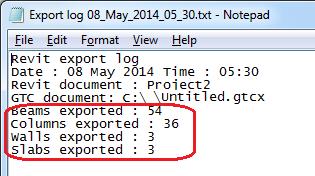
The report contains information about the number of exported elements and lists the elements that cannot be exported.
To import a model in Advance Steel
- Click Export&Import
 Revit
Revit  (Import).
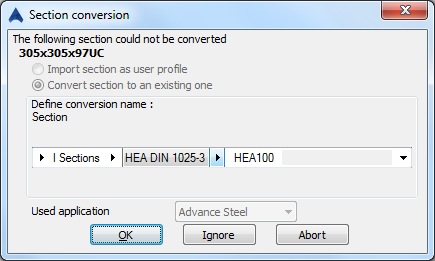
 - If one of the steel/concrete column or beam sections created in Revit has no corresponding section in Advance Steel, a dialog box appears where a corresponding section can be selected.
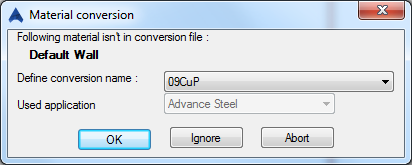
- Also when the material does not exist in Advance Steel it may be necessary to select a suitable material for the conversion.
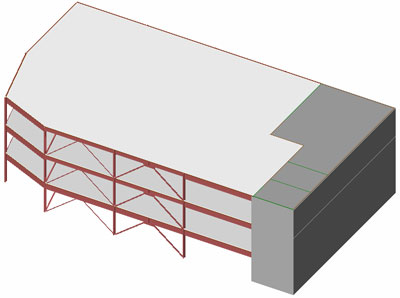
The imported model: