The drawing process suite allows running several processes in one shot to automatically get workshop drawings in a quick way.
The drawing process suite can be customized using the Drawing Process Manager.
- Open the Drawing process manager: On the ribbon, click
 (Drawing process suite).
 - Output
 Document Manager
(Drawing process suite)
Document Manager
(Drawing process suite)
- Output
- Select the User branch for customization.
The icons on the top-left of the dialog box, allow renaming the existing (process) suite, copying it or creating a new one.
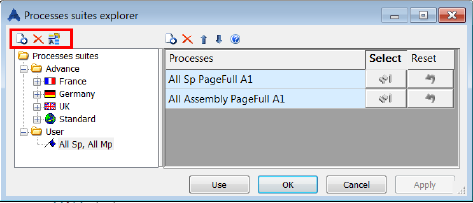
Once a process suite is selected, there are several options available to modify the list of the processes (insert, delete and changing the order by moving up and down).
 Note: The processes that you select must be based on a "Selection" (e.g. Selected SP Plate - AutoPage).
For each process, you need to select the objects from your model for this process.
To select the objects
- Click the blue button (called "Select objects for process") in the dialog box.
- Select the elements in the 3D model and press Enter.
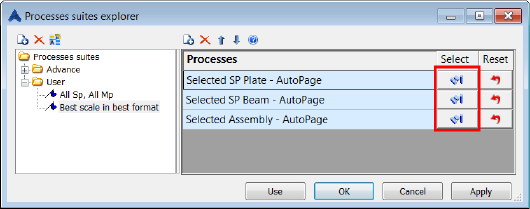
Notice that once your selection is done, the blue icon has a bit of yellow.
Note: If you made a mistake, you can reset the selection by clicking Reset selection. - Click Use to start the drawing creation.
Your process will run in the defined order, and the workshop drawings will be automatically created.