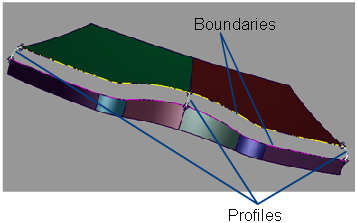
Create one or many transitional surface(s) between multiple continuous surface boundaries, by specifying any number of cross-sections (profile curves) between the primary surfaces.
The primary surfaces’ edges may be trimmed, untrimmed, curves on surface, or isoparms.
You can place any number of profile curves (cross-sections) at any point between the primary surfaces’ boundaries. Profiles can be any type of curves, including blend curves and surface boundaries.
The Surfaces > Multi-Surface Blend > Profile Blend  tool also lets you select free curves as input.
If a rail is made up entirely of free curves, that side reverts to G0 Position continuity. As well, Interior Edge Align is not possible on that side. If a rail is made up of both free curves and surface curves, then up to G1 Tangent continuity is allowed on that side. Interior Edge align can be attempted only for the surface curve sections.
- Choose Surfaces > Multi-Surface Blend > Profile Blend

 to open the option window.
 - Select all the surface boundary curves.
The first set of boundaries is highlighted in purple, and the second set of boundaries is highlighted in yellow.
Note:If Chain Select is turned on in the option window, selecting the boundary of one surface will also select all other boundaries that are tangent continuous with it.
- Click the Go button.
- Select all the profile curves that will define the transitional surface.
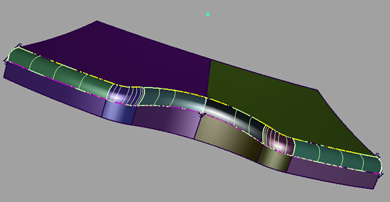
The selected profile curves are highlighted in white.

After you select the first profile curve, an Update button appears.
- Click the Update button when you’re finished selecting the profile curves.

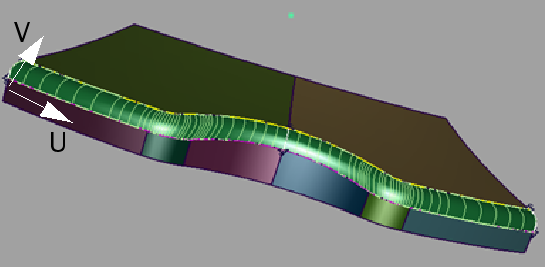
Blend surfaces are built between the primary surfaces.
- Set Surface Type to Single surface in the option window, and click Update to compute a single blend surface if desired.

- Modify other parameters in the option window if necessary, then click Update to rebuild the surface (or turn on Auto Update in the option window for the recalculation to happen automatically).
- Add or delete input curves by clicking on them, to further refine the transitional surface. Note:
Since the input curves have construction history, modifying them also updates the transitional surfaces.
- Turn on Continuity Check in the option box to evaluate the continuity of the blend surface with the primary input surfaces. See the section Troubleshooting trimmed surfaces for more information.