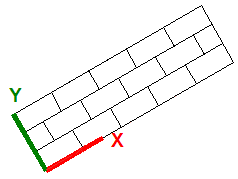
By default, the alignment and orientation of a hatch pattern is determined by the origin point and orientation of the UCS (user coordinate system), but you can change these settings as needed.
- Click

 . Find
 - On the Properties panel, click Pattern from the Hatch Type drop-down list.
- On the Pattern panel, click a hatch pattern.
- On the Origin panel, click Set Origin, and specify a point in the drawing. Tip: For example, if you create a brick pattern, you can start with a complete brick in the lower-left corner of the hatched area by specifying a new origin point.

- On the Properties panel, specify a hatch angle. Tip: In some cases, it might be easier to move or rotate the UCS (user coordinate system) to align with existing objects before you create the hatch object.

- Specify a point inside each area that you want to hatch.
- Press Enter to apply the hatch and exit the command.