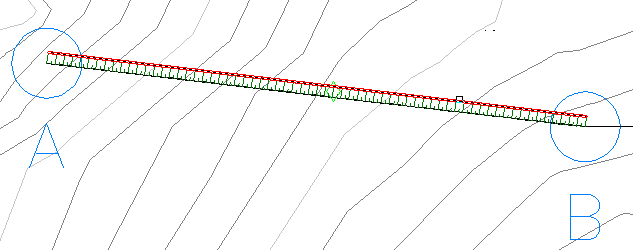
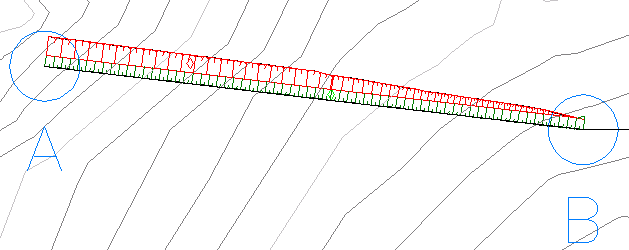
In this exercise, you will create a set of gradings, called a grading group, that form a runoff on the side of an embankment.
This exercise continues from Exercise 2: Assigning Feature Line Elevations.
Create a grading group and specify grading creation settings
- Click tab
 panel
panel  drop-down
 .
. - In the Grading Creation Tools toolbar, click
 Set The Grading Group.
 - In the Create Grading Group dialog box, specify the following parameters:
- Name: Ditch Drainage
- Automatic Surface Creation: Selected
- Volume Base Surface: Selected
- Click OK.
- In the Create Surface dialog box, click OK.
- In the Grading Creation Tools toolbar, click
 Select a Criteria Set.
 - Select Ditch Criteria Set from the list. Click OK.
- In the Select A Grading Criteria list, ensure that Distance @ -6% is selected.
- Click
 to expand the Grading Creation Tools toolbar.
 - In the Style list, select Ditch .
This exercise uses Grading-2.dwg with the modifications you made in the previous exercise, or you can open Grading-3.dwg from the tutorials drawings folder.
Create gradings
- Click
 Create Grading. Click feature line AB.
 - In response to the command-line prompt, click above the feature line to indicate where to apply the grading.
- Press Enter (Yes) to apply the grading to the entire length of the feature line.
- Press Enter to accept the default distance (10 feet).
The grading is created. Ditch Drainage is added to the grading groups collection in Site 1 on the ToolspaceProspector tab. This grading creates one side of a ditch, extending down from the baseline at a 6% grade for a distance of 10 feet.
- Press Esc to end the command.
In the next few steps, you will create another grading from the target line of the first grading to the existing surface.
- Set your display so that feature line AB fills most of the drawing window.
- Click the Select a Grading Criteria list and click Surface @ 4-1 Slope.
- Click
 Create Grading and click the red target line from the first grading that you created.
- Enter Yes to apply the grading to the entire length of the line.
- Press Enter to accept the cut slope (4:1).
- Press Enter to accept the fill slope (4:1).
- Press Esc to end the command.

The grading is created. This grading creates a 4:1 slope up from the bottom of the ditch to the surface. Your results may differ from the illustration.
Note:The Event Viewer might notify you that duplicate points have been ignored. A surface was created from the two gradings, which share a common feature, and therefore share point data. The daylight line of the first grading is the baseline of the second grading. When the surface is created, the data from the points was extracted for each grading. Because the point data is duplicate, the data of one of the two instances of each point is ignored.
To continue to the next tutorial, go to Editing Gradings.