Users can import a DXF (Data Exchange Format) file, created in a CAD drawing package, select the material, gauge and quantity of the item to place into a new or existing job. Users can also import the Item directly into Item Folders for later use.
- To Import the file into an item folder, right click in the Item Folders window and select New - Import.
- To Import the file directly into a job, click on File > Import > Items.
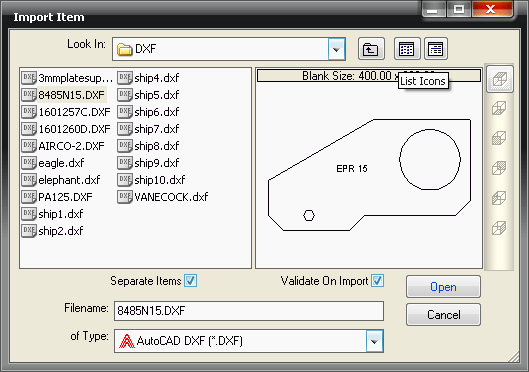
Validate on Import
Ticking this box will check the part on import for drawing errors.
Separate Items
- If a file that contains multiple shapes is imported, the option to Separate Items is given. Clicking No will import the drawing 'as is'. Clicking Yes will create separate drawings from the imported file.
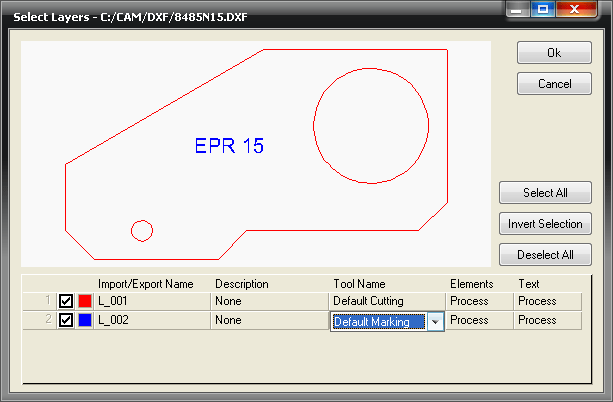
Select Layers
- If the DXF file has multiple Layers it is possible to assign different Tools to the layers. These layers can then be processed, displayed or ignored.
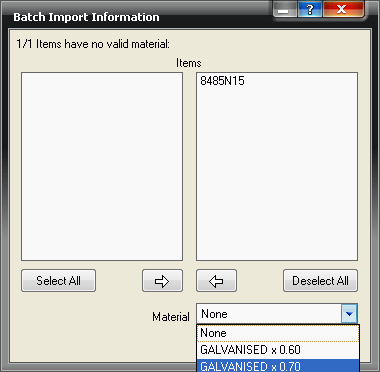
- The user is then prompted to select a material to assign to the Item. Use the pull down selection window to assign the material needed. Click on Apply.
- The imported part will open in Profiler, which will allow you to check and amend the different cuts and / or markings to be made on the item. See the Profiler section in this help for more details on using the Profiler.
- Once accepted and validated the Item is placed in your Job Contents folder ready for nesting and cutting. Item quantities can be changed by right clicking the part in the Job Contents Folder and selecting the Properties option.