When using standard fittings within CAM-Duct it is possible to adjust all of the dimensions and options within the fitting. However, if a dimension, option, connector or a seam within the fitting is always the same it is possible to 'lock' the field to save time when inputting the part.
- Right click on a relevant fitting and from the drop-down menu select Edit.
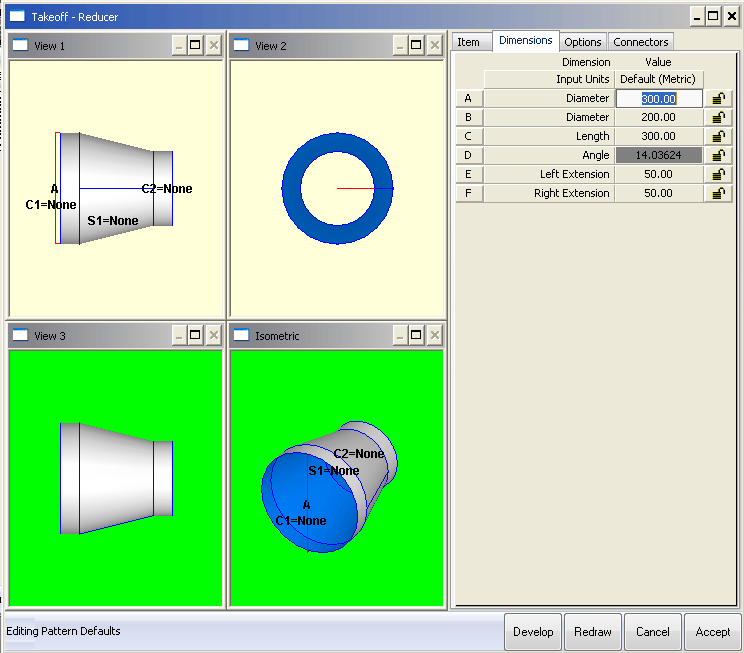
- The Editing Pattern Defaults screen will now be visible. This looks similar to the normal pattern takeoff screen, but there are two differences. First of all, beside each dimension and option there is now a padlock. Secondly, in the bottom left hand corner of the screen the mode is set to Editing Pattern Defaults.
- Enter the dimensions in the image below, then select a dimension that will always be the same. For example, if the length is always 300, clicking on the Padlock beside the 300 dimension in the length field.
- It is possible to lock as many, or as few dimensions etc as is necessary.
- In the dimensions tab click on the padlock in the A, B and C, change the value of F and click against its padlock.
- Click Redraw to view the new pattern.
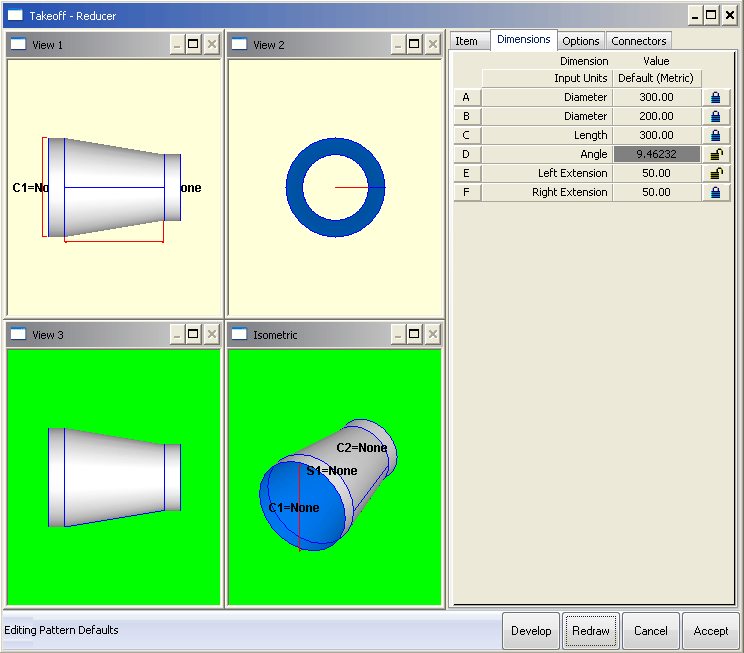
- Click Accept and the changes to the pattern defaults will be saved.
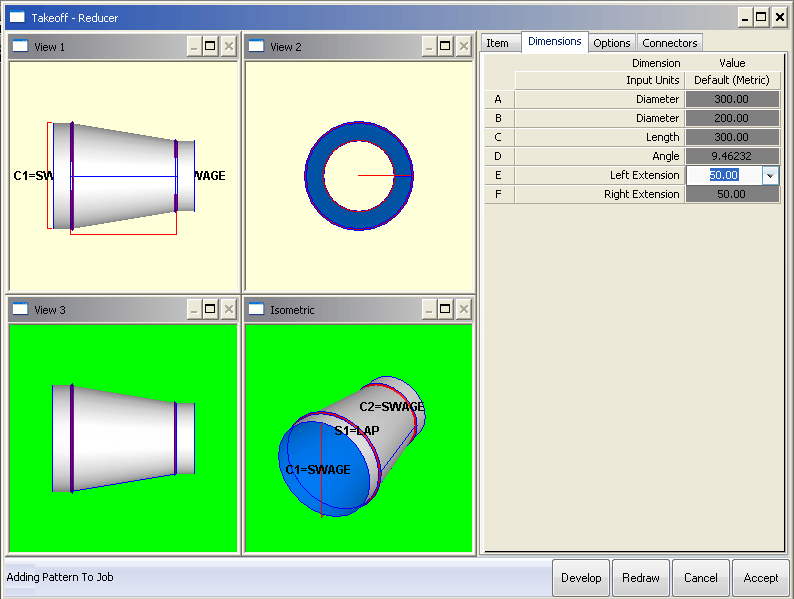
When the pattern is next added to a job, the only dimensions that will be visible, and therefore change will be the ones that were left 'unlocked', in this case the Angle and Left Extension fields.

It possible to view the locked dimensions without being able top change them.
- Click File >Setup > Pattern Database > Pattern Switches or select the Pattern Database icon from the Utility Bar, in the Miscellaneous field tick the Display Locked Dims option.
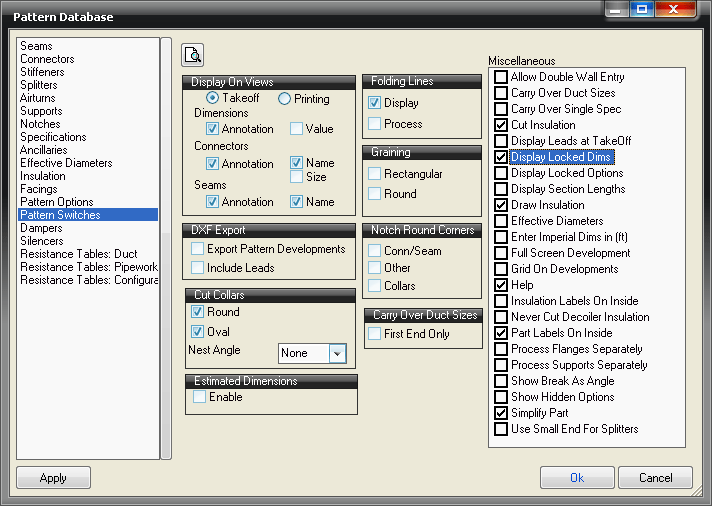
- Add the same item again and the pattern takeoff screen will look as follows.
Note: All of the original dimension options are visible, but only the dimensions left un-ticked can be altered.