The stitch command is used to leave small gaps of metal around the cut so that the part remains attached to the sheet. There are 3 options available in stitching. These can be accessed by clicking on Profiler > Stitch and selecting one of the following.
Stitch Island
-
You will be prompted in the command line to Select Islands that you wish to have stitching applied to.
-
Click on the islands to highlight them (default colour is yellow).
-
Right click the mouse button to complete the selection process.
-
The command line will prompt for a Stitch Gap.
-
Type in the figure you wish the size of the stitch to be and press Enter.
-
The command prompt will ask for the Number of Stitches required in the part.
-
Type in the required figure and press Enter.
-
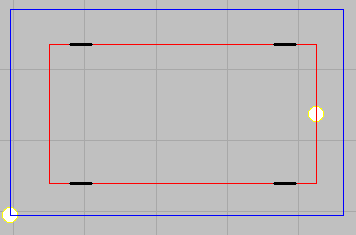
The command line prompt will ask for Open Ends, this requires a y/ n response to determine where the cut will start.
-
With y selected the cut will start at the stitch as in Fig 1.
-
With n selected the cut will start with a "lead in" as in Fig 2.
Fig 1
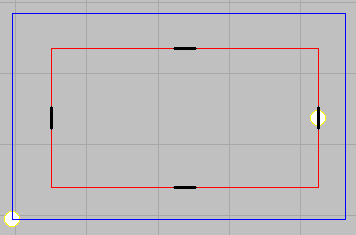
Fig 2
Manual Stitch This requests a stitch length and then allows you to give co-ordinates for the stitches to be placed at the command line, or click on the island(s) at the position where you want the stitches to be placed.
Remove Stitch Removes the stitches from the selected island, again by either entering co-ordinates for the stitches or clicking on the stitches that are shown on an island or islands.