In order to create a Barcode on a label you must have talc3932.dll installed, which will be provided by your supplier when Bar coding is purchased. talc3932 is used for 32bit Operating Systems.
Open CAMduct, ESTduct and go to File - Settings - Main Database - BarCode.
Select either Code39Normal or Code39Full (take note that choosing Code39Full will make your Barcode bigger, care has to be taken to ensure that your Scanner and Printer are capable of producing and reading the Barcodes you create, choosing Code39Normal may not recognise all characters that you have included in a part name. (The scanner has to be able to be full ASCII compatible.)
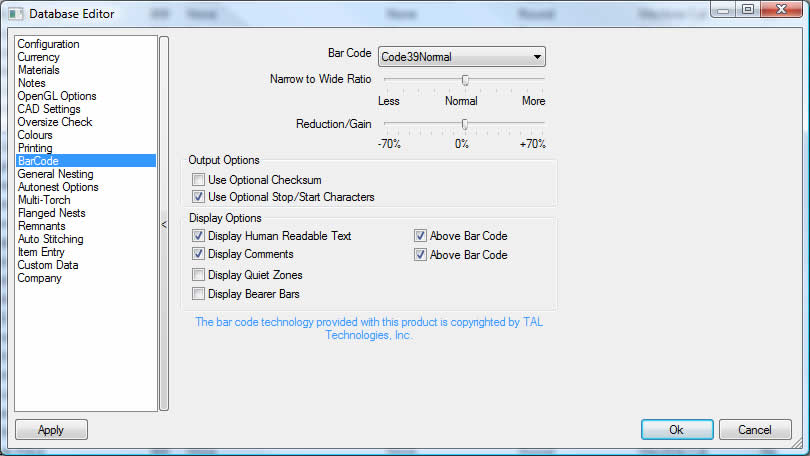
Click OK to save any changes.
For testing purposes, it is recommended you add Item Status, Item Handle and any other fields relating to Trackit to your Job Contents or Quick Takeoff view. Selecting Right Click > View > Customize allows you to filter for the desired object and add this to the list that is displayed on the Right hand side.

Finally, the setup of the Reports and Labels are now required to print the barcodes. Currently there are only two types of reports that can print the Barcode, these are Worksheets and Labels.
To set up the labels go to File > Print Layout > Labels > Item Labels. Add the desired print object as shown below: Tip: Filter for "scan" in the filter field to isolate the results.

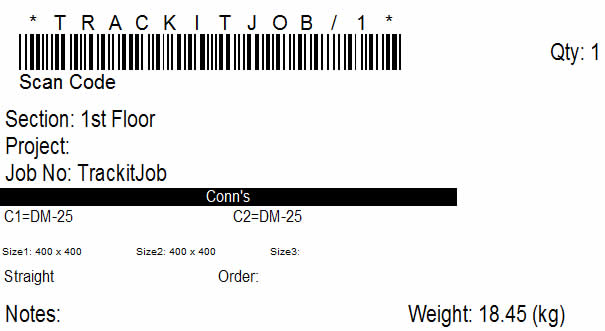
You want to place the "Item Scan Code" object in a suitable place bearing in mind the dimensions of the finished Barcode when printed. There are multiple Item Scan Codes which require though for which one you are to use on your labels. (GUID, Handle or Item Number).
When placed onto the layout of the label. Right Click on the object and select Properties.
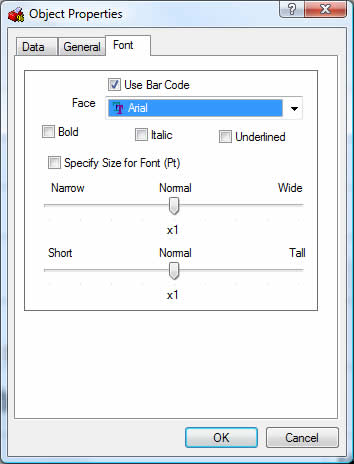
Enable Use Bar Code to transform this print object into a barcode then press OK. The Label can be previewed in order to ensure the display is OK and the barcode fits on the label.