Normally a machining operation is started by creating a Setup. A setup defines a number of general properties for a set of machining operations - including the Work Coordinate System (WCS), the stock geometry, fixtures, and the machining surfaces. If you do not create a setup manually before adding your first operation, a setup with default parameters is created for you automatically. This is what occurred in Tutorial 1, where you went directly into a facing operation without first creating a setup.
In this second tutorial, you will create a setup to define the origin of the WCS and to select your model.
- Click
CAM tab
 Job panel
Setup
Job panel
Setup
 to display the Setup dialog box.
 - You can also right-click on Tutorial2.ipt Operation(s) at the top of the CAM Browser and select New Setup... from the pop-up context menu.
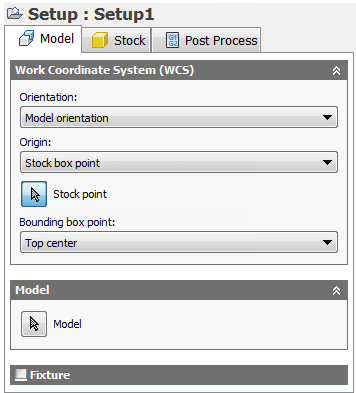
The Setup operations dialog box appears with the Model tab active
Set the Work Coordinate System (WCS) Origin
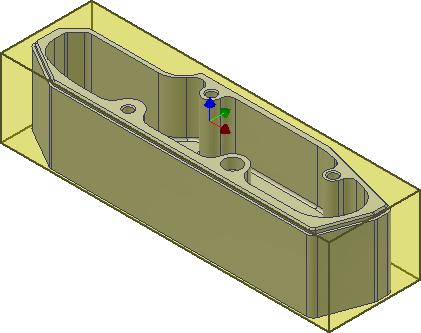
In the graphics window, the stock material is created automatically around the bounding box of the part. The model orientation is shown by the WCS at the top center of the part. The XYZ orientation is correct, but we need to change the WCS origin.
- In the Work Coordinate System (WCS) group, select Stock box point from the Origin: drop-down menu.
- Click the Stock point button and select the point (represented by a black dot) at the lower left corner on the top face of the stock. Alternatively, you can also select Top corner 1 from the Bounding box point: drop-down menu.

The Top corner 1 bounding box point
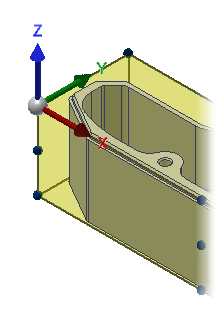
The WCS is now re-oriented at the lower left of the top face of the stock
Define the Model Surfaces
As with the stock, defining the machining surfaces is not strictly necessary. But we do it here as an exercise for more complicated setups.
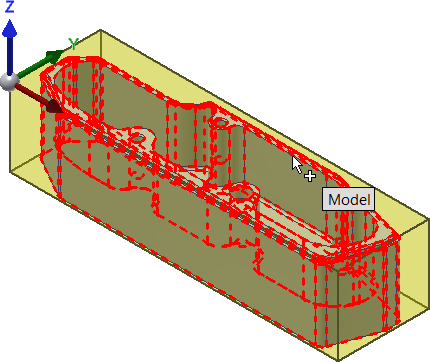
- In the Model group, click the Model button.
- Click the model within the stock, to select the part as the machining surfaces.
- Finally, click
 at the bottom of the Setup dialog box, or right-click in the graphics window and select OK from the marking menu, to exit the setup procedure.
Selecting the model within the bounding box
Continue to To Contour the Part...