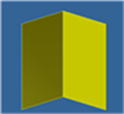
Use Intersect Faces to trim or break intersecting faces. Perform in conjunction with Extend Faces to ensure that faces intersect.
- Open a file that contains surfaces.
- If necessary, right-click the surfaces in the browser and select Copy to Construction in the context menu to copy the required surfaces to the construction environment.
- In the browser, double-click the Construction folder to open the construction environment.
- On the ribbon, click Construction tab
 Surface panel
  Intersect Faces .
 - Choose one of the following methods to select surfaces:
- Trim

- Click Trim, and then select two intersecting surfaces, making sure to select the area you want to keep. Surfaces are trimmed to the intersection.
- Break

- Click Break, and then select two intersecting surfaces. The surfaces are split at the intersection. All are placed in the same browser group.
Note: If more than two surfaces intersect, only two are trimmed at one time. - Trim
- Continue to click Trim or Break and select surfaces in the graphics window.
- When finished, click Done.
Note: You can use multiple surfaces to trim. For example, you can stitch two connected surfaces together into a quilt. Select Intersect Faces, and click the quilted body. Select a surface that intersects the quilt to create two trimmed bodies.