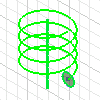
Use the Coil command to create a spring

To begin, sketch a profile that represents the cross section of the coil feature. Then, use the Line command, or the Work Axis command to create an axis of revolution for the coil.
- On the ribbon, click 3D Model tab
 Create panel
  Coil
Coil  .
. If there is only one profile in the sketch, it is automatically highlighted.
- If there are multiple profiles, click Profile, and then select the profile. Profiles can be open or closed.
- Click the axis of revolution. It can be at any orientation, but cannot intersect the profile.
- If there are multiple solids, click the Solid selector, and pick the body to participate in the operation.
- In Output, click Solid or Surface.
- If there are existing solid bodies, click New solid to create a body.
- On the Coil Size tab, in the Type drop-down list, click a type:
- Pitch and Revolution
- Revolution and Height
- Pitch and Height
- Spiral
Enter the Pitch, Height, number of Revolutions, or Taper as appropriate. (Taper is not available for a Spiral.)
- On the Coil Ends tab, choose one of the following methods to define the start and end of the coil:
- Flat Create a transition in the pitch of the coil. Enter a Transition Angle and then a Flat Angle (up to 360 degrees), to stand upright on a flat surface, for example.
- Natural End the coil without transition.
 Show Me how to create a coil